Unreachable Findings
Introduction to Unreachable Findings Feature
Unreachable Findings is a state that can apply to DAST and Auto API findings. This feature allows the state of findings to be maintained, where the retested page response differs largely from the original vulnerable response. This is useful in cases where web application firewalls (WAFs), errors, or even rotating content causes the vulnerable page to become temporarily unreachable. In these cases, instead of closing the finding, the finding is kept open and the Unreachable symbol is added.
Findings that are in the 'unreachable' state are locked open until a response that is at least 80% similar to the original response is seen again. Unreachable findings may also be manually closed via the controls in the Continuous Dynamic Portal.
If you have an issue with findings repeatedly opening and closing, or you want to track the difference between mitigation (via a WAF) and proper remediation, you should consider enabling this feature for your assets.
| This feature is disabled by default, and can be enabled either for individual assets, or on an account-wide basis. |
Enabling the Unreachable Findings Feature
There are two methods of enabling this feature:
-
Global Enablement - You can enable this feature for all Site assets and/or all API assets.
-
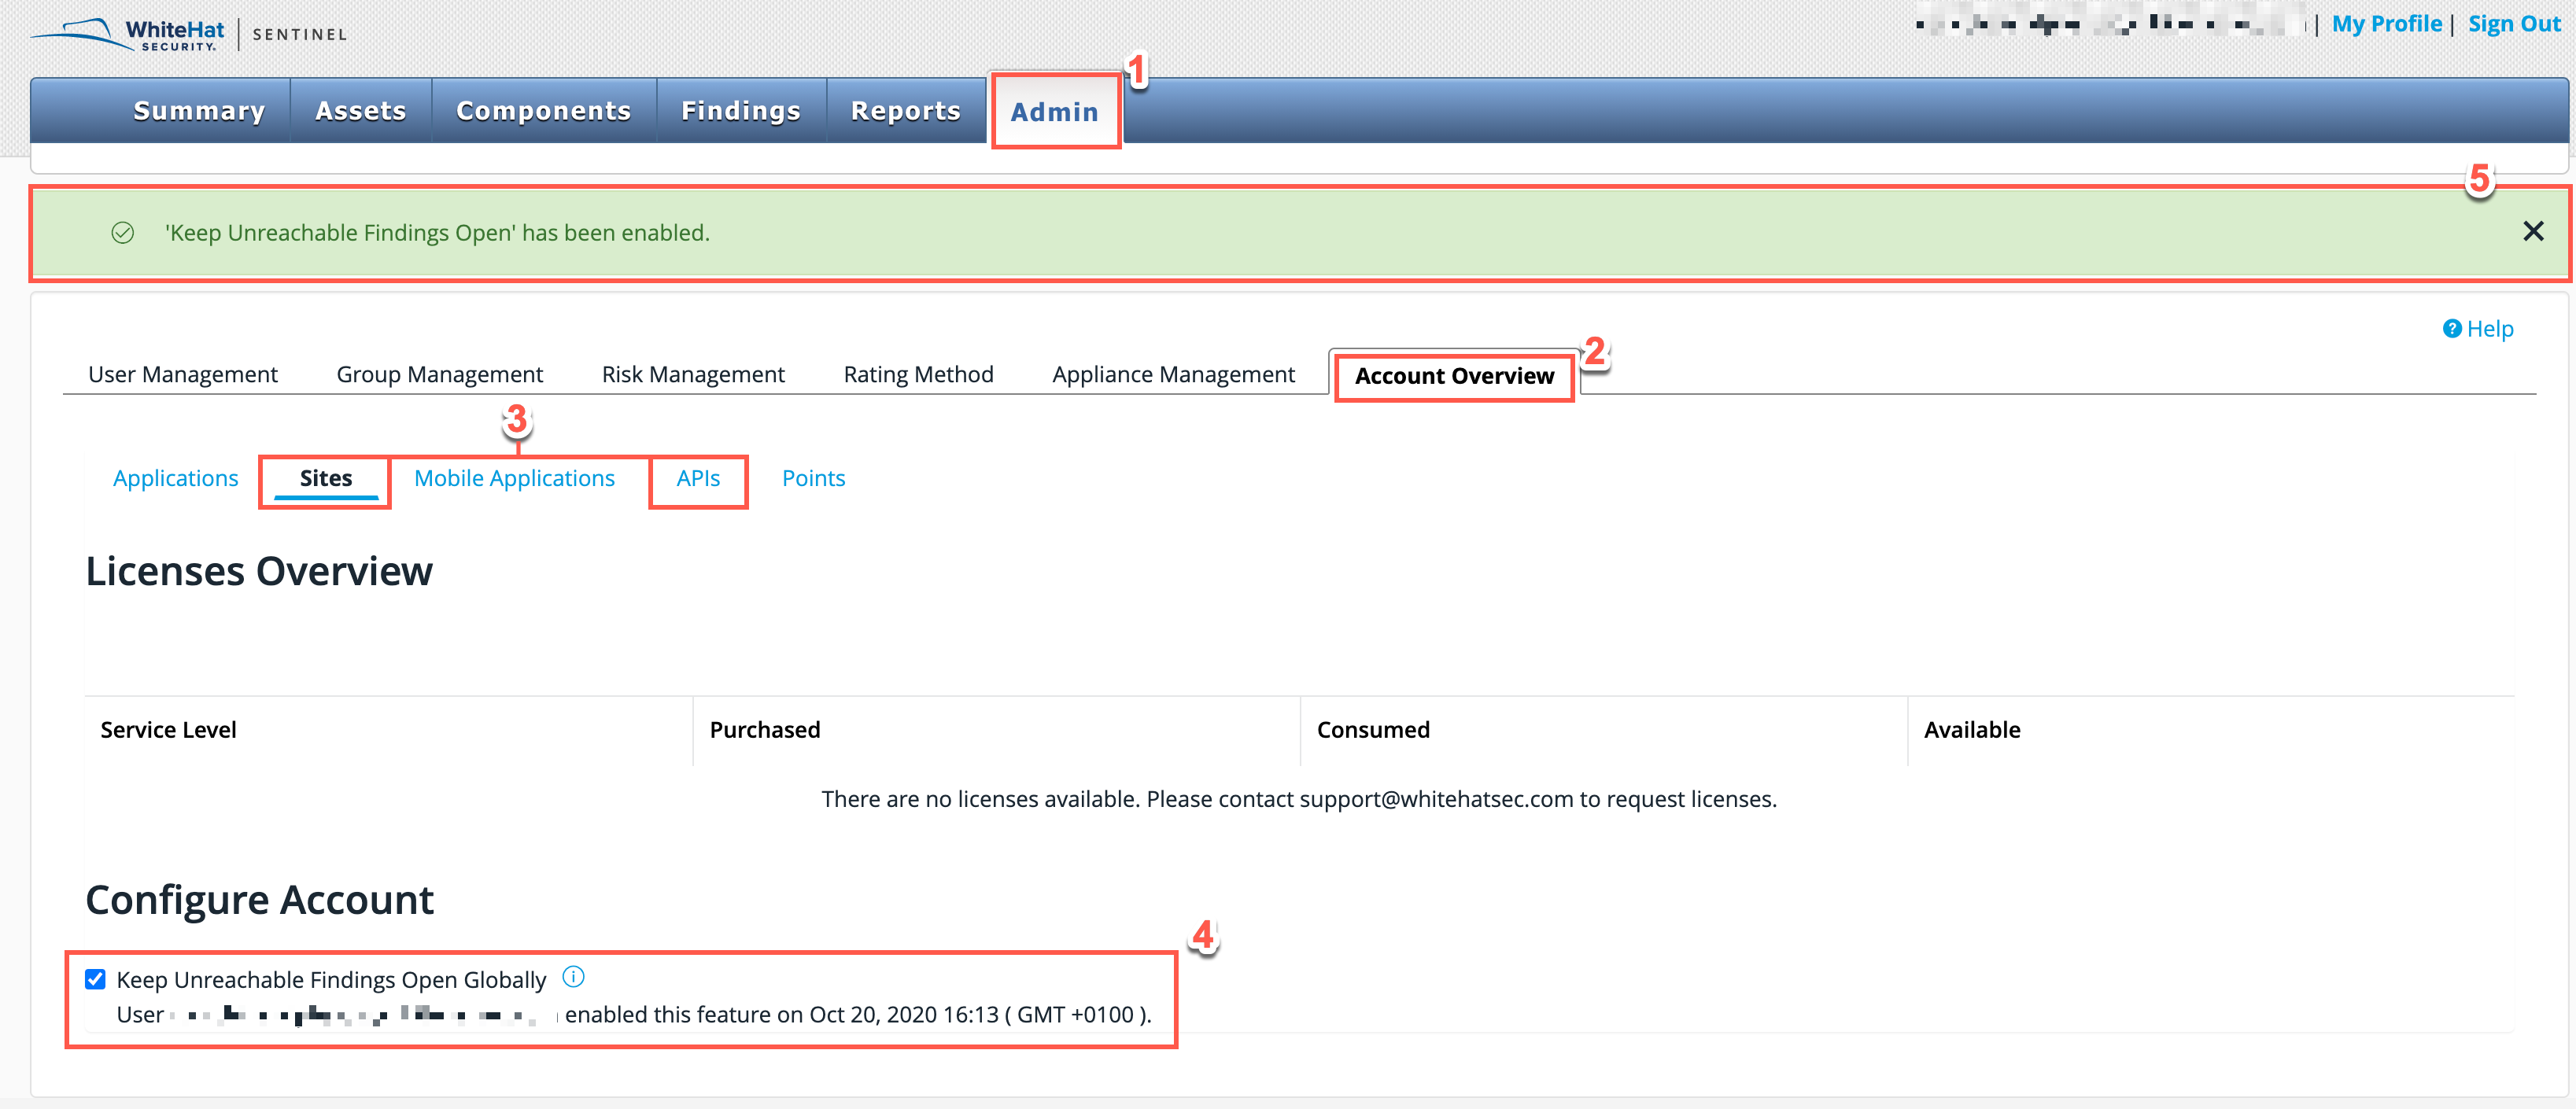
From the main Portal tabs, select the Admin tab.
-
From the Admin sub-tabs, select Account Overview.
-
Select Sites or APIs from the Account Overview options (For the example in the screenshot above, Sites is selected).
-
In the Configure Account section, place a tick in the check box beside Keep Unreachable Findings Open Globally.
-
A confirmation banner at the top of your page confirms that the feature has been enabled.
If you want to disable the feature again, repeat Steps 1-3 and then remove the tick from the check box beside Keep Unreachable Findings Open Globally.
-
-
Asset-Specific Enablement - You can enable this feature to specific Site assets and/or specific API assets.
-
From the main Portal tabs, select the Assets tab.
-
Click on the Site or API asset that you want to enable the feature for. To find the correct asset, you can use the filter button.
-
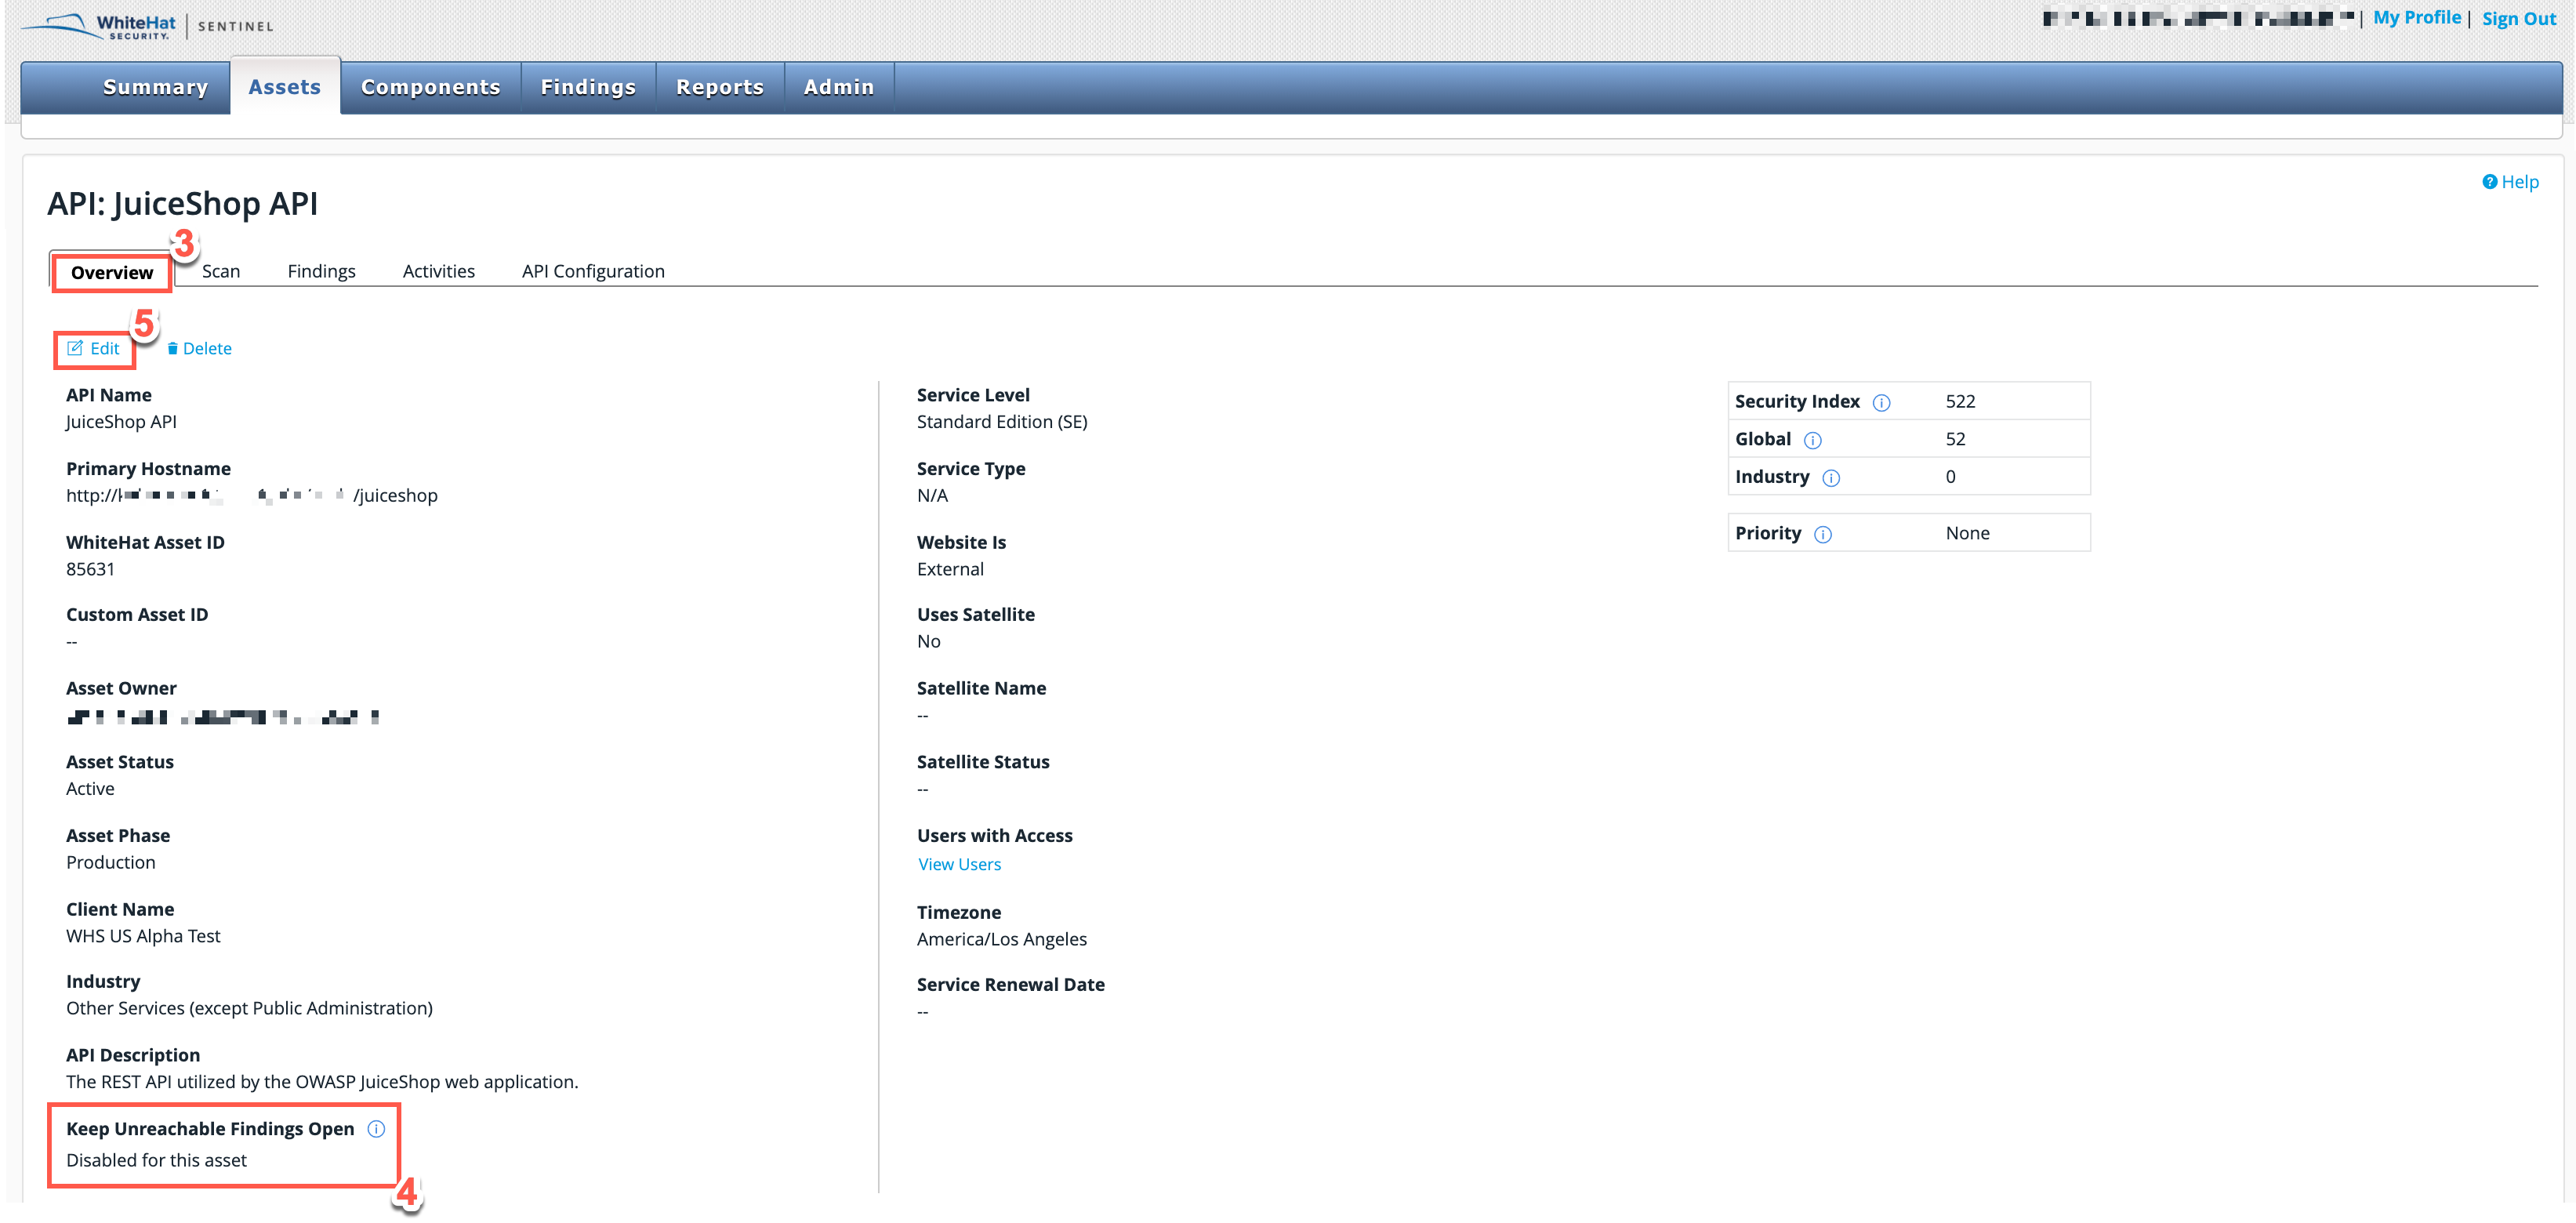
Once you have found and clicked on the correct asset, in the page displayed, select Overview.
-
View the current unreachable findings status for the asset.
-
Click Edit.
-
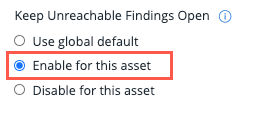
Scroll the edit page to the section entitled Keep Unreachable Findings Open.
-
Select from the following options:
-
Use global default - This adopts the default global setting configured in the Admin tab.
-
Enable for this asset - This enables the feature for this individual asset and overrides the default global setting configured in the Admin tab.
-
Disable for this asset - This disables the feature for this individual asset and overrides the default global setting configured in the Admin tab.
-
-
A confirmation banner at the top of your page confirms that the feature has been enabled.
If you want to disable the feature again, repeat Steps 1-5 and then select Disable for this asset. Alternatively, you can select Use global default.
-
Identifying 'Unreachable' Vulnerabilities
Once you have the Keep Unreachable Findings Open feature enabled, unreachable findings are flagged for your attention in two main ways.
The first way to identify if findings are unreachable is via the Asset Management page:
-
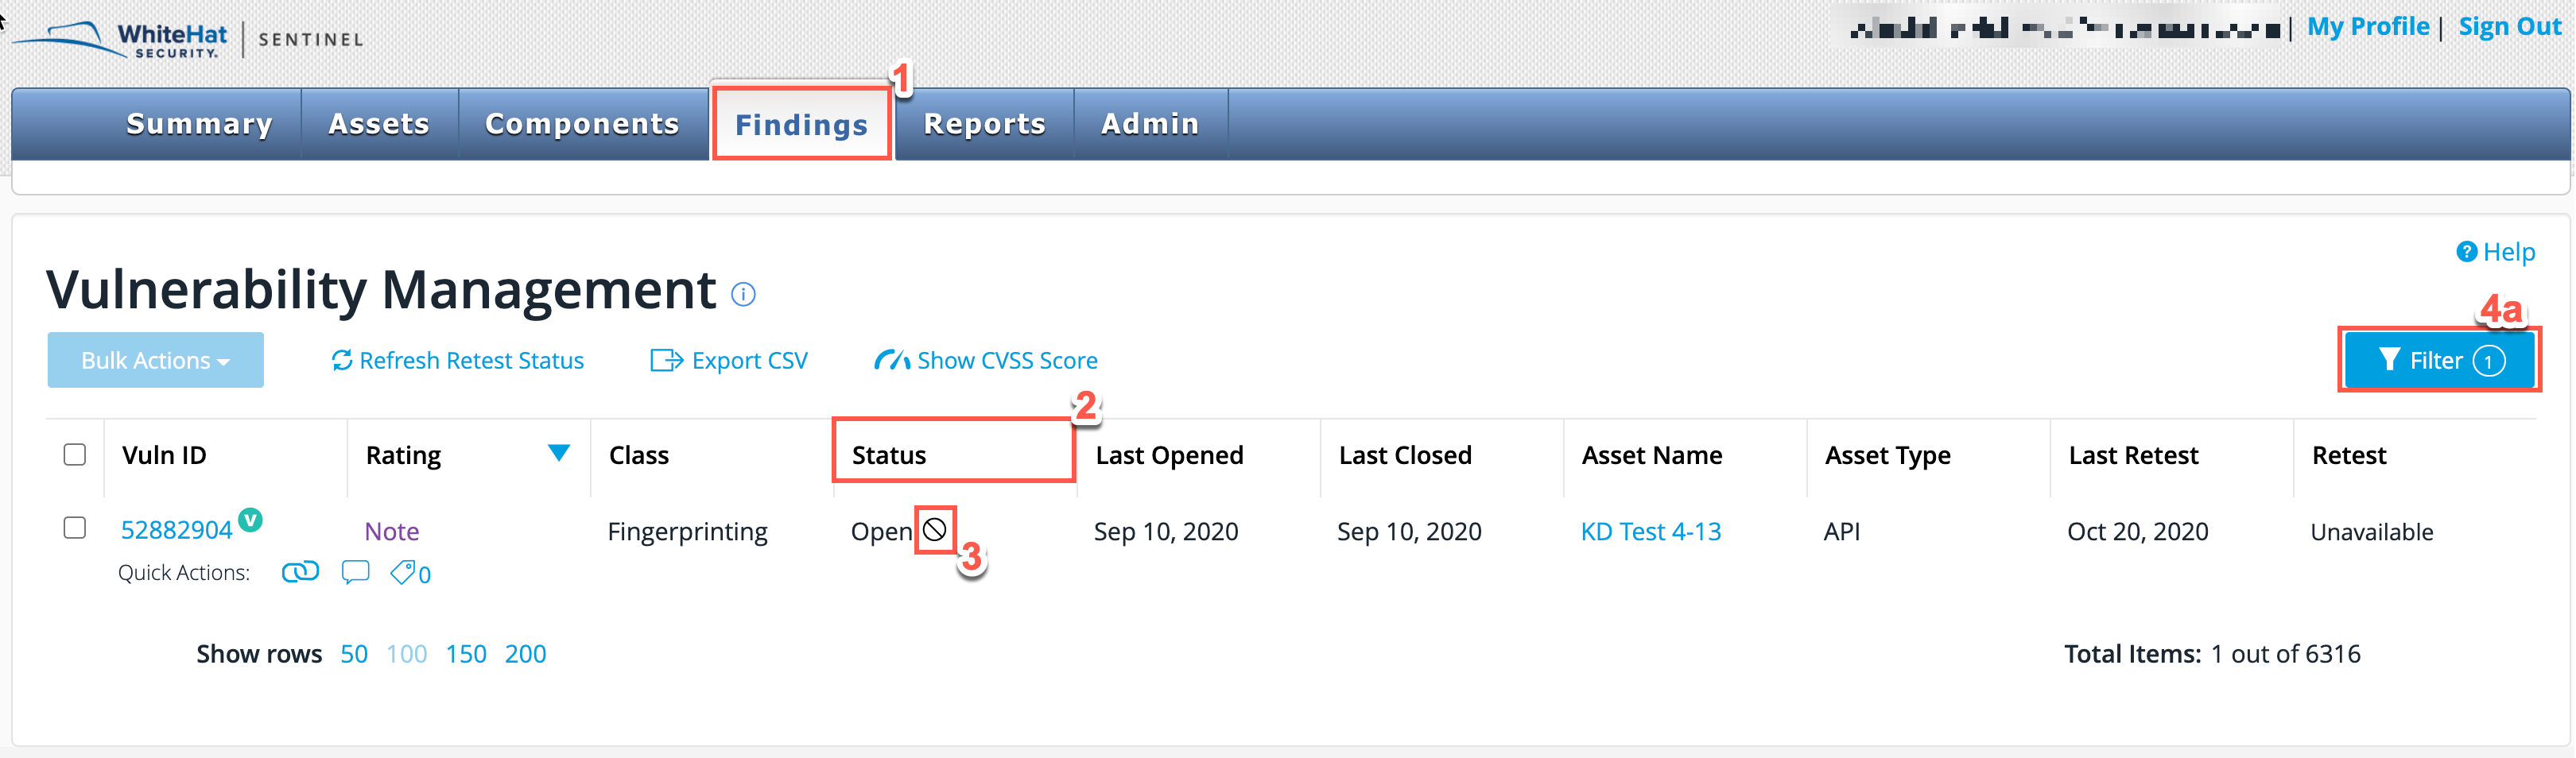
From the main Portal tabs, select the Findings tab.
-
In the table displayed, look for the Status column.
-
Search the list for any status marked as Open and with the highlighted symbol displayed beside it.
-
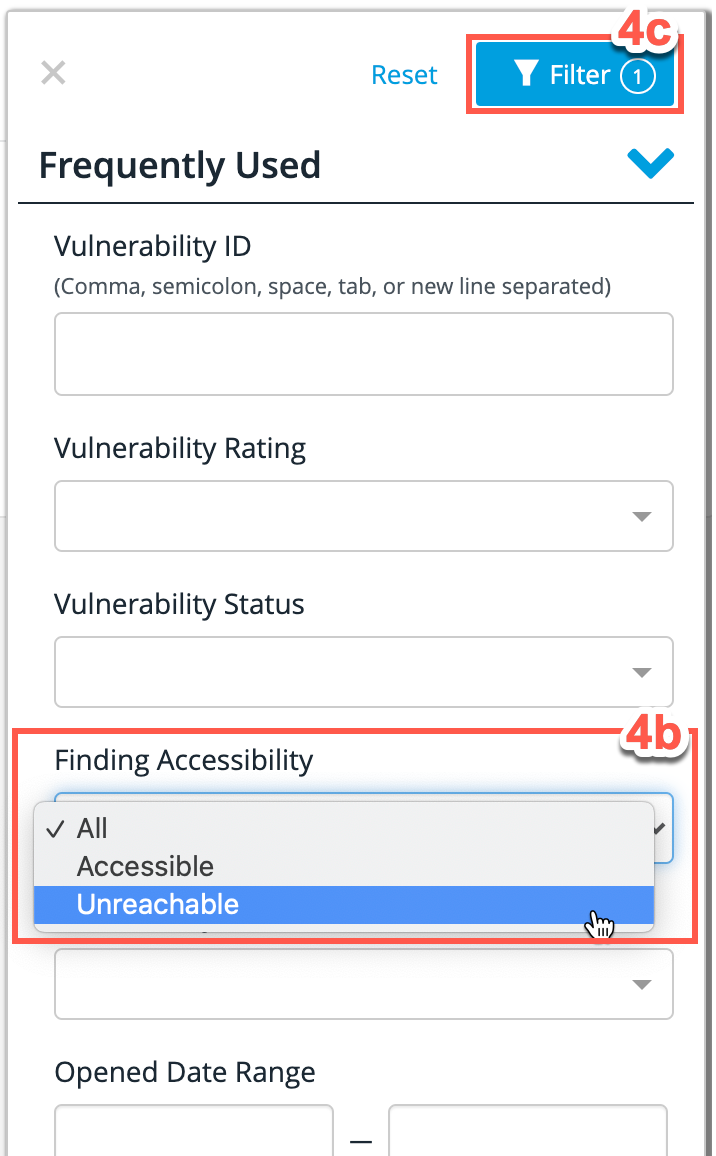
Optionally, to filter all vulnerabilities and view only the ones flagged as unreachable:
-
Press the Filter button.
-
In the Finding Accessibility section of the filter list, select Unreachable.
-
Press the Filter button to filter your results according to your selection.
-
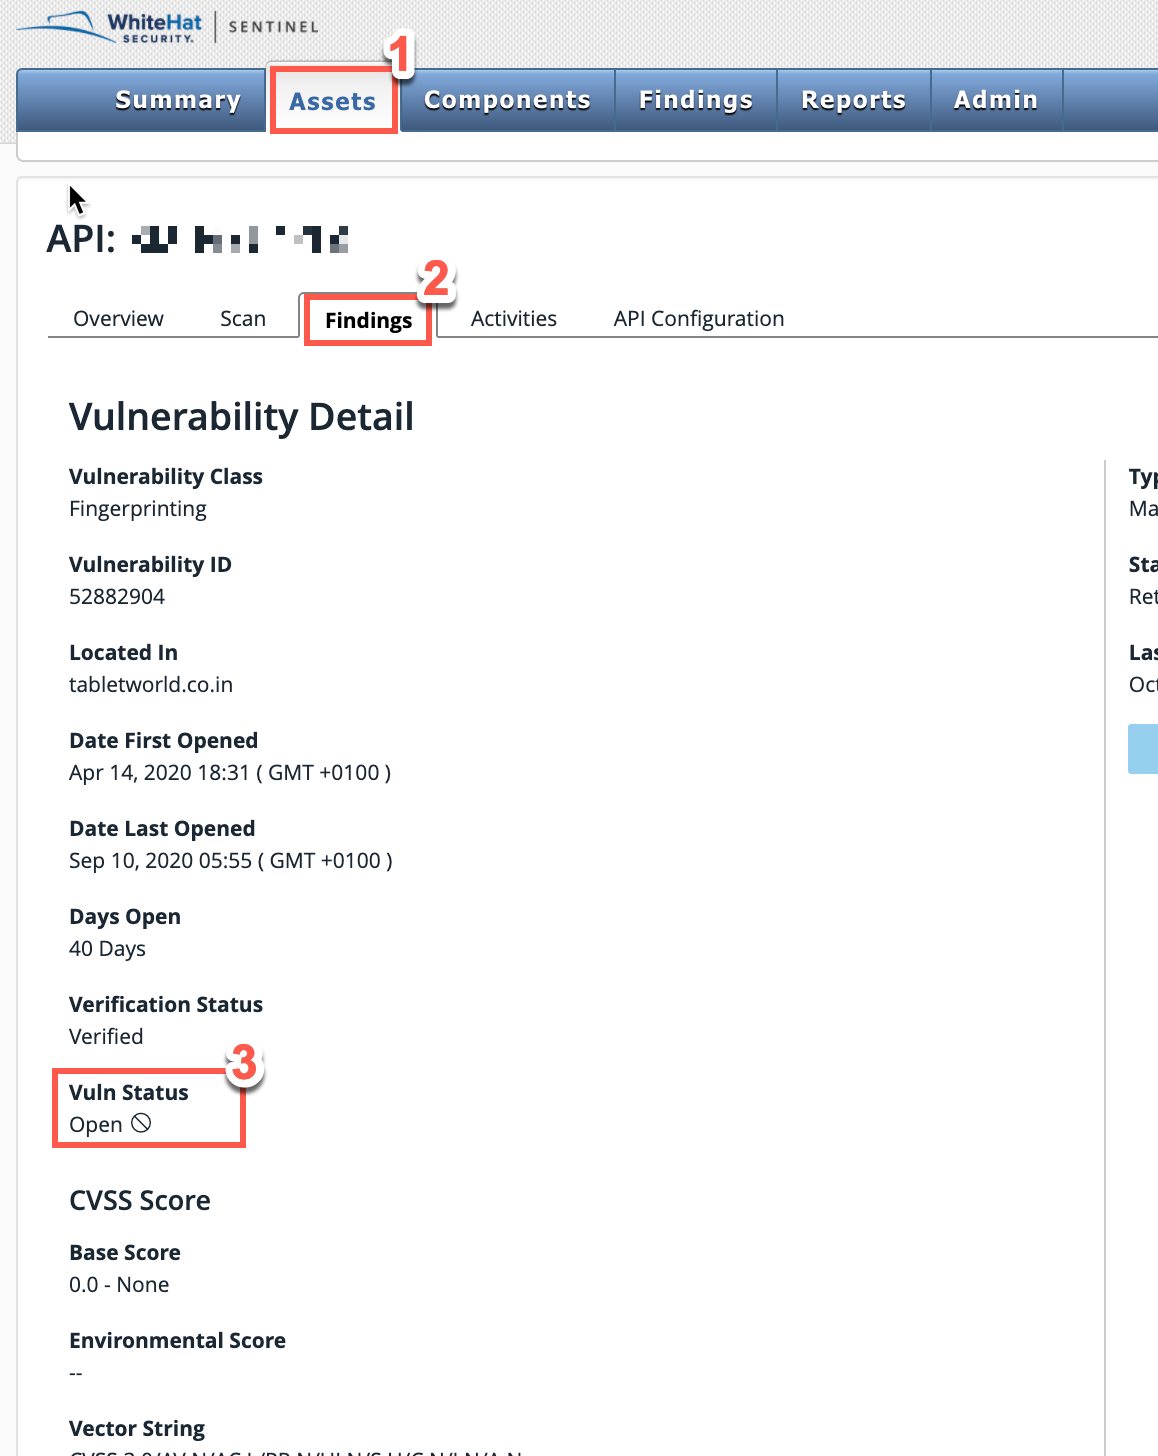
The second way to identify if findings are unreachable is via the Vulnerability Detail page:
-
From the main Portal tabs, select the Assets tab.
-
From the Assets sub-tabs, select Findings.
-
In the page displayed, look for Vuln Status. If the finding is 'unreachable', the Vuln Status will be marked as Open and will display the 'unreachable' symbol beside it.
Activity Log
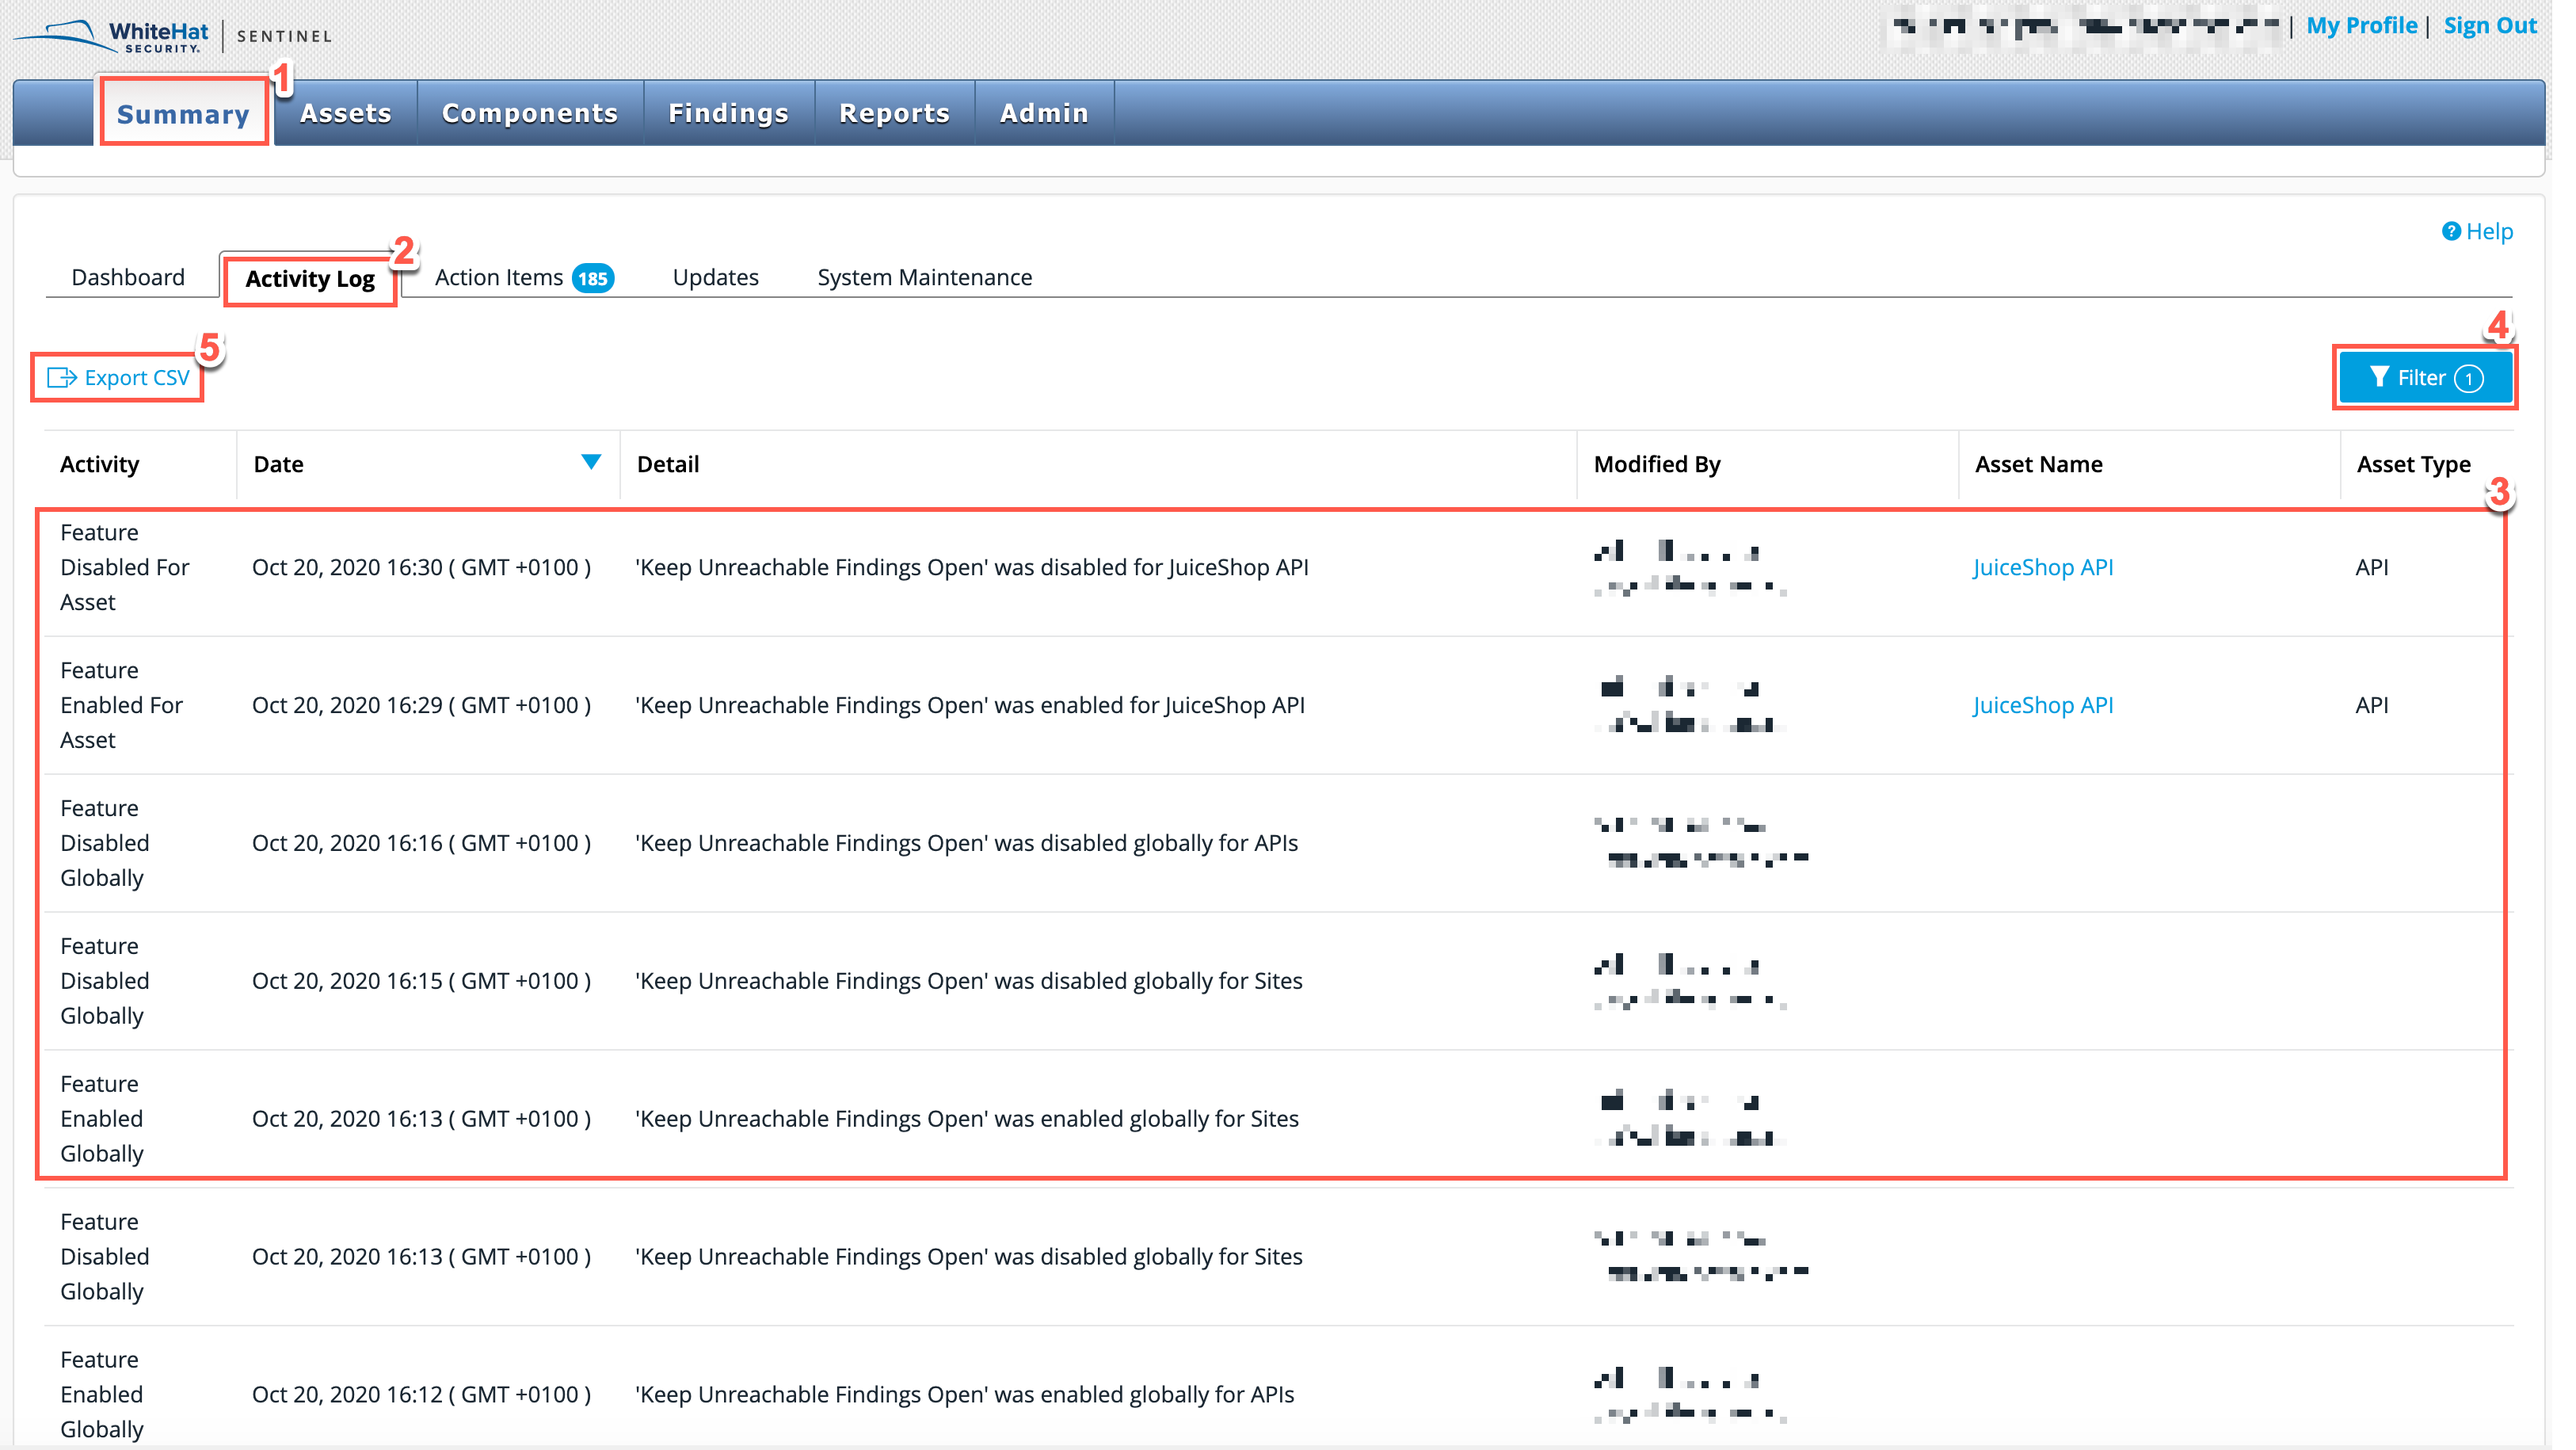
For the purposes of record keeping, any changes made to enablement/disablement of this feature are recorded in the Activity Log. This includes the nature of the change, the date and time stamp, details of what was changed, who made the modification, plus the name and type of the asset. To see these records:
-
From the main Portal tabs, select the Summary tab.
-
From the Summary sub-tabs, select Activity Log.
-
In the table displayed, view a log of all Sentinel activities. In the example screenshot provided, you can see records of specific Site and API asset enablement/disablement for the Unreachable Findings feature. You can also see records of enablement/disablement for the Unreachable Findings feature globally.
-
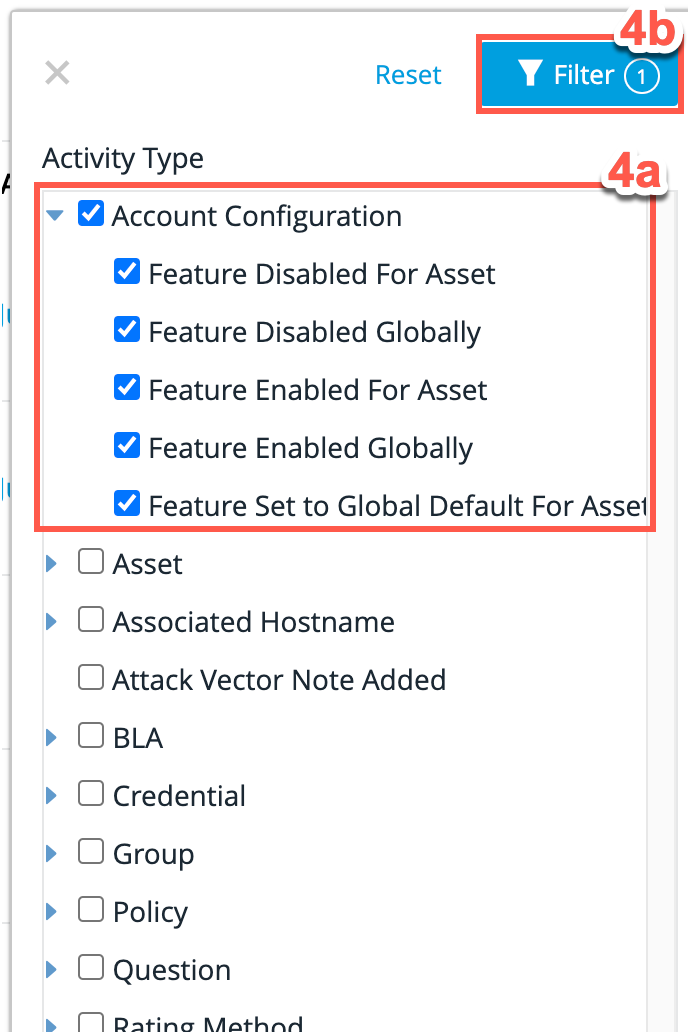
Optionally, filter all records and view only the ones that you want to see by using the Filter button:
-
Click the Filter button and locate the Account Configuration section in the list of filters available, which relate specifically to the Unreachable Findings feature.
-
Once you have selected the appropriate filters, press the Filter button again.
-
-
Once all required results are displayed on your screen, optionally export the list as a CSV file by using the Export CSV option.