Site URL Coverage Tab
The URL Coverage tab lists the URLs scanned for the selected site Asset for each completed assessment. To access the URL Coverage tab, perform the following steps:
-
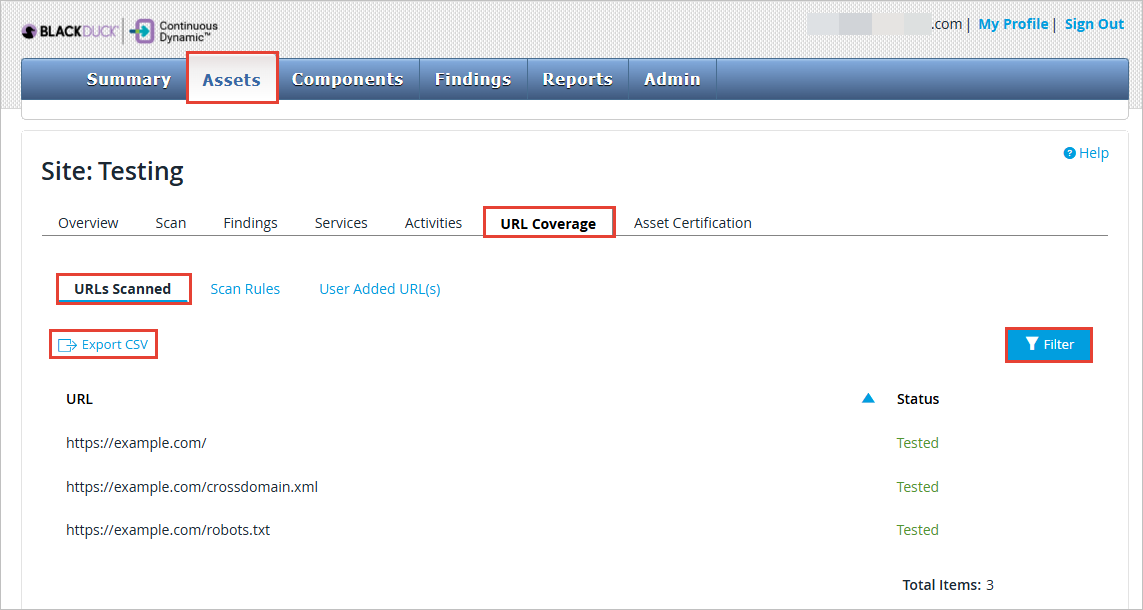
From the Continuous Dynamic Portal menu, select Assets. This displays the Asset Management page.
-
Select a site from the asset list Asset Management page.
-
From the tabs displayed, select URL Coverage.
-
Click URLs Scanned to view all scanned URLs.
-
This table displays each of the URLs scanned for the selected site in each completed assessment. You will also see the Status and the Total number of items.
-
Optionally, click the Export CSV link to export the information from the scanned URL list to a CSV file.
-
Use the Filter icon to filter the listed components by various criteria. This displays the following panel:
| Field No. | Field Name | Description |
|---|---|---|
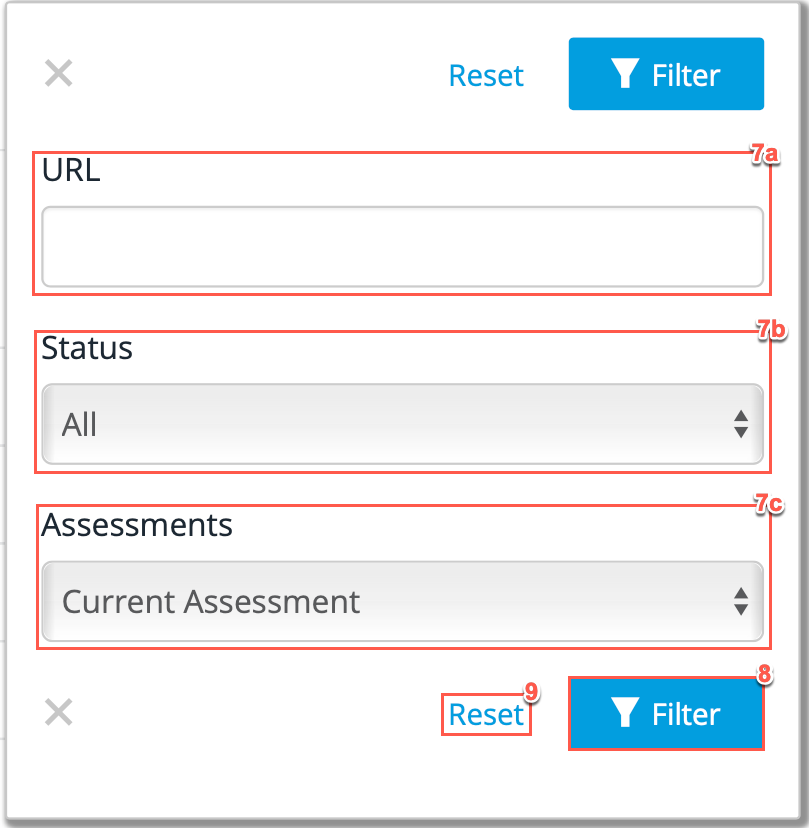
7a |
Filter by URL |
You can enter your specific URL here to search and view the current scan status. |
7b |
Status |
Here you can define which of your URLs that you would like to view, based on their scan status. The four options are as follows:
|
7c |
Assessment |
Here you can filter the URL results by the Assessment date, or you can choose your current Assessment. |
8 |
Filter |
Now select the Filter icon to filter all listed URLs by your filters selected in the previous steps. |
9 |
Reset |
This is to clear all applied filters. |
Scan Rules
To access and use the URL Coverage tab, perform the following steps:
-
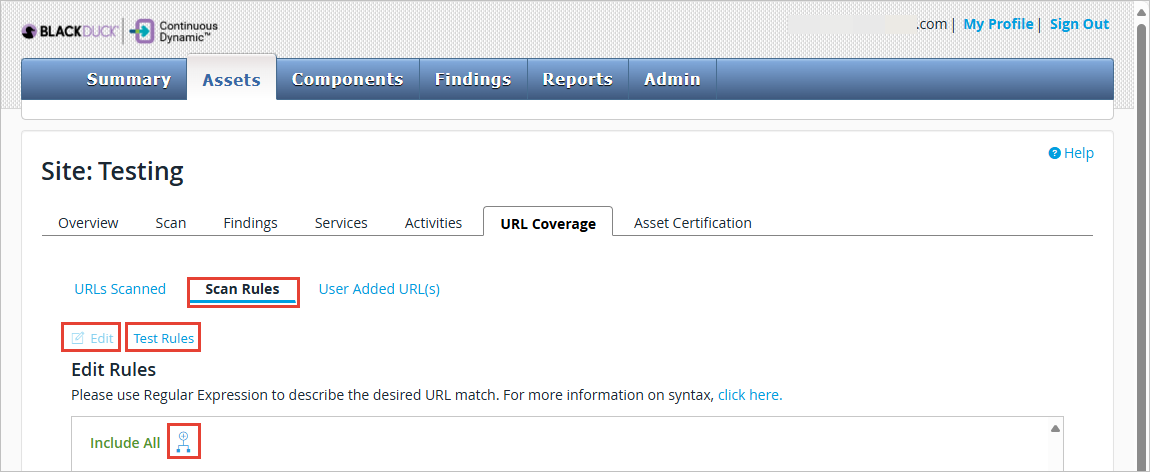
From the main Portal menu, select Assets. This displays the Asset Management page.
-
Select a Site from the asset list Asset Management page.
-
From the tabs displayed, select URL Coverage.

-
Click Scan Rules to view the set scan rules for the URLs.
| Only Admin users can add, modify, or delete Scan Rules or User Added URL(s). |
Editing Scan Rules
To edit or set new scan rules, perform the following steps:
-
From the main Portal menu, select Assets. This displays the Asset Management page.
-
Select a Site from the asset list Asset Management page.
-
From the tabs displayed, select URL Coverage.
-
Click Scan Rules to view the set scan rules for the URLs.
-
Select the Edit icon.
-
Select the add branch icon beside the Include All text to add a new IF statement.
Before saving changes to the scan rules, users will be warned of the impact of the change in terms of vulnerabilities being affected. Once confirmed by the user the scan rule changes will be saved and applied. If there are any vulnerabilities whose URLs are impacted by the scan rules, then those will be marked as Out of Scope for blacklisted URLs. For more information on scan rules, see Scheduling a Scan. -
After you have edited your scan rules, select the Save icon at the bottom of the table to keep any changes that have been made.
-
Optionally, you can test your rules by clicking Test Rules. This displays the following pop-up:

-
Type your new URLs in the text box provided. Multiple URLs can be added at once with a new line of separation between them.
-
After you have typed your new URLs, select Test Coverage to test your scan rules.
-
User Added URL(s)
If you have admin privileges, you can add new URLs by performing the following steps:
-
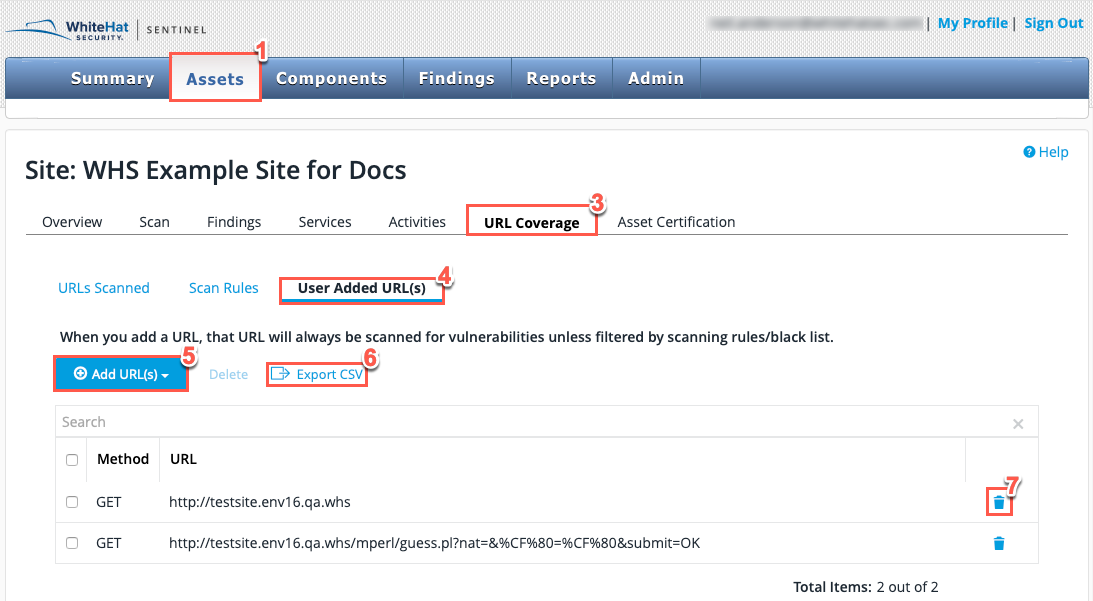
From the main Portal menu, select Assets. This displays the Asset Management page.
-
Select a Site from the asset list Asset Management page.
-
From the tabs displayed, select URL Coverage.
-
Click User Added URL(s) to view the URLs that have been already added to your asset.
-
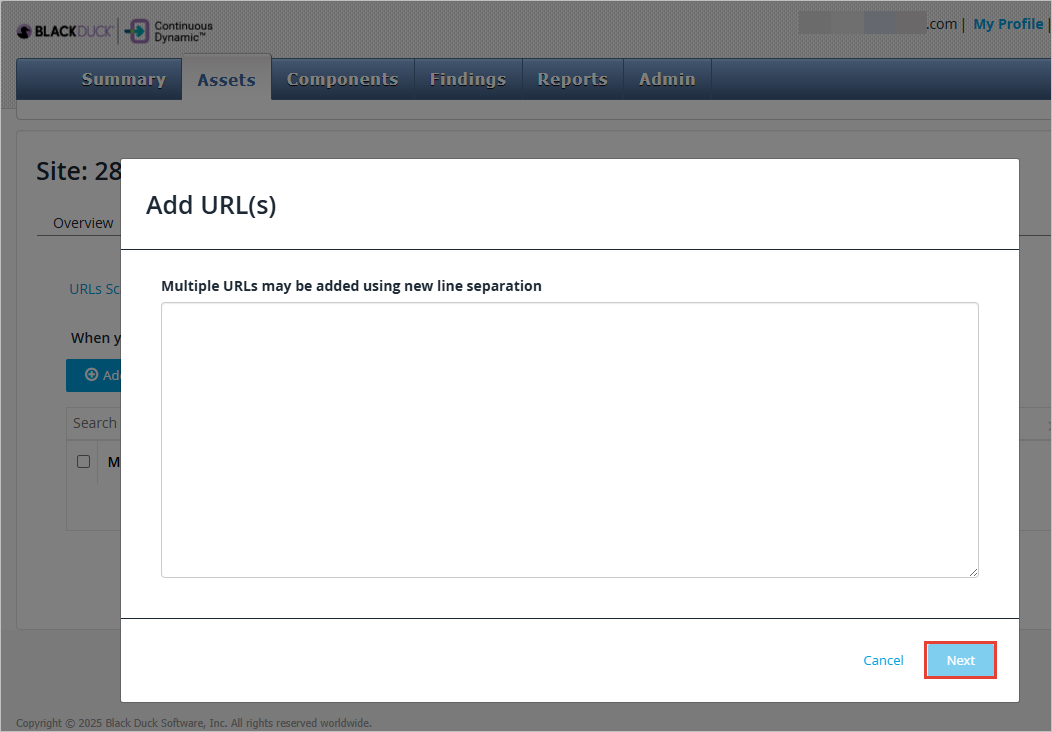
Select the Add URL(s) icon.
-
Enter your new URL in the text box provided. Multiple URLs can be added at once with a new line of separation between them.
-
After you have entered your new URLs, select Next to add them to your asset.
-
-
Optionally, click the Export CSV link to export the information from the URL list to a CSV file.
-
Users with admin privileges can also delete existing manually added URLs either one at a time by clicking the trash/bin icon next to the URL, or in bulk by selecting all the URLs to be deleted and clicking Delete.
Before deleting the URL(s), users will be warned that there might be an impact on the vulnerabilities associated with the URL(s) and those will be marked as Out of Scope.
| Any changes will take full effect in the next scan. However, if a scan is in progress when edits are made to the rules, the rest of the scan will follow the new rules. |