Basic Configuration
Mapping Vulnerability Ratings to Jira Priorities
Vulnerability ratings will automatically use the Advanced Rating Methodology, which is based on OWASP ratings.
To map vulnerability ratings to Jira priorities, perform the following steps:
-
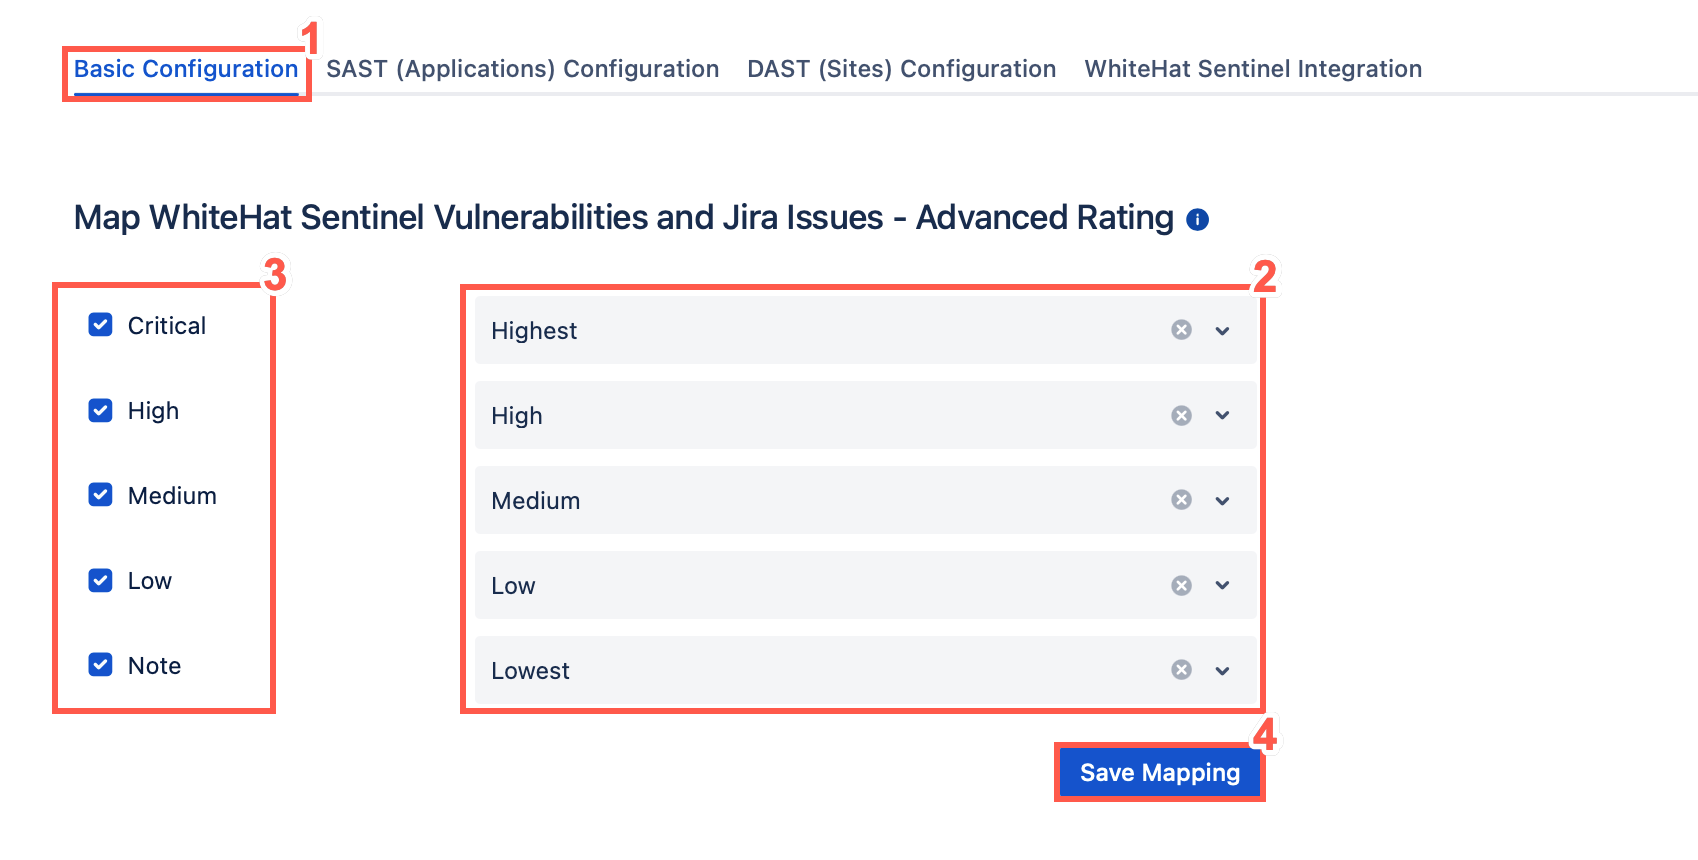
On the app page, select the Basic Configuration tab.
-
The default mapping associates the most severe vuln rating with the highest Jira priority. You can change this mapping using the drop-down lists.

For more information on choosing Legacy Ratings or Advanced Ratings, see Understanding the Rating Methodology. -
Select the vulnerability ratings that should (checked) or should not (unchecked) be used to create Jira tickets.

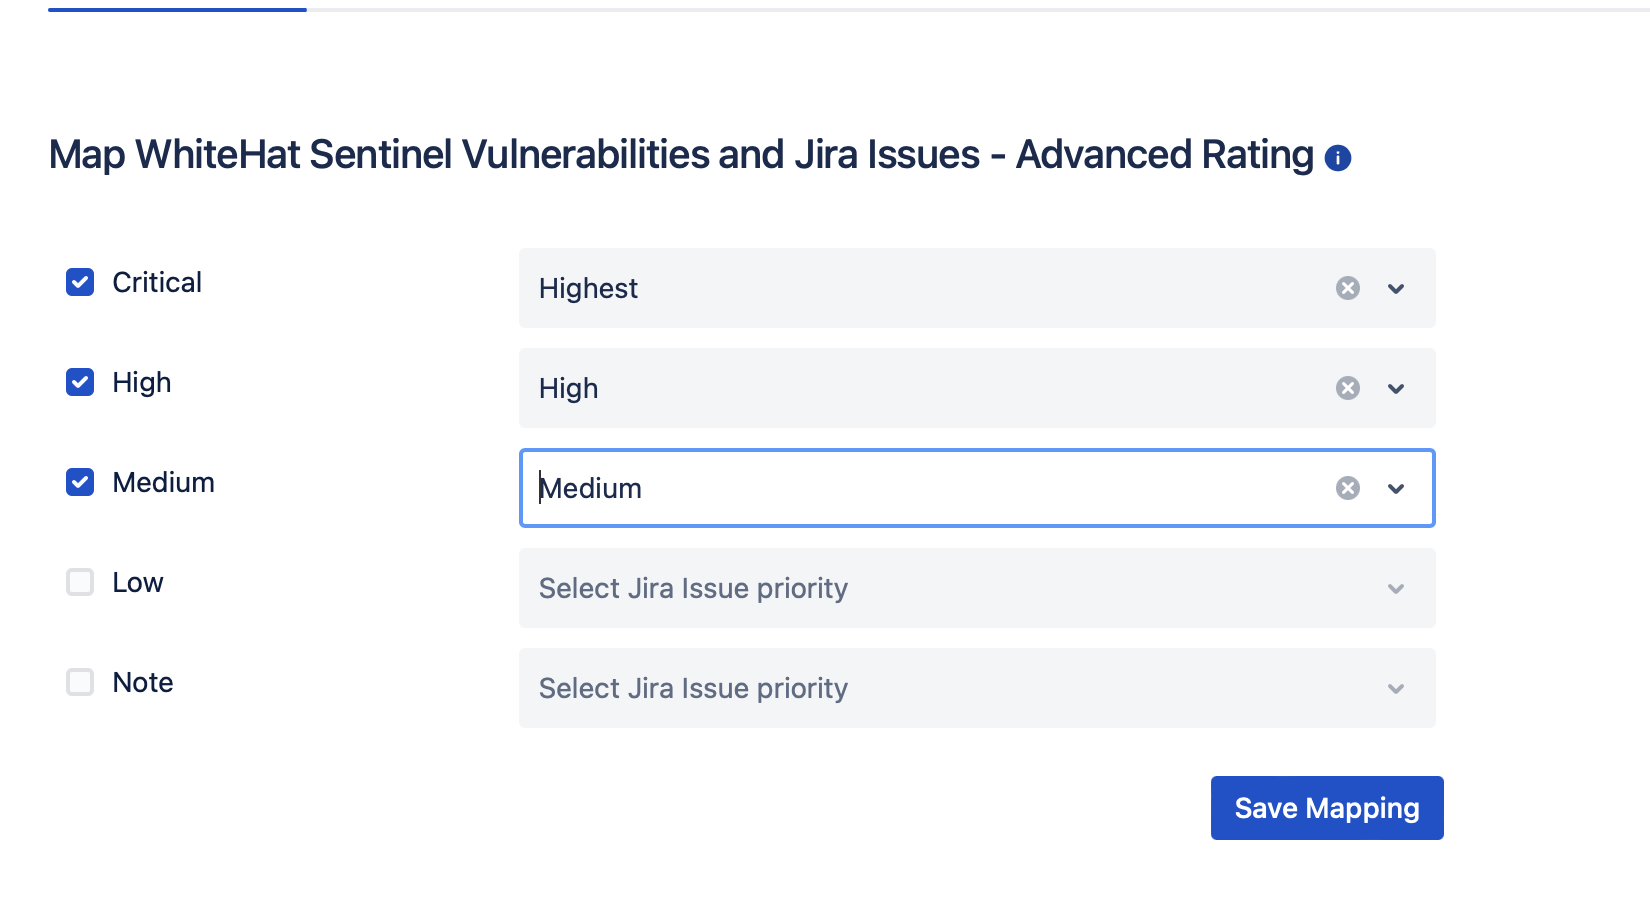
In the above example, Jira tickets will be created for vulnerabilities rated Critical, High, or Medium. Critical vulnerabilities will receive the Highest Jira priority, High risk vulnerabilities will receive a Jira priority of High, and Medium risk vulnerabilities will receive a Jira priority of Medium. Jira tickets will not be created for vulnerabilities with a rating of Low or Note. In addition, you can limit vulnerabilities that will result in Jira tickets based on the Continuous Dynamic tags associated with the vulnerability. -
When you have completed mapping vulnerability ratings to Jira priorities, click Save Mapping.
If you selected any tags to be used to create Jira tickets, only vulnerabilities that have at least one of the listed tags in the Continuous Dynamic Portal will be used to create Jira issues.
Tickets, Vulnerability Content & Scheduling Settings
In the Tickets, Vulnerability Content & Scheduling Settings section, you can configure default updates for your tickets.
-
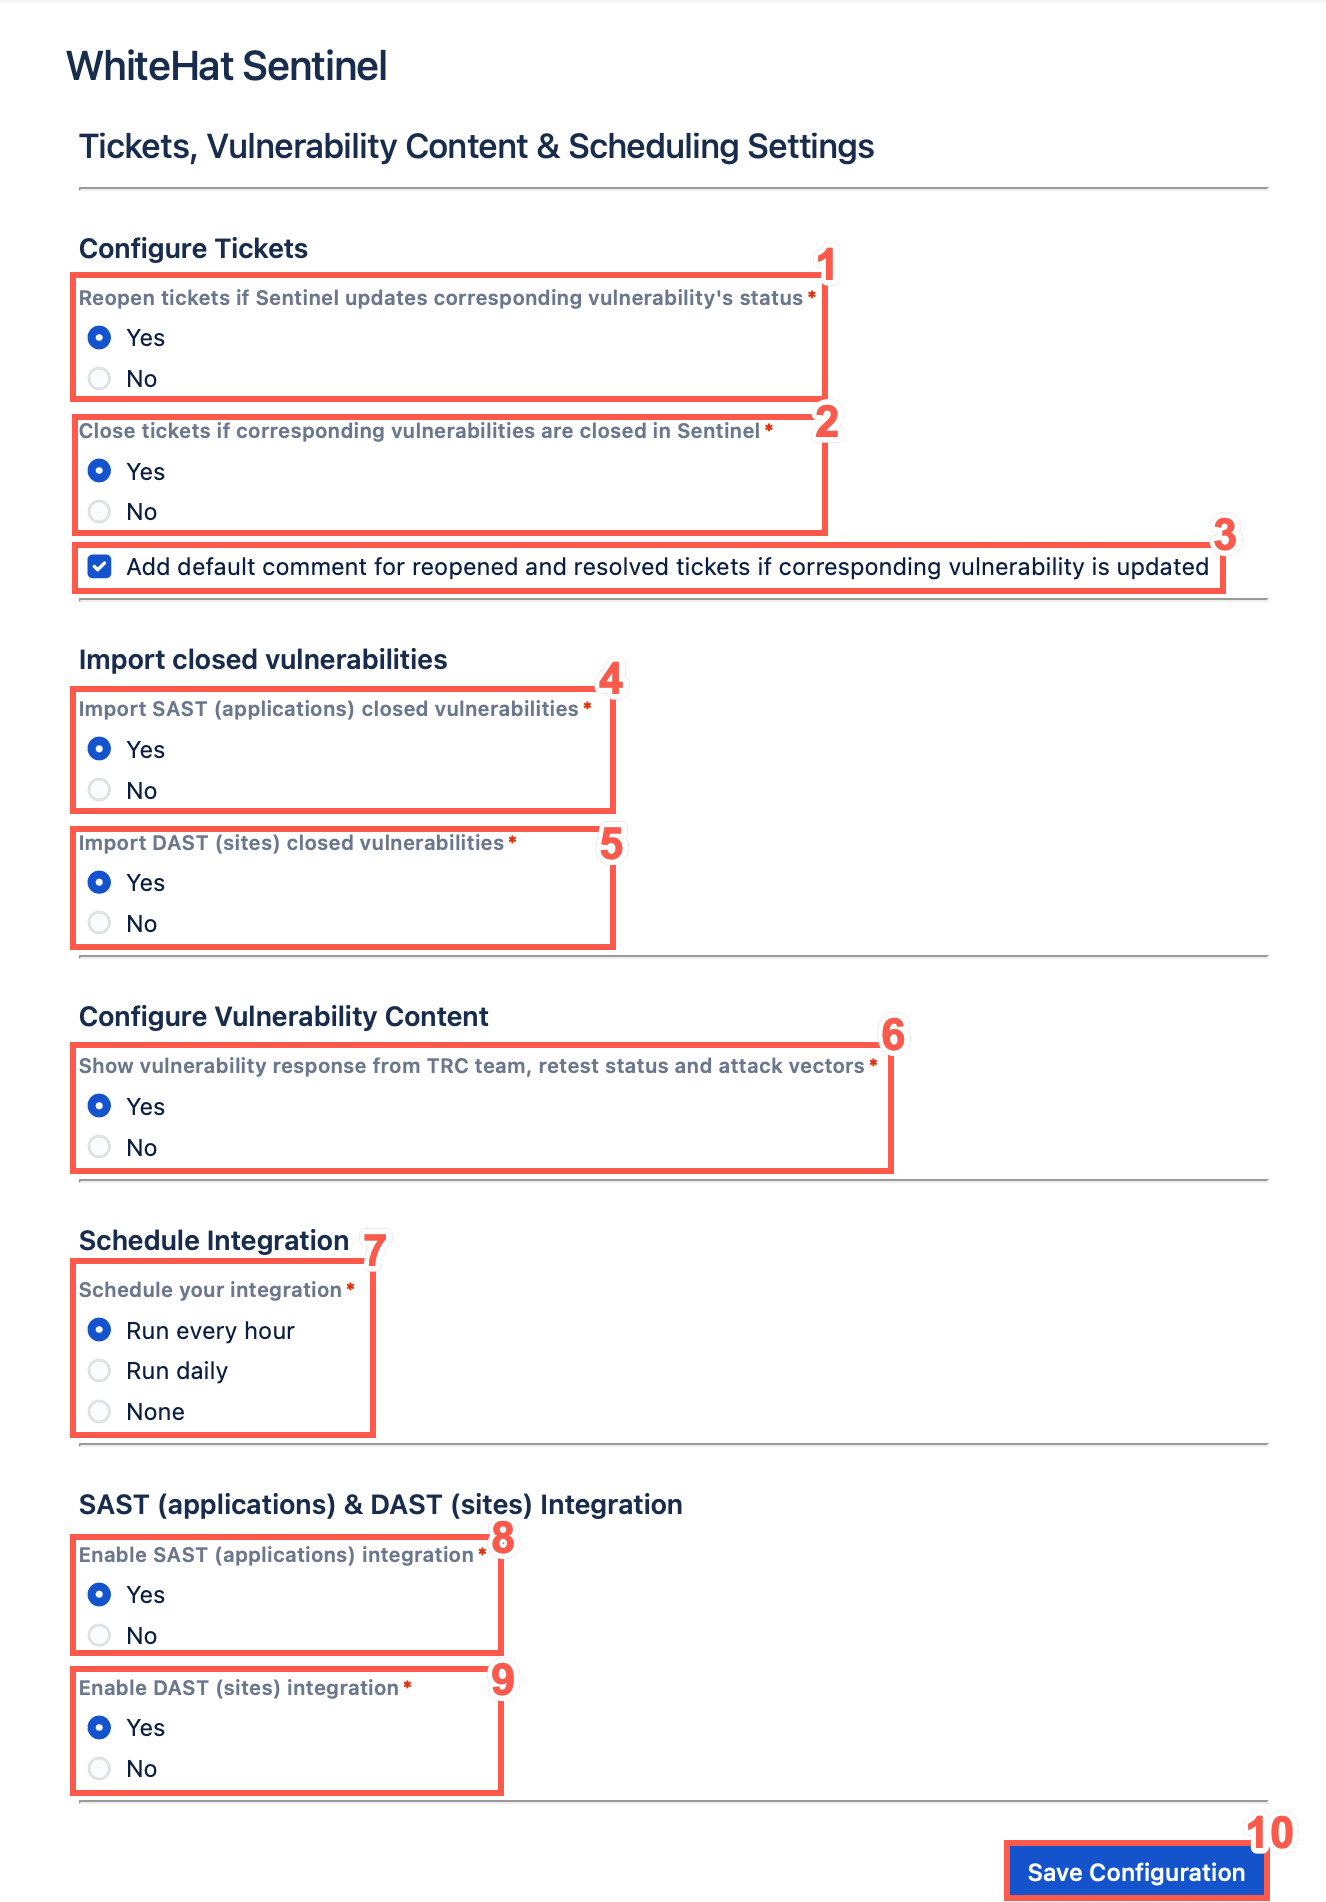
Choose whether to reopen closed Jira tickets whenever a vulnerability’s status is updated in the Portal.

-
Choose whether to close your existing Jira tickets automatically if corresponding vulnerabilities are closed in the Portal.
-
Optionally, select the check box to Add default comment for reopened and resolved tickets if corresponding vulnerability is updated.
-
Optionally, configure the Import SAST (applications) closed vulnerabilities. Select the relevant option to import closed SAST vulnerabilities.
-
Optionally, configure the Import DAST (applications) closed vulnerabilities. Select the relevant option to import closed DAST vulnerabilities.
-
Optionally, configure the vulnerability content that will be displayed on Jira tickets. Select the relevant option to show responses from the Threat Research Center (TRC) team, the vulnerability retest status, and the attack vectors.
-
Schedule your integration with Continuous Dynamic. You can select from the following schedules:
-
Run every hour
-
Run Daily (default)
-
None
If you choose to run your integration daily, you must select the exact hour when the integration should run every day.
-
-
To Enable SAST (Applications) Integration select Yes.
-
To Enable DAST (Sites) Integration select Yes.
-
Click Save Configuration.