Scheduling a Scan
There are two locations for scan scheduling in the Continuous Dynamic Portal:
-
The Assets Tab
-
The Action Items Tab
From the Assets Tab
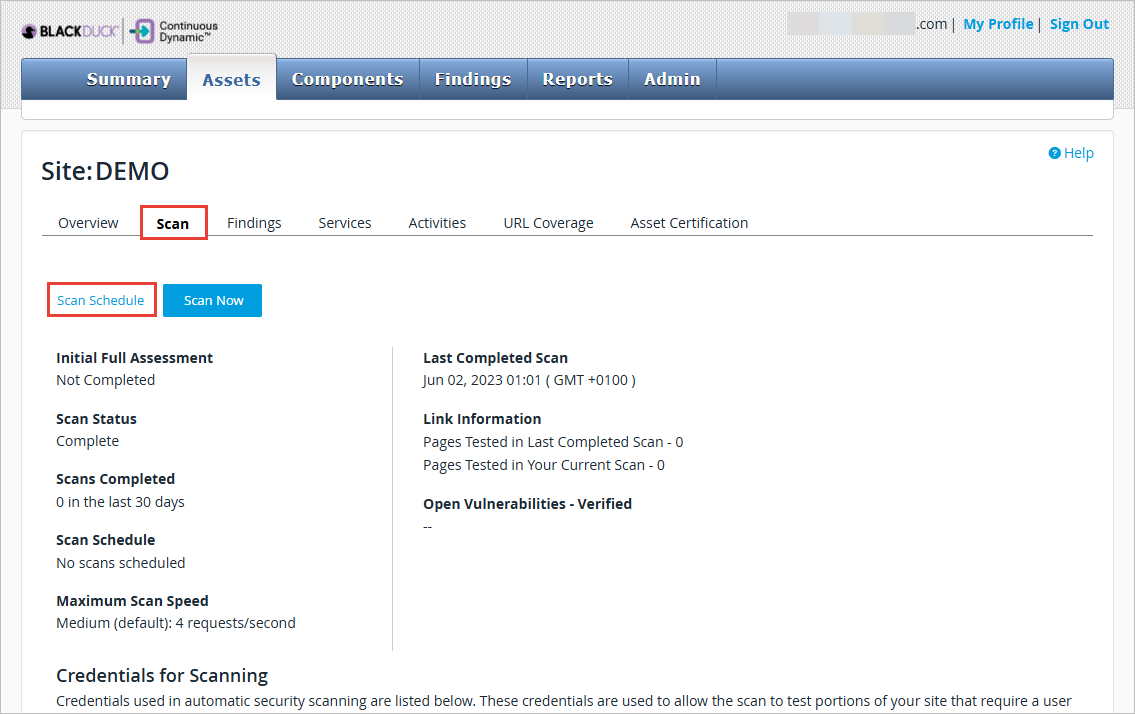
Setting a Schedule for a Single Site Asset
To schedule a scan for a site asset, perform the following steps:
-
From the main Portal menu, select Assets.
-
Optionally, click the Filter button to set filters for the site assets with Scan Setup Issues.
-
Select an asset from the Asset Management table.
-
Click the Scan tab.
-
Click Scan Schedule.
-
Click the Schedule dropdown and select an option from:
-
Not Scheduled / Stopped (not recommended)
-
Continuous (24/7 scanning: recommended)
-
Nights 8P-6A, and Weekends 24hrs (Nights from 8pm to 6am, and continuously from Friday evening to Monday morning)
-
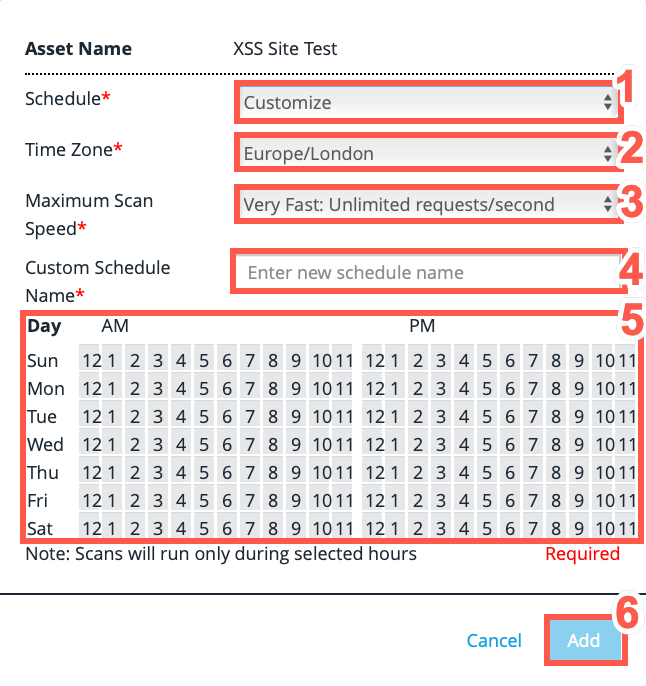
Customize
Custom schedules can only be set for single assets. 
-
-
Click the Maximum Scan Speed dropdown and select an option from:
-
Very Fast: Unlimited requests/second
-
Fast: 8 requests/second
-
Medium: 4 requests/second
-
Slow: 2 requests/second
-
Very Slow: 1 request/second
The Maximum Scan Speed value is required for Sites. This sets a limit on the number of requests per second that will be sent by Black Duck, ensuring that there is no noticeable impact to your network during a scan.
-
-
Click Add to add this scan schedule to this asset. The scan will commence at the next scheduled time.
Setting a Custom Schedule
| No asset may be associated to more than one schedule, and changing the schedule for an asset will remove any previous association. |
To set a custom schedule,
-
Select Customize as the Schedule.
-
Click the Time Zone dropdown and select a timezone to apply to the start scan time.
-
Click the Maximum Scan Speed dropdown and select an option from:
-
Very Fast: Unlimited requests/second
-
Fast: 8 requests/second
-
Medium: 4 requests/second
-
Slow: 2 requests/second
-
Very Slow: 1 request/second
-
-
Type a schedule name in the Custom Schedule Name text field.
-
The interface will now show you a schedule by day and hour. Click the days and hours during which you would like scans to run, you can click and drag to select multiple hours or days at once.
Scans will run only during the highlighted time periods. If a scan is incomplete when the schedule ends, it will be suspended until the next permissible (highlighted) point in the scan schedule. -
Click Add to add this scan schedule to this asset. The scan will commence at the next scheduled time.
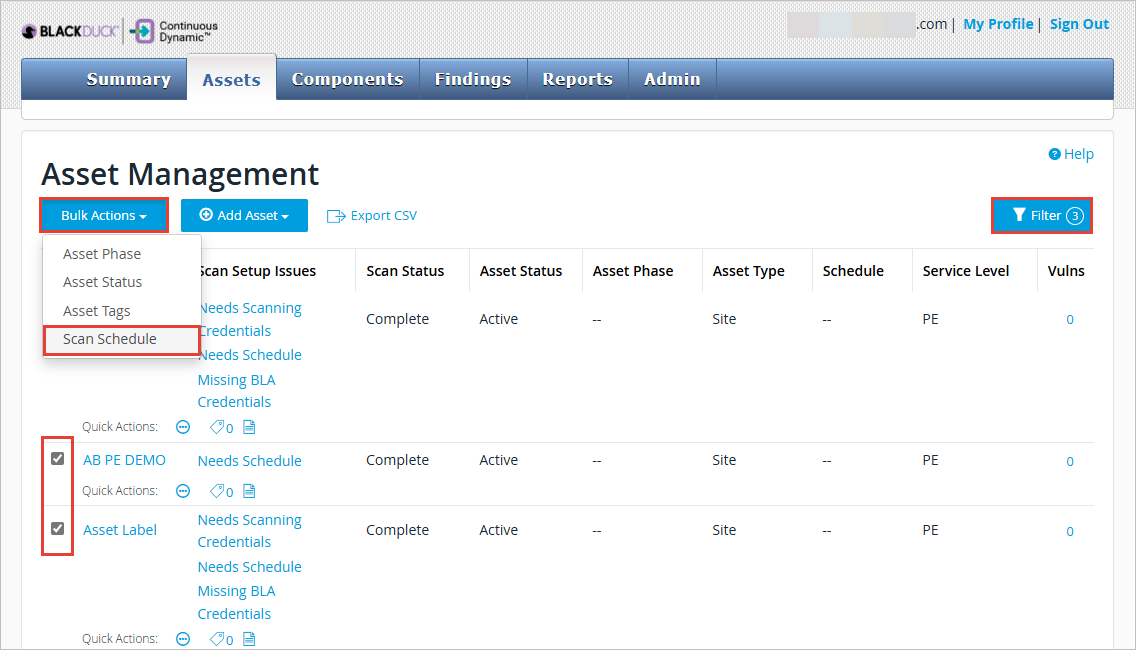
Setting a Schedule for Multiple Assets
From the Assets tab, you can set a schedule for a specific asset or for several assets at once.
To schedule a scan for multiple assets, perform the following steps:
-
From the main Portal menu, select Assets.
-
Optionally, click the Filter button to set filters for the assets with Scan Setup Issues.
-
Select multiple assets from the Asset Management table by selecting the checkbox to the left of the asset name.
-
Click the Bulk Actions button to display a list of possible actions you can take.
-
Select Scan Schedule.
-
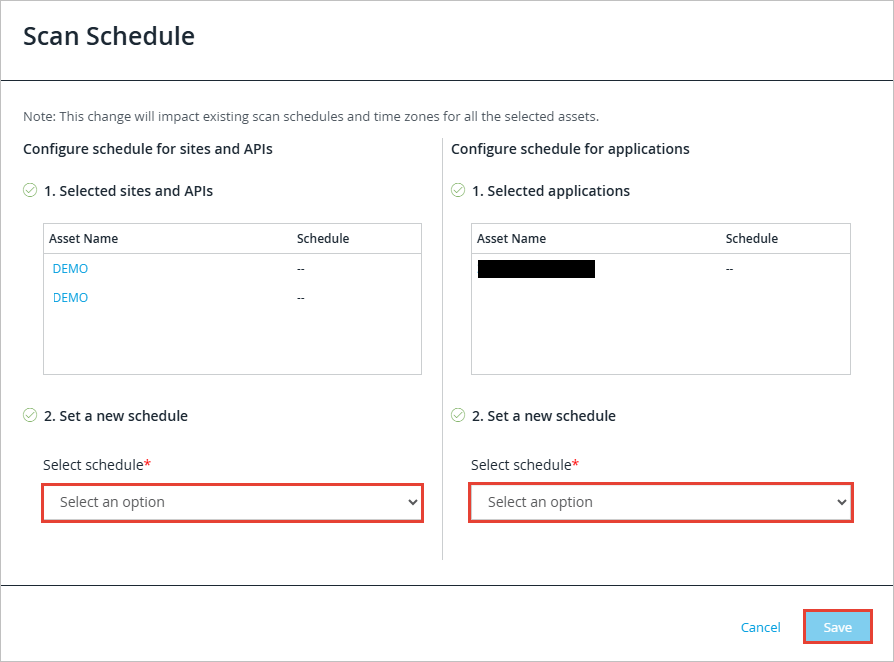
Click the Schedule dropdown for sites and APIs and select an option from:
-
Never Scan (not recommended)
-
Continuous (24/7 scanning: recommended)
-
Nights 8P-6A, and Weekends 24hrs (Select a timezone)
-
-
Click Save to add the scan schedules to the selected assets. The scan will commence at the next scheduled time.
From the Action Items Tab
To schedule a scan from the Action Items page, perform the following steps:
-
From the Action Items page, click on Needs Schedule.
-
The scheduling popup is displayed.
-
From there, establish the schedule as described in Setting a Schedule for a Single Site Asset.