Adding a Site Asset
To add a site, navigate to the Asset Management page and perform the following steps:
-
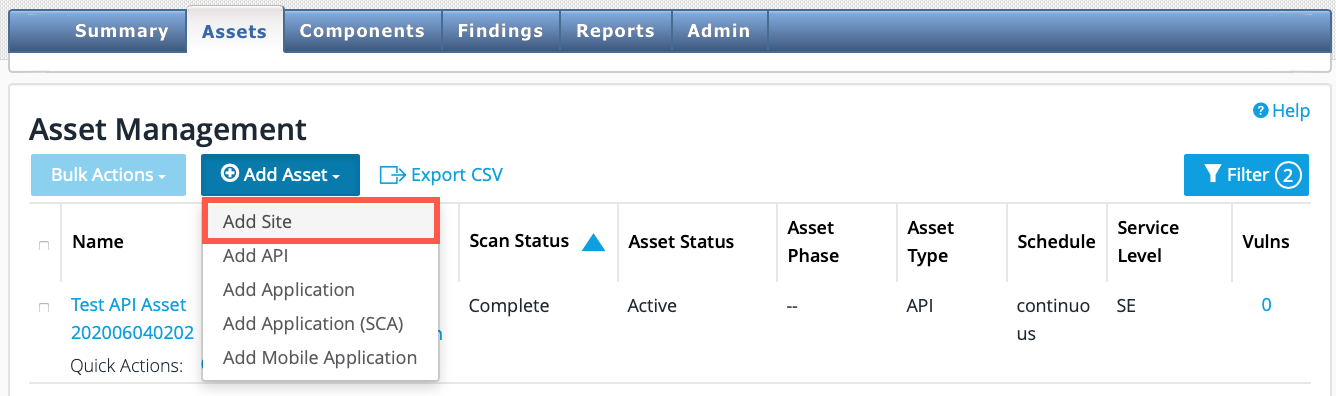
Click Add Asset.
-
From the Add Asset dropdown, select Add Site.
The Add Site option is only available to users who are assigned the Can Add Site permission. You can check this as an Admin or Client Admin. Navigate to the User Management page, select the user, and then confirm that Can Add Site is selected. -
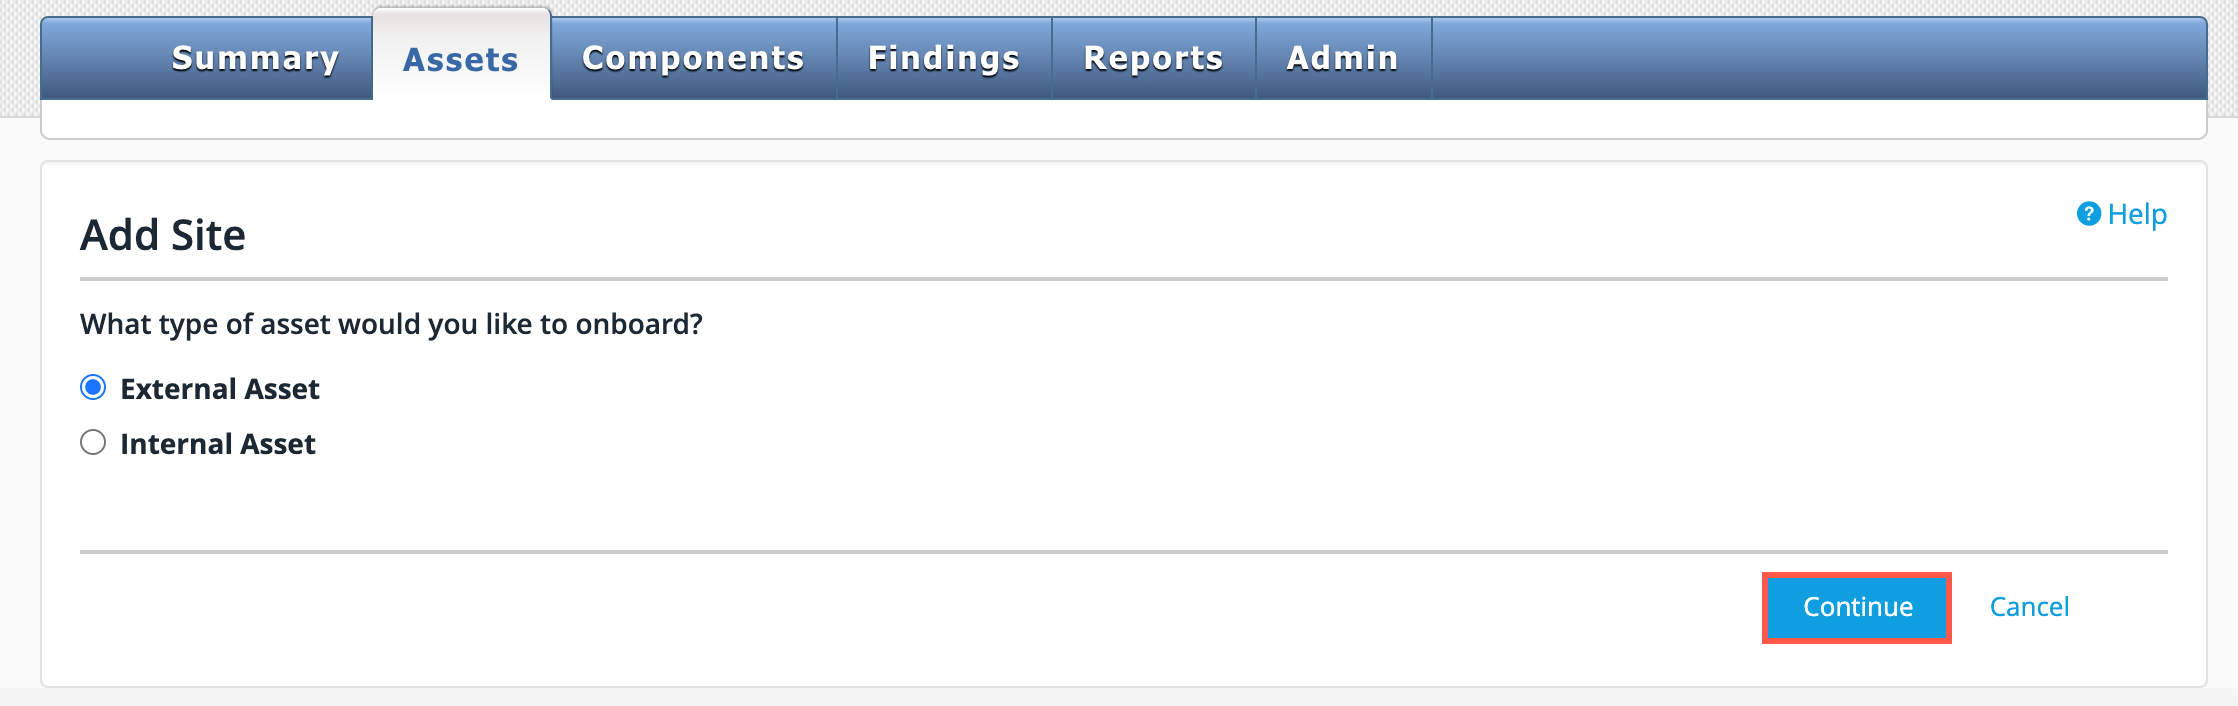
Select External Asset or Internal Asset, then click Continue.
-
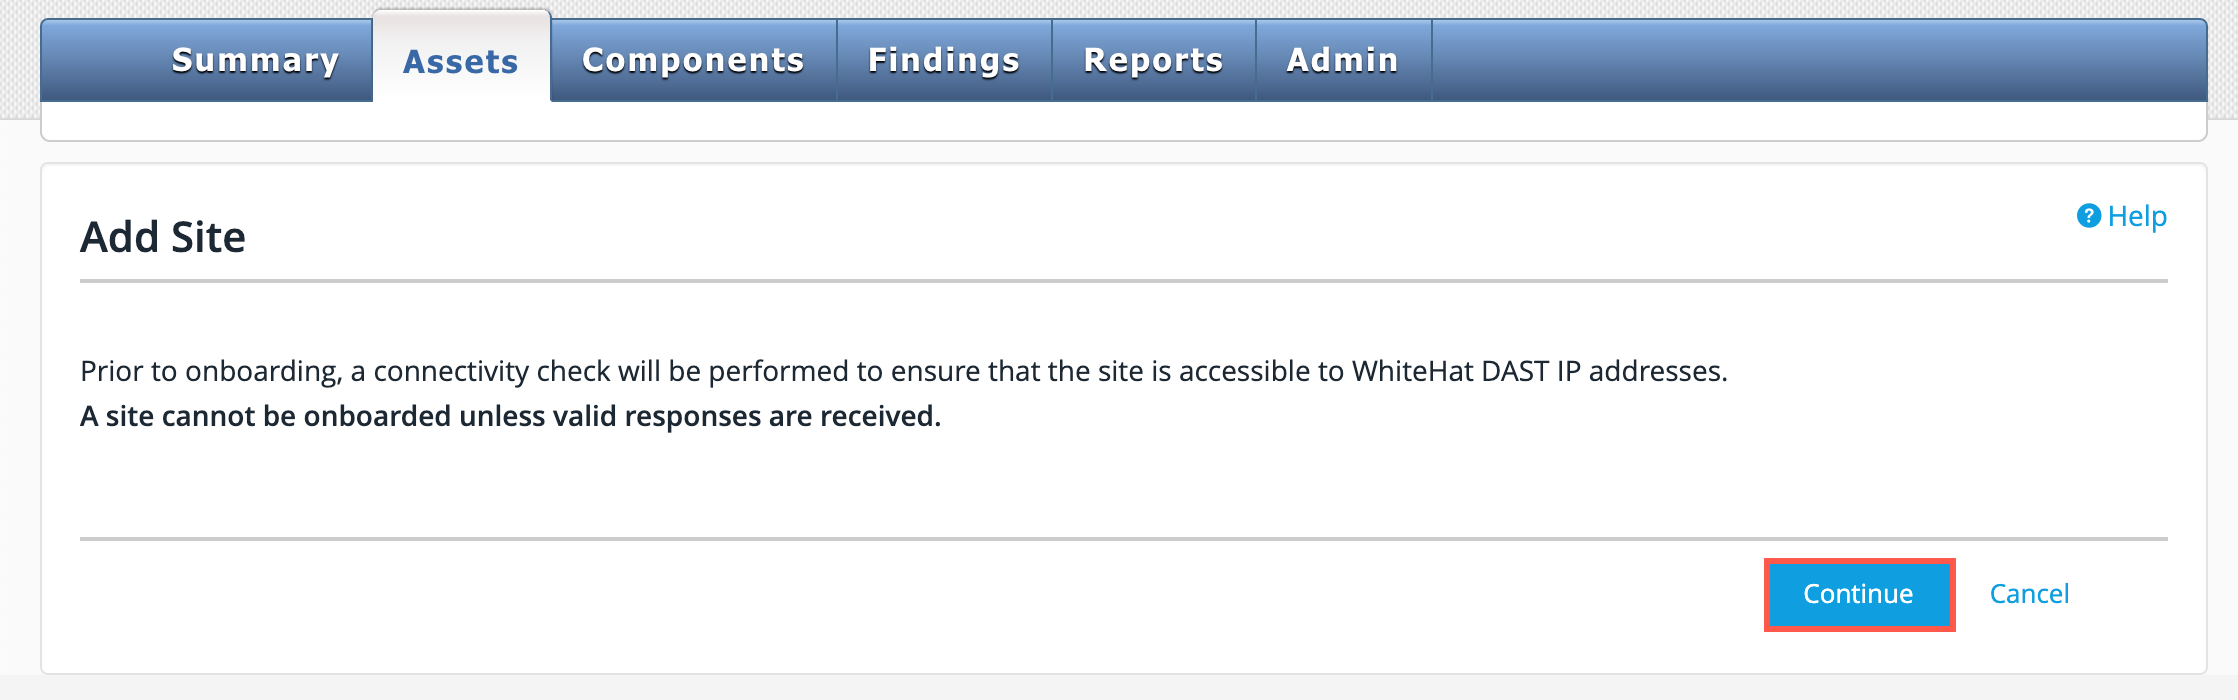
Click Continue to confirm that a connectivity check will be performed on the site.
-
Enter the Primary Hostname URL of the Site asset you want to add.
The Primary Hostname URL must be provided in a format such as http://site.com. Underscores in URLs and public login domains are not supported by the Sentinel Appliance—see Hostname Requirements (DAST) for more information.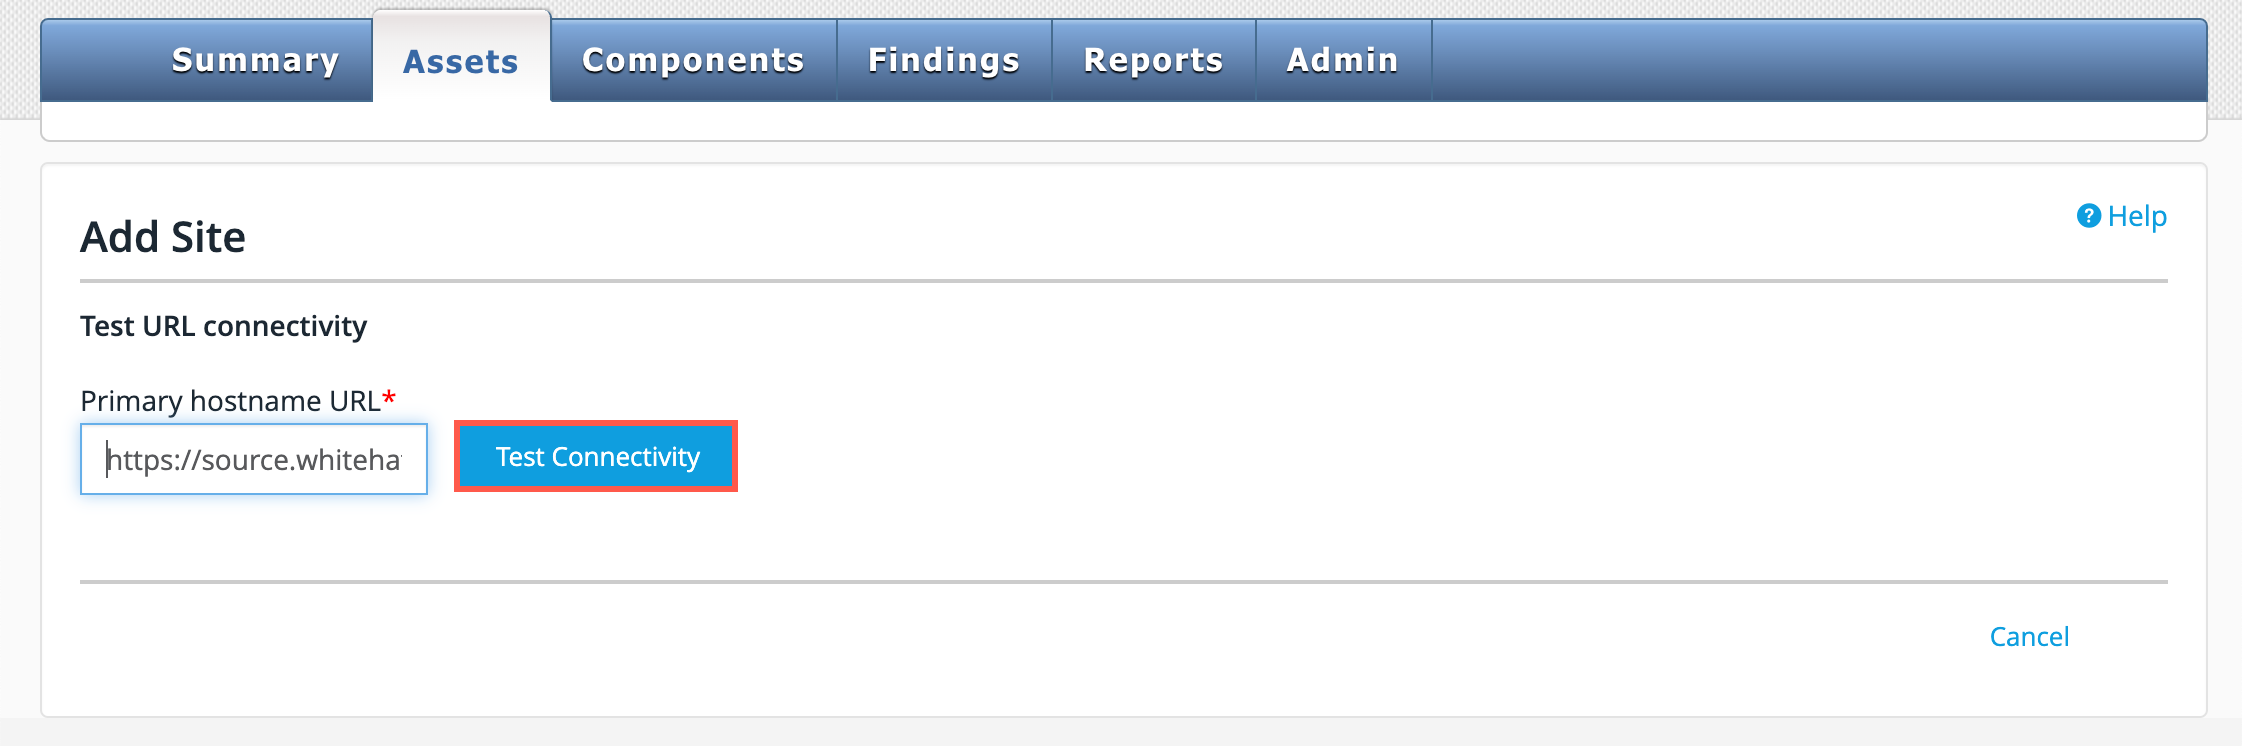
-
Click Test Connectivity. One of the following HTTP response codes will be returned:
Response Codes 200
Success
403
Success - Authentication Forbidden
408
Failure - Request Timeout
503
Failure - URL unreachable
-
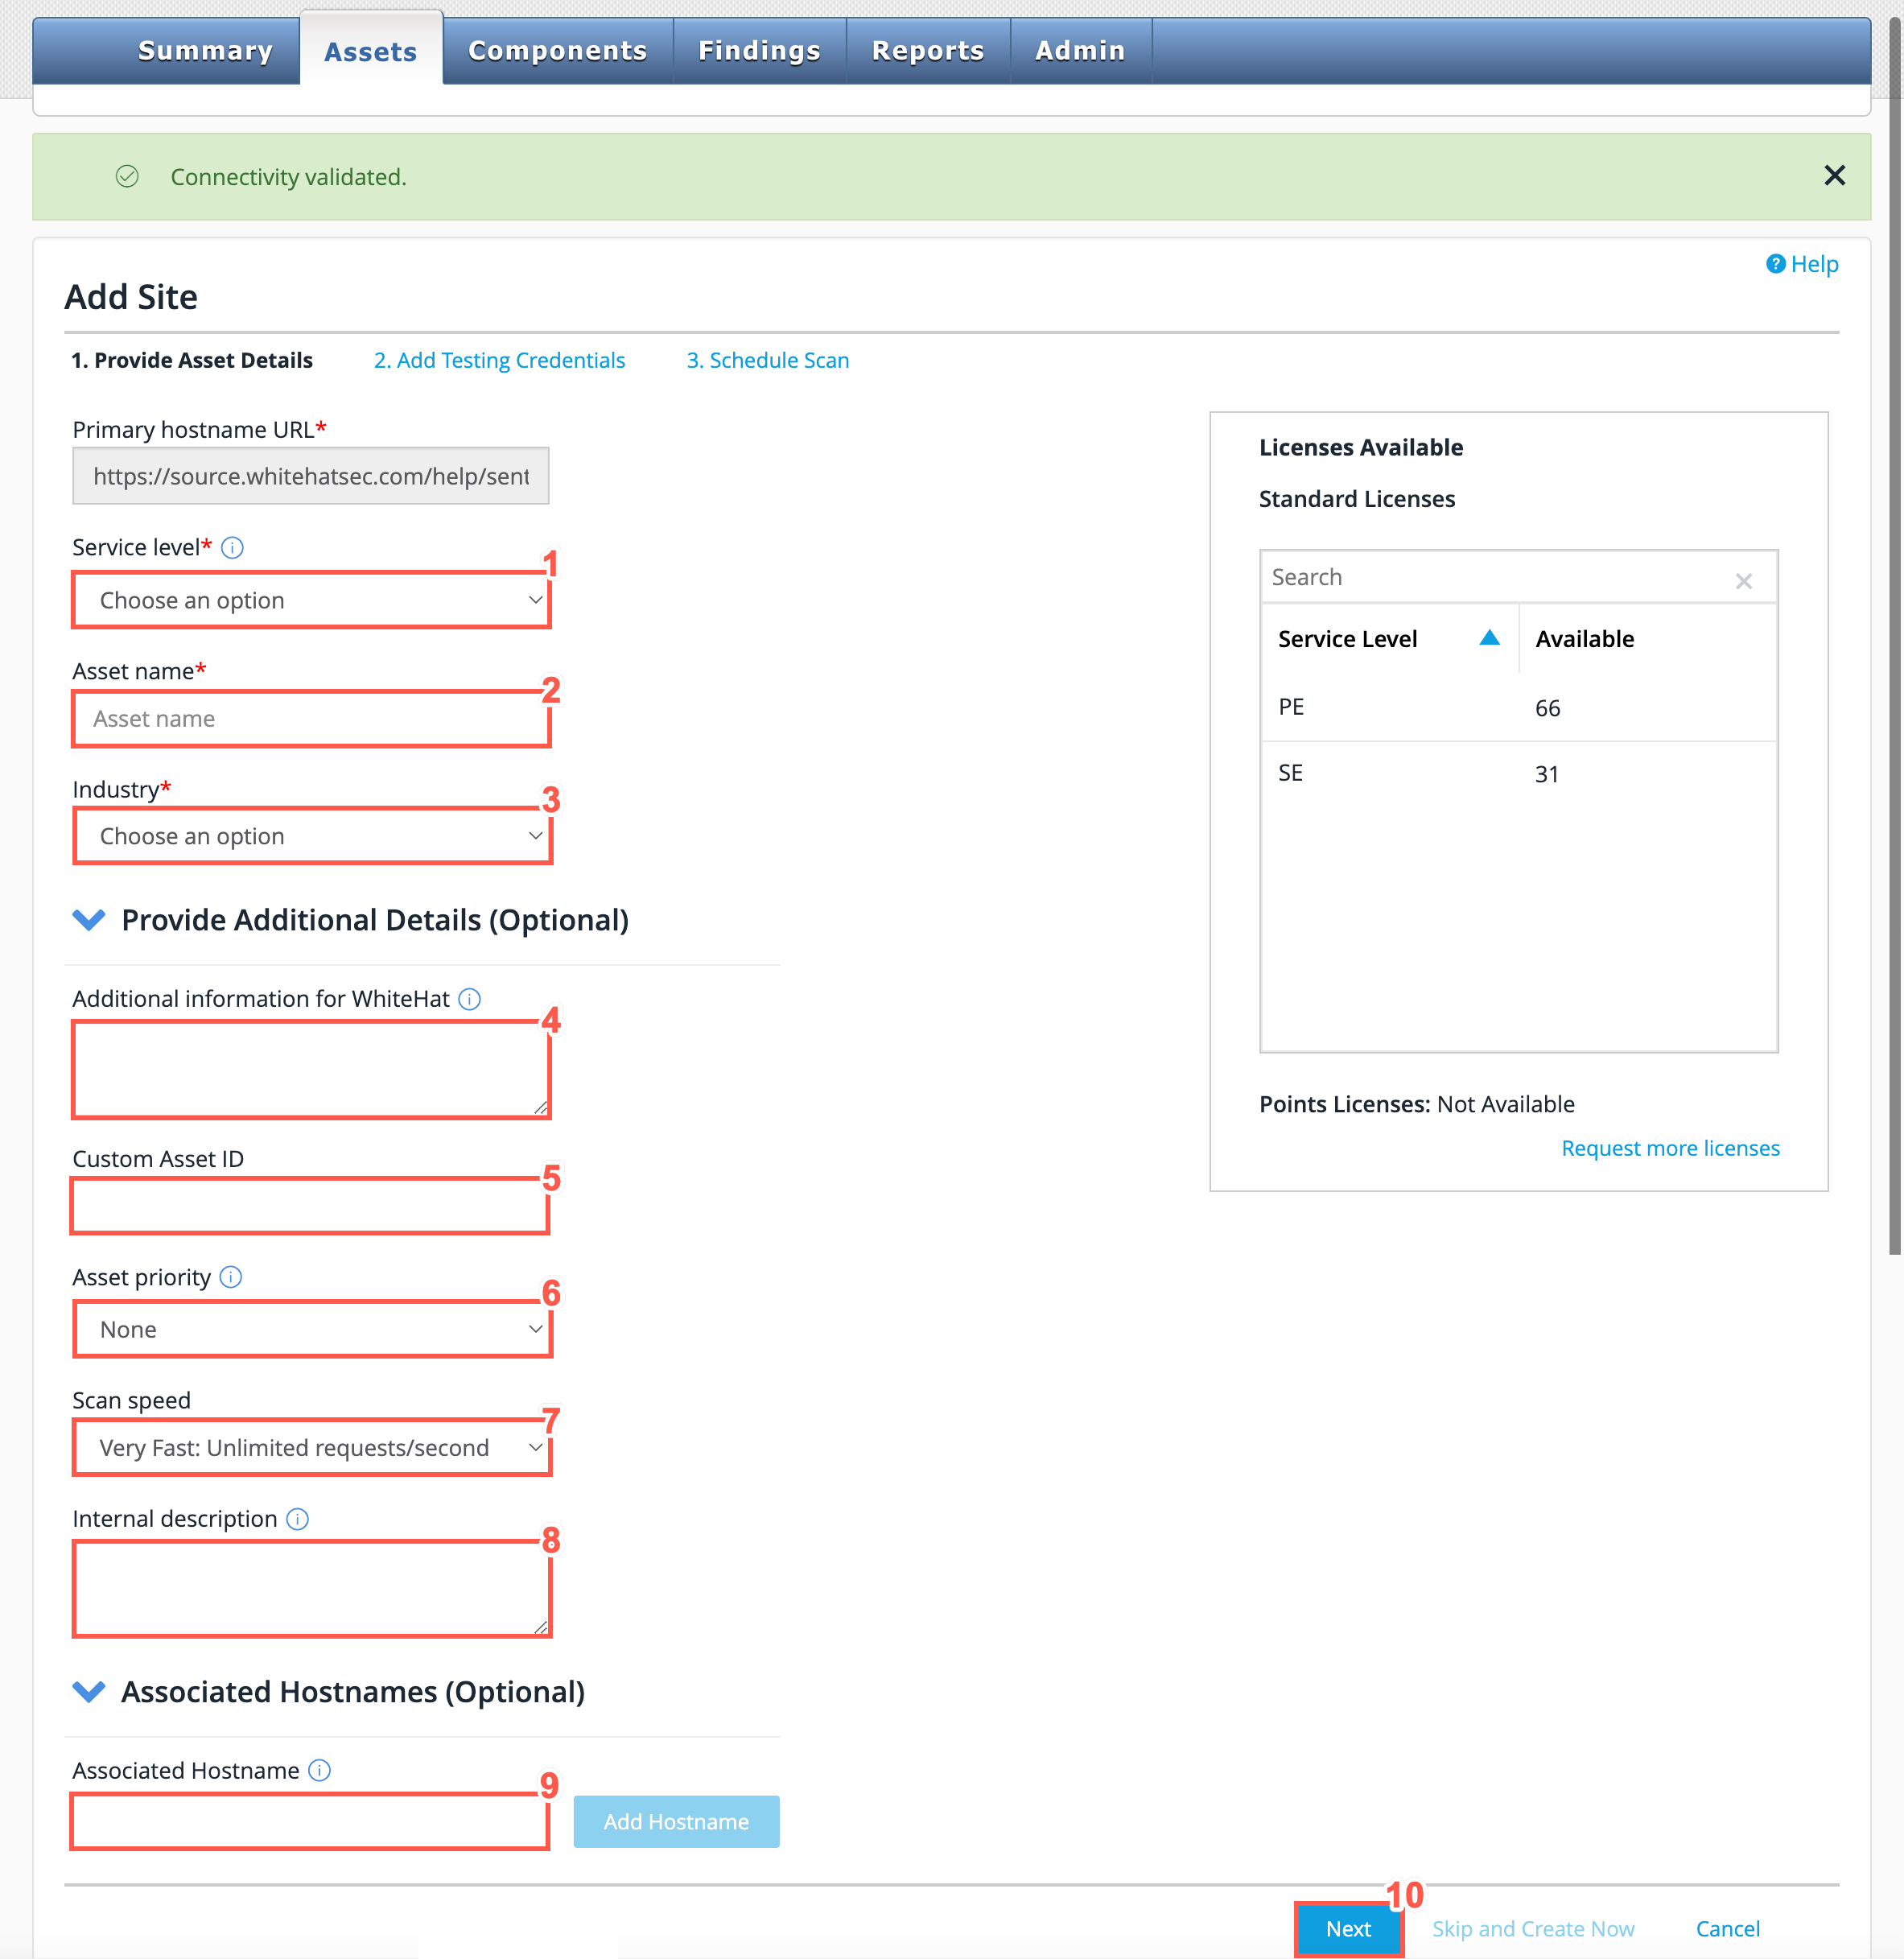
If the connection is successful a "Connectivity validated" message is displayed:

| For information on how to edit a user’s role in the Continuous Dynamic Portal, see Editing a User. |
Now, complete the three steps in the Add Site wizard. Further details of each step are provided below.
1. Provide Asset Details
To add a new site you need to provide some basic information such as the site credentials to use for scanning and a site schedule.
On the Provide Asset Details tab, perform the following steps:
-
Select a Service level from the dropdown.
-
Enter the Asset name in the text field provided.
-
Select an Industry that best fits the purpose of your site. This will be used for peer benchmarking purposes when you have received finding results.
-
Optionally, add any additional information to be reviewed by Technical Support (TS) or the Threat Research Center (TRC) teams before the site’s onboarding is finalized. Please note that this information will not be displayed in the Portal, or available through the API.
-
Optionally, add a Custom Asset ID to the site in the text field provided. This is displayed in reports after the Asset name.
-
Select your Asset priority from the dropdown. See Understanding Asset Priority for more information.
Higher priority assets generally store more sensitive data, have more users, and/or are more important to your organization. The asset priority set will impact the rating displayed for vulnerabilities found on the asset. None represents no adjustment to the final score based on priority. -
Select your desired maximum Scan speed from the dropdown.
-
Optionally, add an Internal description of your site for internal referencing.
-
In the Associated Hostnames (Optional) section, add any associated host names for the Site asset. Refer to Adding Associated Hostnames to a Site for more information.
-
Click Next to proceed to the Add Testing Credentials tab, or click Skip and Create Now to create the asset without testing credentials or a scan schedule.
2. Add Testing Credentials
On the next tab, add testing credentials (also referred to as scanning credentials) for the site Asset.
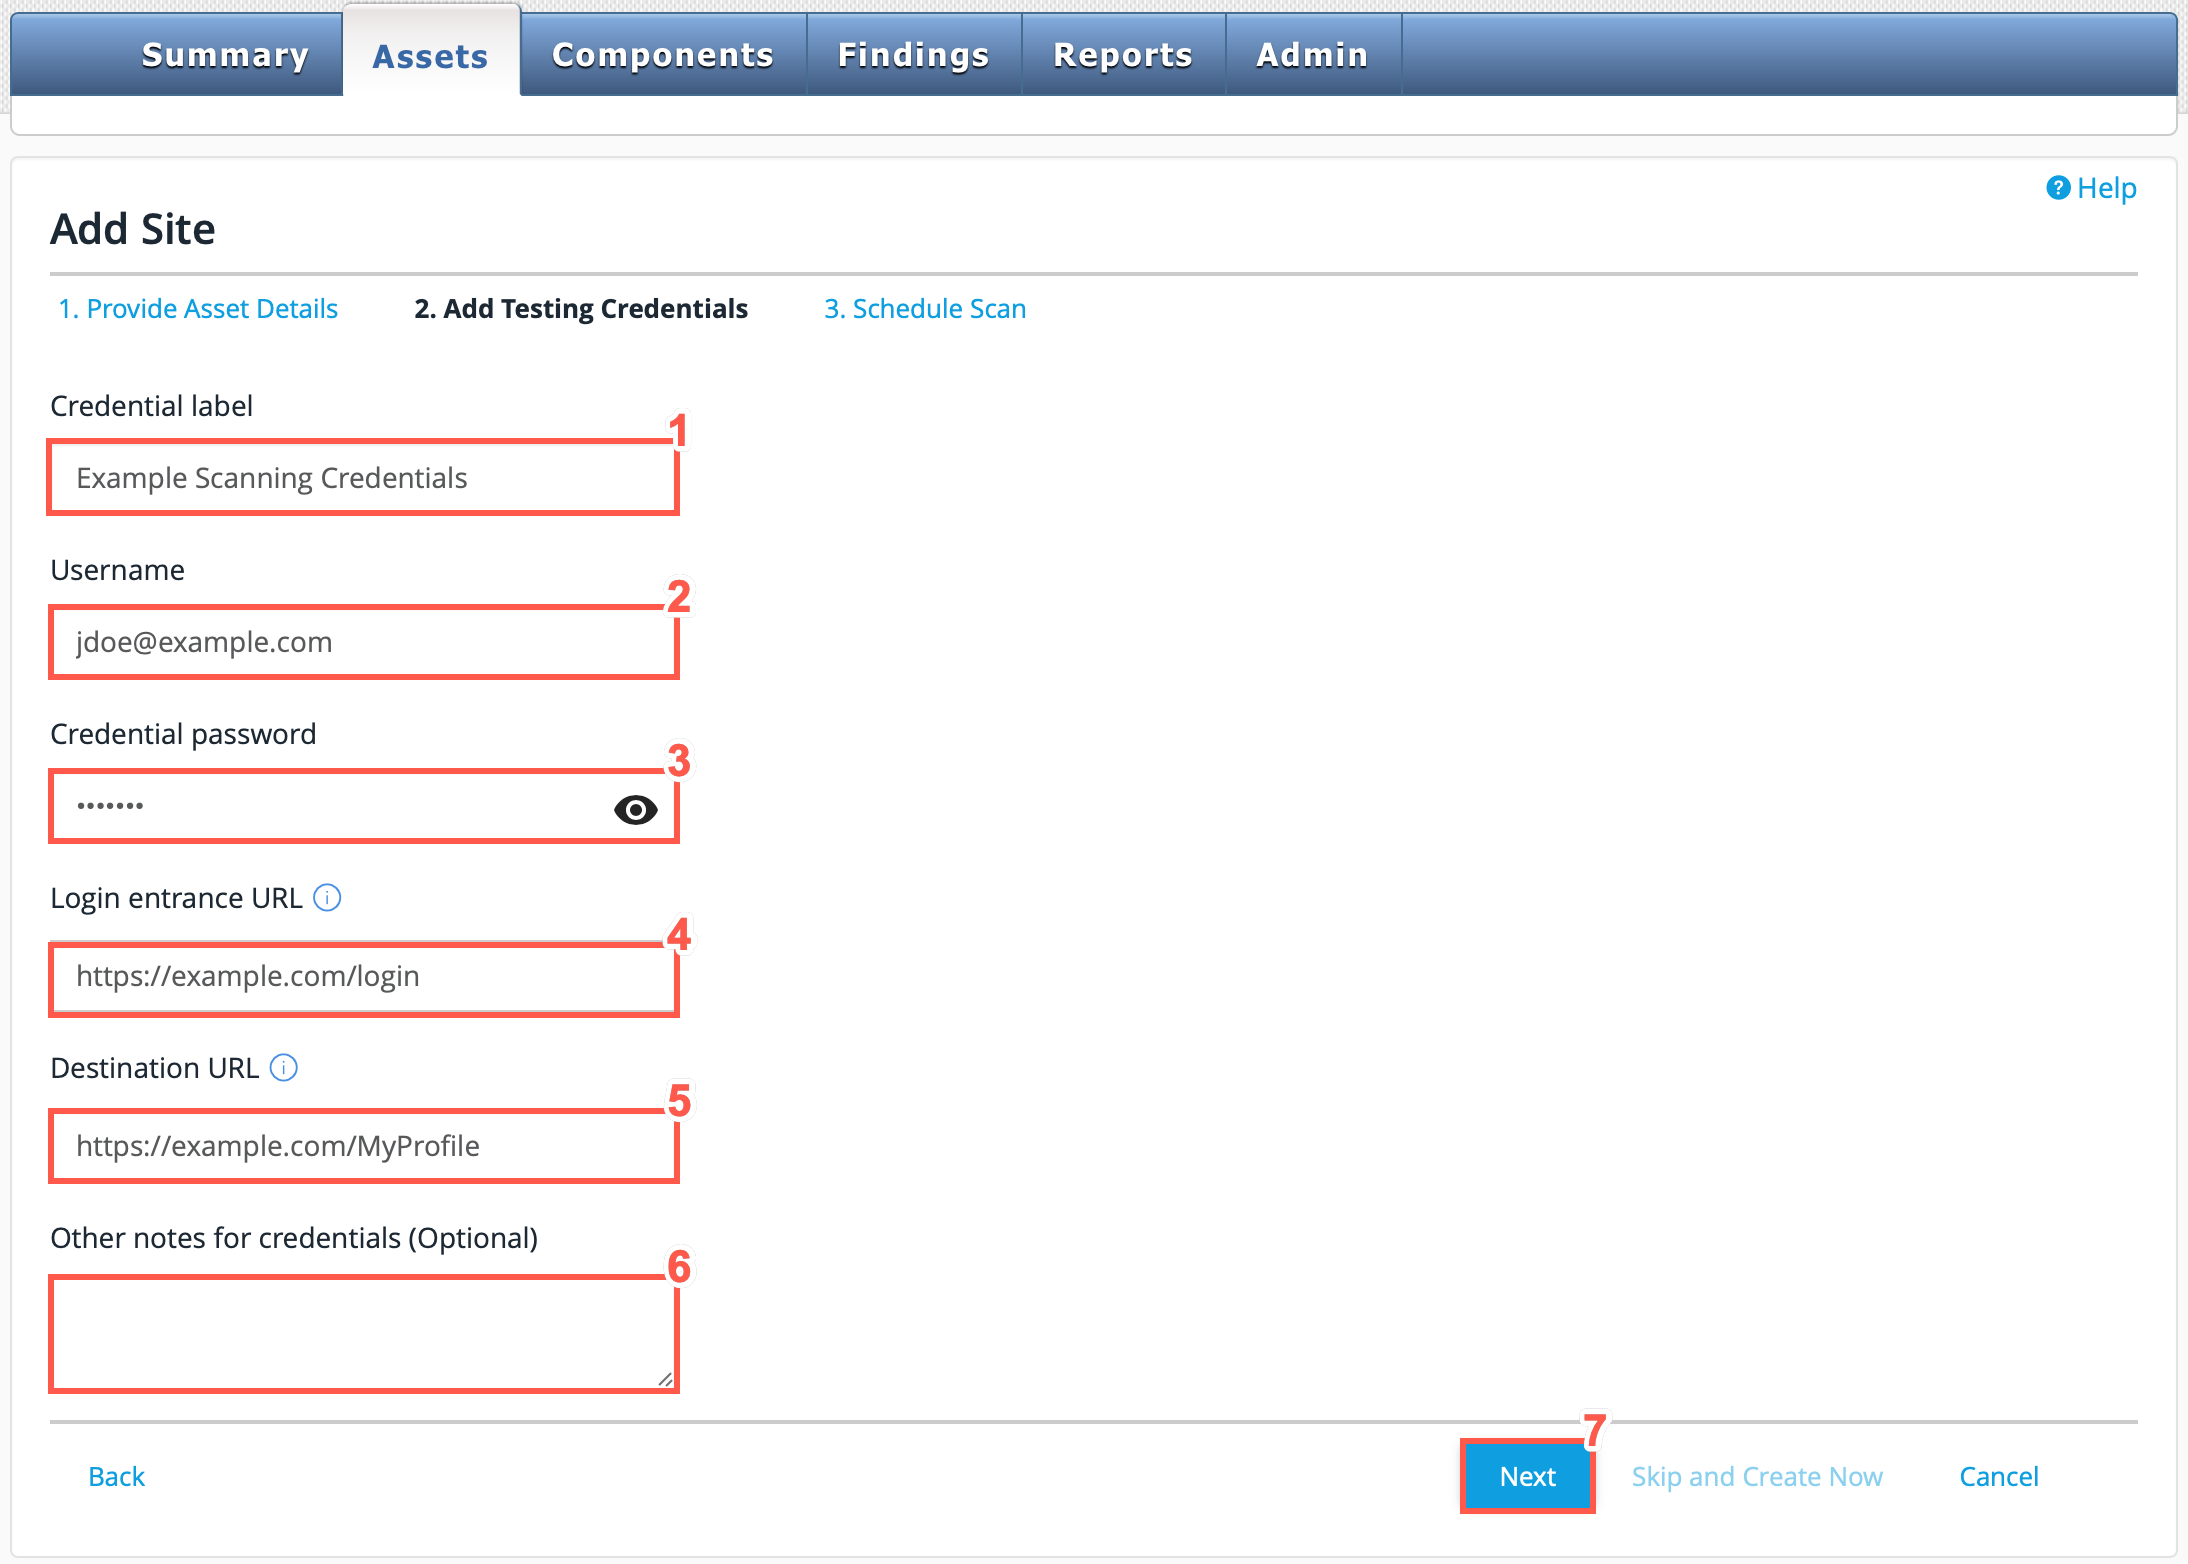
Perform the following steps:
-
Enter a Credential label for your own reference.
-
Leave Username & Password selected as the Authentication Type.
If your testing credentials are stored in a Privileged Access Management (PAM) system, select PAM Integration and then follow the steps in Adding Scanning Credentials. See PAM Authentication Overview for more details about this feature. -
Enter the Username to use for this credential.
-
Enter the Credential password. You can click the eye icon to display the password.
-
Enter the Login entrance URL.
-
Enter the Destination URL.
-
Optionally, add login notes for your site.
-
If supported by your site, select Enable Time-based One-time Password (TOTP) MFA, and then enter your TOTP secret key. See Setting up Time-based One-time Password (TOTP) MFA for more information.
-
Click Next to proceed to the Schedule Scan tab or click Skip and Create Now to create the asset without a scan schedule.
If necessary, you can choose to add credential information to the site at a later time; however, unless a site has no login required for access at all, the TRC will not be able to test the site content thoroughly until credentials are available.
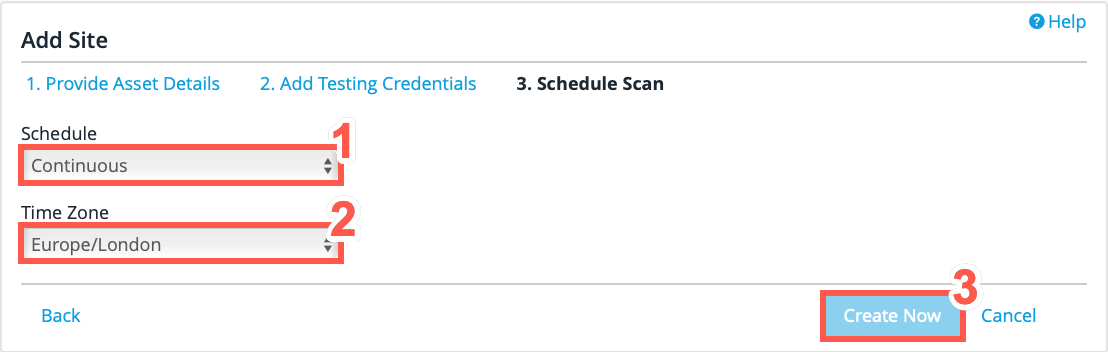
3. Schedule Scan
On the Schedule Scan tab, perform the following steps:
-
Select a Schedule from the dropdown. Schedules available include:
-
Continuous
-
Nights 8P-6A, and Weekends 24hrs
-
Never Scan
-
-
Select a Time Zone from the drop-down list.
The time zone is important for ensuring that the scan runs according to your preferred schedule. Please select it carefully. For additional information on setting your schedule, please see Scheduling a Scan. -
Click Create Now. A confirmation message of your site creation will display.
Select the Assets tab to return to the Asset Management page and the new site will be listed.
Editing a Site Asset
| Field Name | Description |
|---|---|
Editing a Site |
To edit a site, navigate to the Site Overview page and choose Edit Site Info, Edit Schedule/Time Zone, or click on Credentials or Settings. |
Edit Site Info |
Clicking the Edit Site Info button enables you to edit the Site Name, your custom Asset ID for the site, the Asset Owner, Industry, Description of the site, Status (active or inactive), and Phase (pre-production, production, discontinued, or none). Make your desired changes and click Save Changes. |
Edit Schedule/Time Zone |
Clicking the Edit Schedule/Time Zone button enables you set or change the scan schedule and the time zone. Refer to Scheduling a Scan for more information. |
Credentials |
Clicking on Credentials displays your current credentials and enables you to add, edit, or disable credentials as needed. For more information, refer to Entering or Editing Credentials. |
Settings |
Clicking on Settings displays your site settings (priority and scan speed.) To edit these settings, click Edit Site Settings. For more information, refer to Asset Details - Application Overview Tab |