API Endpoints
Adding API Endpoints
There are two ways to add endpoints for an API that you want to scan with AutoAPI. The recommended method is to upload an API specification document to the Continuous Dynamic Portal. This configures all of the endpoints included in the API specification document for scanning.
You can also add API endpoints individually if you do not have a specification document.
API Specification Document Details
The API specification document must be in either JSON or YAML format and conform to the Open API 3.0 or Swagger 2.0 specifications. Additionally, we support Postman and Kong Insomnia collections in JSON format — see the following sections for more details.
Postman Collection Details
The Postman collection format is supported either by file upload to the Portal, or by sending the raw collection JSON (YAML is not yet supported) via the Continuous Dynamic API at POST /api/apiAssets/{siteID}/endpoints.
Because the AutoAPI process stores and manipulates API documentation in OpenAPI 3 format, the Postman collection is converted, so functionality that is not supported by OpenAPI v3 will cause errors. Notably, requests with methods other than GET, PUT, PATCH, POST, DELETE, HEAD, OPTIONS, TRACE, and CONNECT will cause errors.
Collection-level Postman variables are supported. The Postman collection schema allows for folder, request, and URL variables, which are also supported.
Note the following limitations:
-
Authorization configured in the Postman collection is not applied on upload, but must be manually configured in the Portal.
-
Environment variables and global variables are not exported with the Postman collection. This means that any field that contains references to these variables must be manually updated — you can do this via the Portal UI.
-
The pre-request script section from the request is not parsed.
-
Content-Type for the request body is not detected based on the raw body (The OpenAPI specification pairs each request body with a type that defaults to
application/jsonif not provided.) If a Content-Type header exists for a request, that content type will be used instead. Requests with eitherform-dataorx-www-form-urlencodedwill have their type identified automatically.
Insomnia Collection Details
The Insomnia v5 collection format is supported by file upload to the Portal.
Functionality that is not supported by OpenAPI v3 will cause errors, notably requests with methods other than GET, PUT, PATCH, POST, DELETE, HEAD, OPTIONS, TRACE, and CONNECT.
Environment variables are supported and replaced during the upload process. You must include environment variables when exporting the collection from Insomnia.
Note the following limitation: Authorization configured in the Insomnia collection is not applied on upload, but must be manually configured in the Portal.
Uploading an API Specification Document
To upload an API specification document, perform the following steps:
-
Click Add Endpoints.
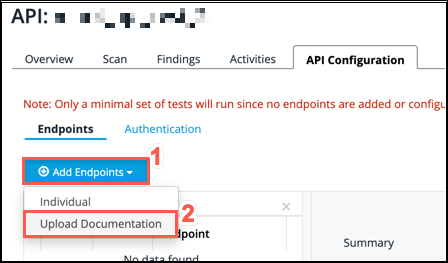
-
Select Upload Documentation from the dropdown list.
-
Drag and drop your specification file to the Upload Documentation box, or browse to the file location.
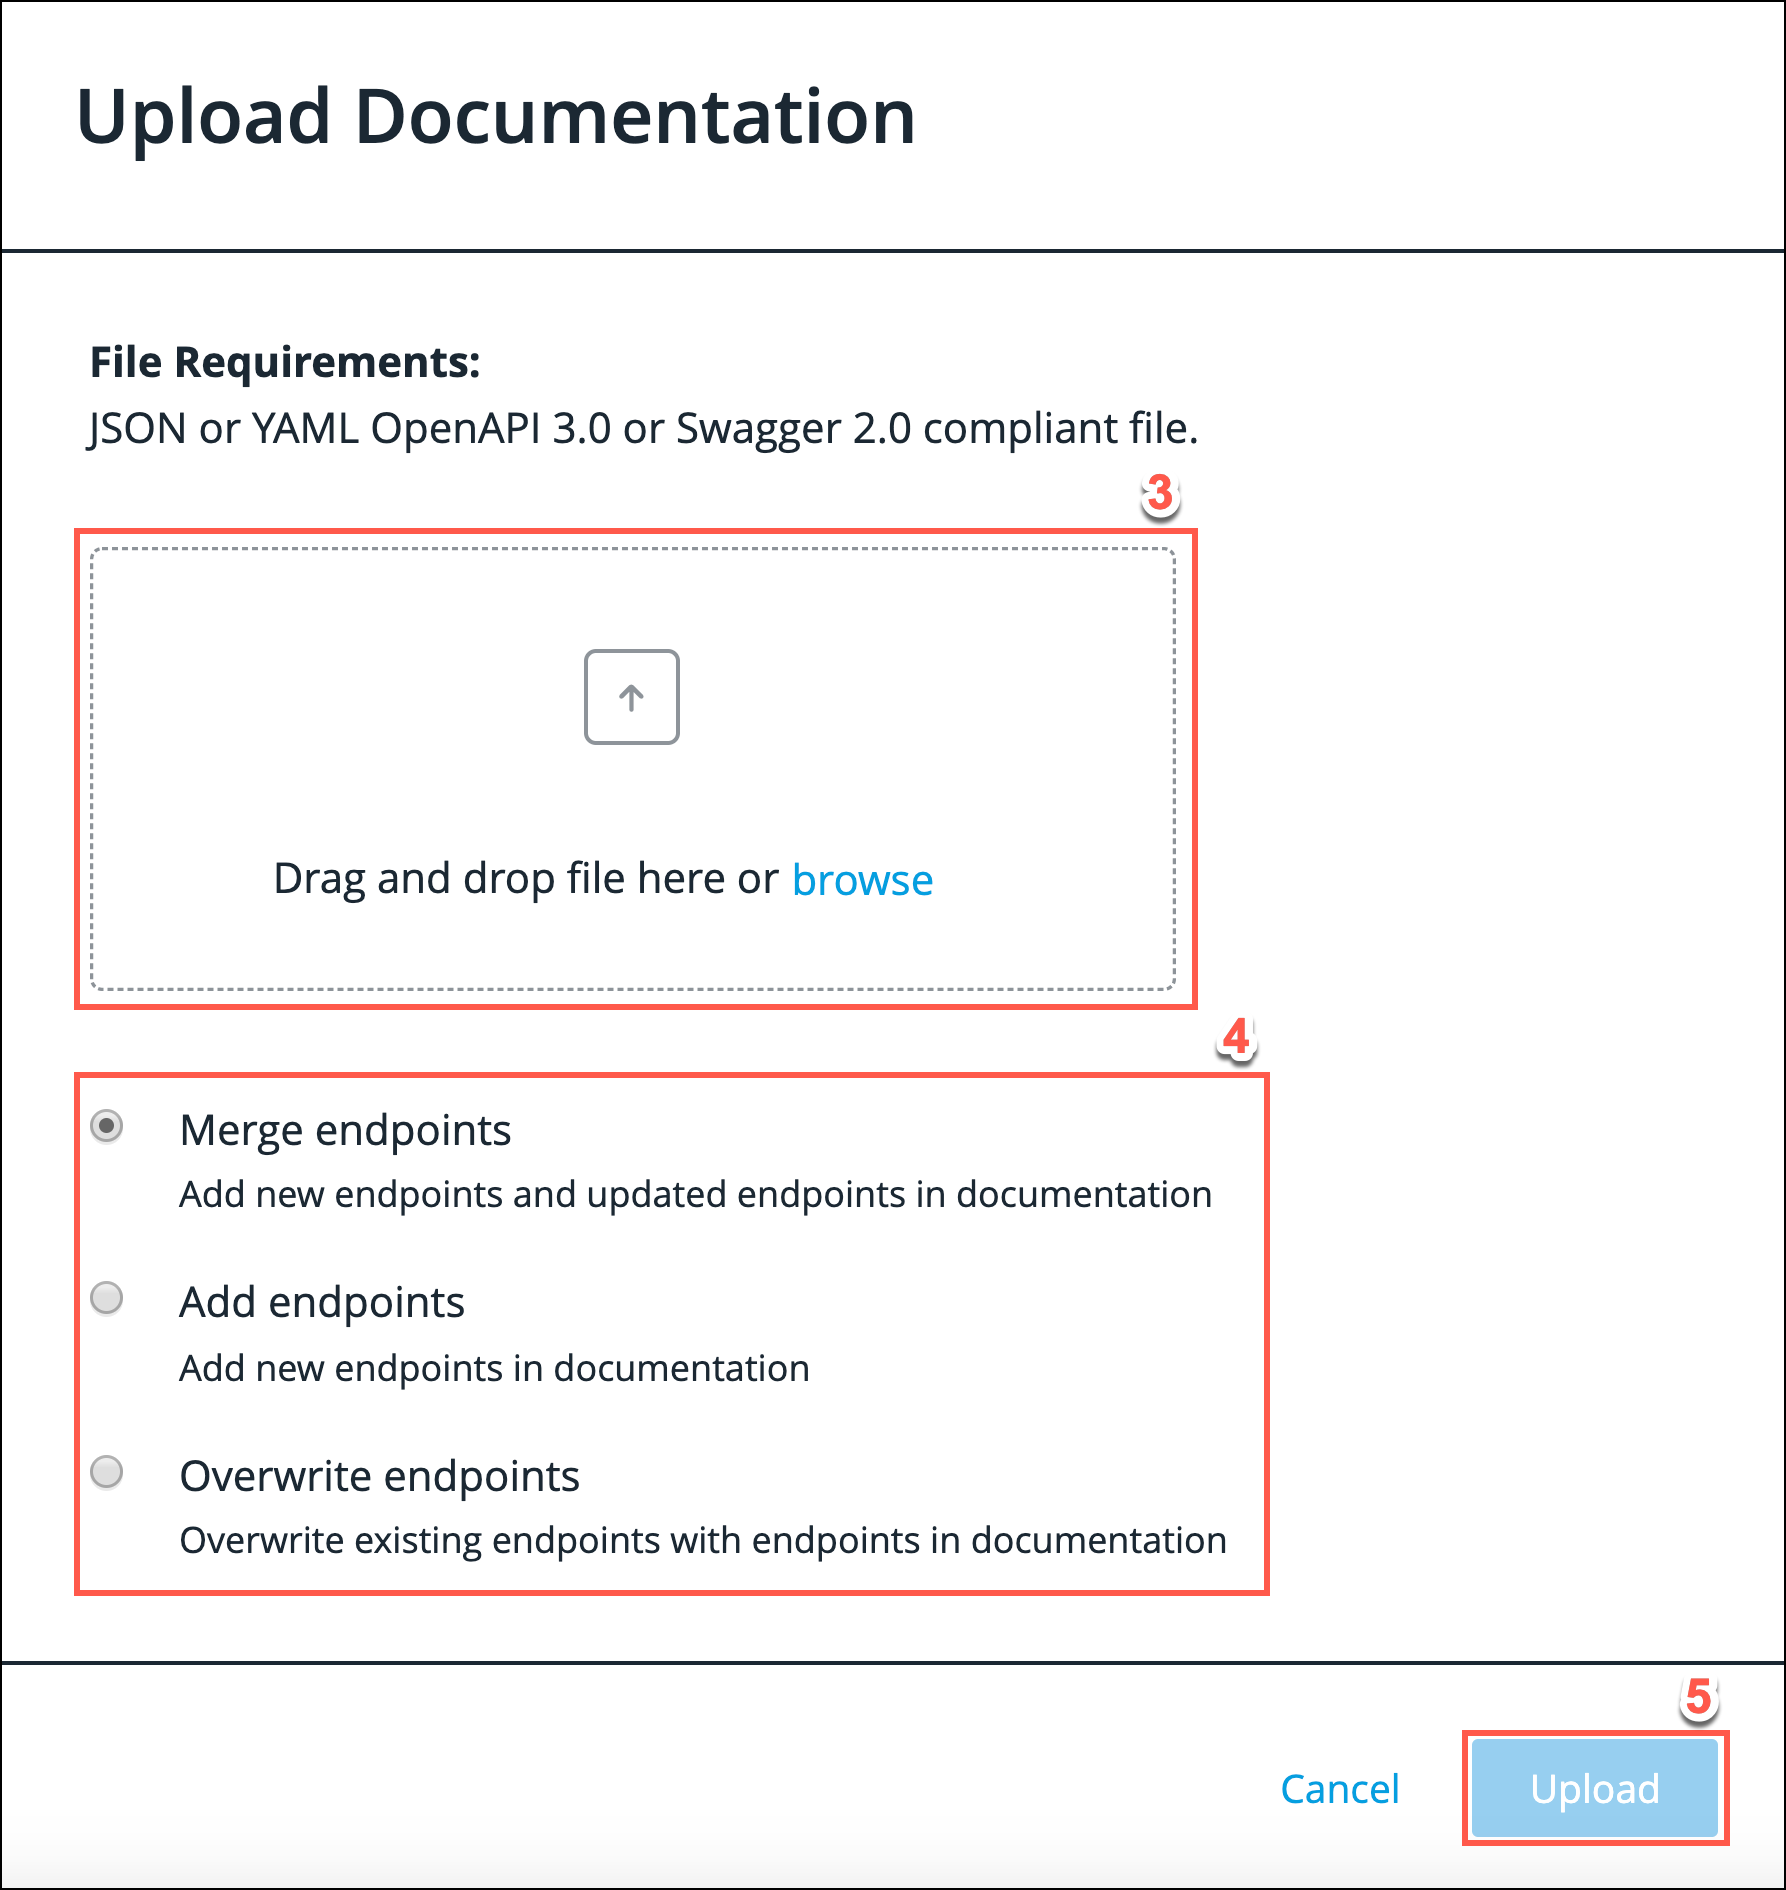
-
Select one of the three upload options (only displayed if you have already uploaded an API specification document):
-
Merge endpoints - Add new endpoints and updated endpoints in the documentation.
-
Add endpoints - Add new endpoints in the documentation
-
Overwrite endpoints - Overwrite existing endpoints with the endpoints in the documentation
-
-
Click Upload.
Each of the endpoints included in the API specification document is now displayed in the endpoint list.
Endpoints for all HTTP methods are enabled by default: GET, HEAD, TRACE, OPTION, PUT, POST, DELETE, and PATCH. To disable endpoints you do not want to scan, toggle them off in the Enable column.
Endpoints that require further configuration are identified by the information icon. This usually means that a required parameter does not have a default value provided. You can click the endpoint to resolve the issue.
Adding an Individual Endpoint
-
Click Add Endpoints.
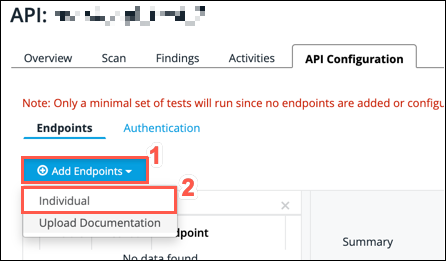
-
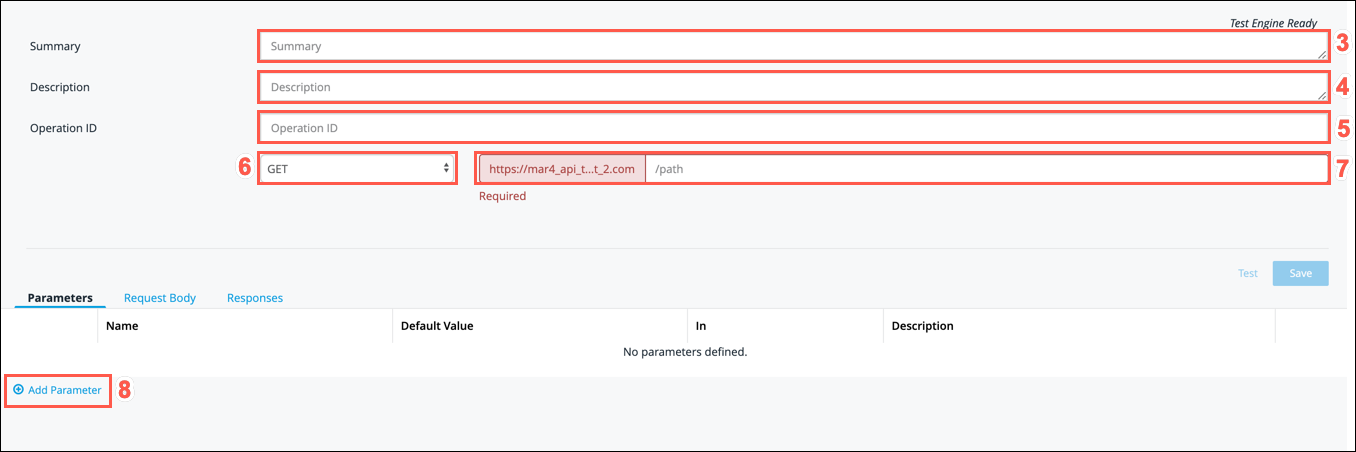
Select Individual from the dropdown list. The endpoint configuration screen is now displayed; you can populate the fields for the endpoint that you are defining.
-
In the Summary field, provide a brief overview of your endpoint.
-
In the Description field, provide a full description of your endpoint.
-
In the Operation ID field, provide a unique identifier for the endpoint.
-
In the endpoint method field, select a method for the endpoint from the dropdown. You can choose GET, PUT, POST, DELETE, OPTIONS, HEAD, PATCH, or TRACE.
-
In the endpoint path field, provide a path for the endpoint. The primary hostname URL is automatically populated, so you must provide the URL for the specific endpoint that you are defining.
-
If your endpoint uses parameters, you can add these by clicking on the Add Parameter button. This displays additional fields for you to populate with values.
-
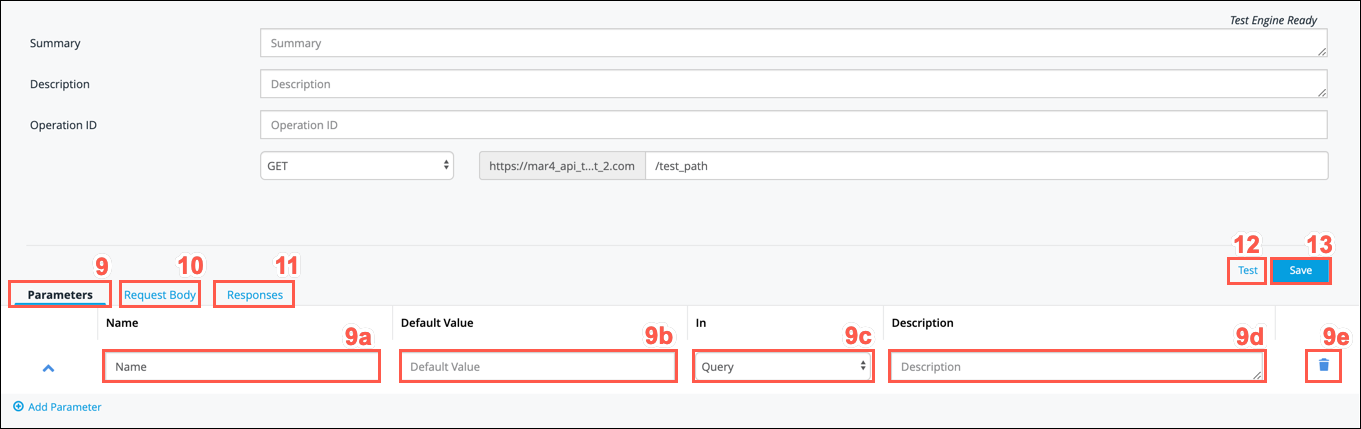
Ensure that you are on the Parameters tab.
-
Insert the name of your parameter in the Name field.
-
The Default Value field displays the default value for the parameter. This is a mandatory field for any required parameter.
-
The In field defines what the parameter value is obtained from. From this dropdown list, choose from Query, Header, Path, or Cookie.
-
Provide a full description of your parameter in the Description field.
-
Click on the trash/bin symbol beside any parameter to delete it.
-
-
The Request Body tab enables the user to add and define request bodies.
Request bodies are typically used with create and update operations (POST, PUT, PATCH). For example, when creating a resource using POST or PUT, the request body usually contains the representation of the resource to be created. -
The Responses tab displays the response(s) defined for that particular operation. You cannot modify a response in this tab. An API specification must specify the responses for all API operations. Each operation must have at least one response defined, which is usually a successful response. A response is defined by its HTTP status code and the data returned in the response body and/or headers.
-
Use the Test button to build the entire endpoint from all the information that you have provided.
This calls the endpoint and the request and response are displayed in the text boxes at the bottom of the page. These provide useful information for troubleshooting any issues with the endpoint configuration.
-
Click Save to save all the information provided.
Editing API Endpoints
To enable or edit an existing endpoint:
-
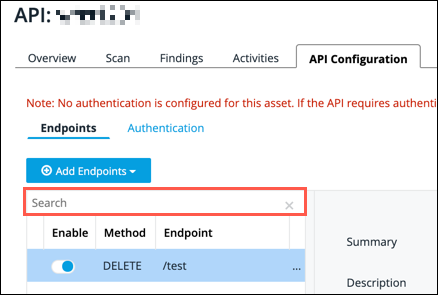
Locate the endpoint that you wish to enable or edit from the endpoint list. You can search the endpoint list using the Search field. This filters the list to display only endpoints where the endpoint URL contains the entered text.
-
Optionally, disable any endpoints you do not want to scan using the toggles in the Enable column.
-
Update the endpoint details as required.
-
Click Save.
Deleting API Endpoints
-
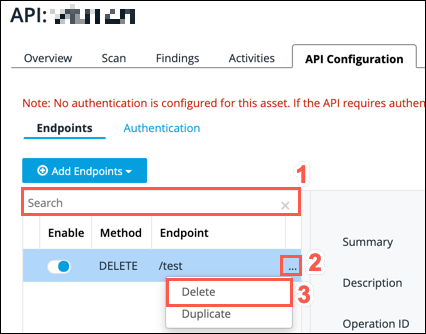
Locate the endpoint that you want to delete from the endpoint list. You can search the endpoint list using the Search field. This filters the list to only display endpoints where the endpoint URL contains the entered typed.
-
Click the ellipsis for the endpoint that you want to delete.
-
From the options displayed, select Delete.
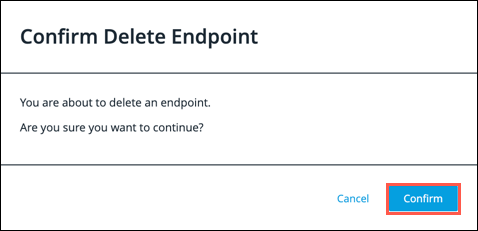
-
When prompted, click Confirm to complete the deletion.