API Authentication
AutoAPI supports two methods of API authentication; API Key and OAuth. You can only provide one method of authentication for each API.
Adding API Key Authentication
-
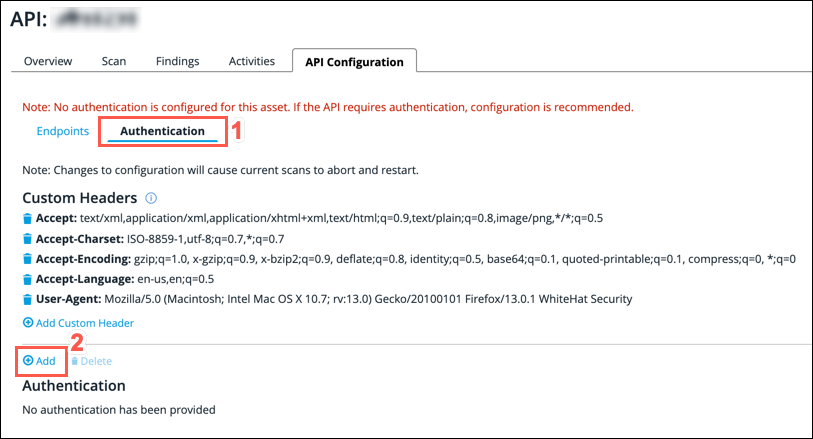
From the API Configuration screen, click on the Authentication sub-tab.
-
Click the Add button.
-
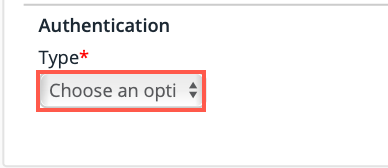
Select API Key from the dropdown list.
-
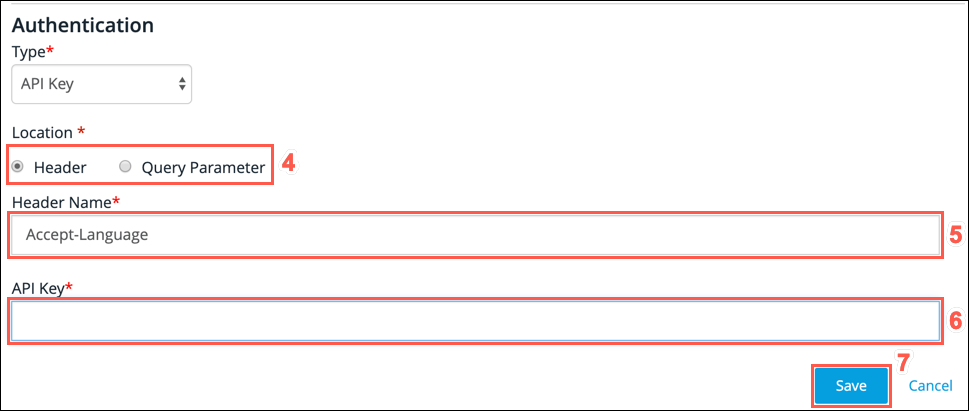
Select the appropriate radio button to indicate whether the API Key is passed in the Header or as a Query Parameter in the API request.
-
Depending on which option that you selected in the previous step, type the Header Name or Query Parameter that is used to pass the API Key.
-
Type your API key into the API Key text field.
-
Click Save.
| For security reasons, the authentication credentials are displayed with the API Key field masked. |
Adding OAuth Authentication
-
From the API Configuration screen, click the Authentication sub-tab.
-
Click the Add button.
-
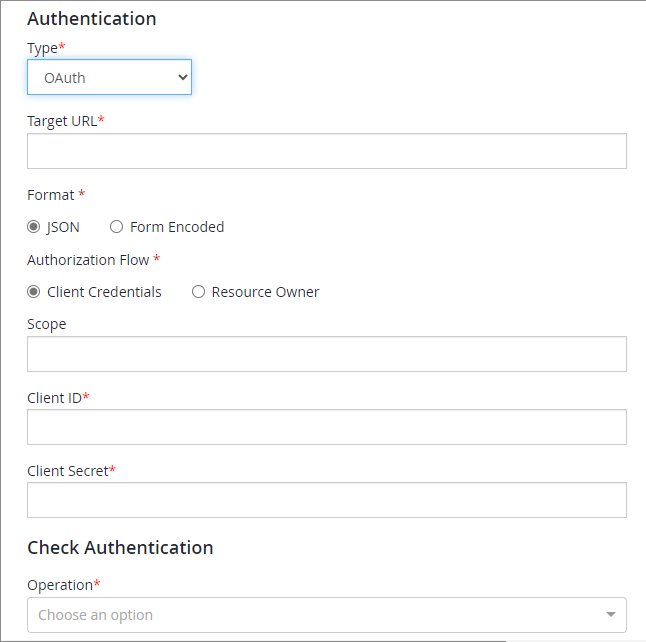
Select OAuth from the Type dropdown list.
-
Enter a Target URL. This is a valid OAuth API endpoint that the credentials will be submitted to.
-
In the Format field, select the JSON or Form Encoded radio button to indicate the format that the request is sent in.
-
In the Authorization Flow field, select either the Client Credentials or the Resource Owner radio button to indicate which OAuth flow that API requests use.
-
If you are adding an internal API (determined by the Internal asset checkbox when the API was added), select the following options:
-
Select whether the OAuth Server Type is Public or Private.
-
Select whether the Host Resolution Type is IP or DNS.
If DNS is selected, no OAuth Server IP Address is needed. -
If you selected IP, enter a valid OAuth Server IP Address in the text field.
-
-
Optionally, enter a value for Scope.
-
Enter a value for Client ID in the text field provided.
-
Enter a value for Client Secret in the text field provided.
For Authorization Flow, if you selected the Resource Owner flow, additional fields now appear to enable you to provide a Username and Password. -
In the Check Authentication section, select a GET operation from the Operation dropdown. This is the operation that will be used to test the OAuth authentication works as expected.
Continuous Dynamic makes two API requests, one using the authentication credentials provided and one using no authentication credentials. The request and response details for each request are displayed so that you can confirm that authentication is working as expected, or so that you can resolve issues if authentication is not working as expected. This is a mandatory step for OAuth authentication.
-
Once you are satisfied that authentication is working as expected, click the Save button.
| For security reasons, the authentication credentials are displayed with the Client Secret and Password fields masked. |
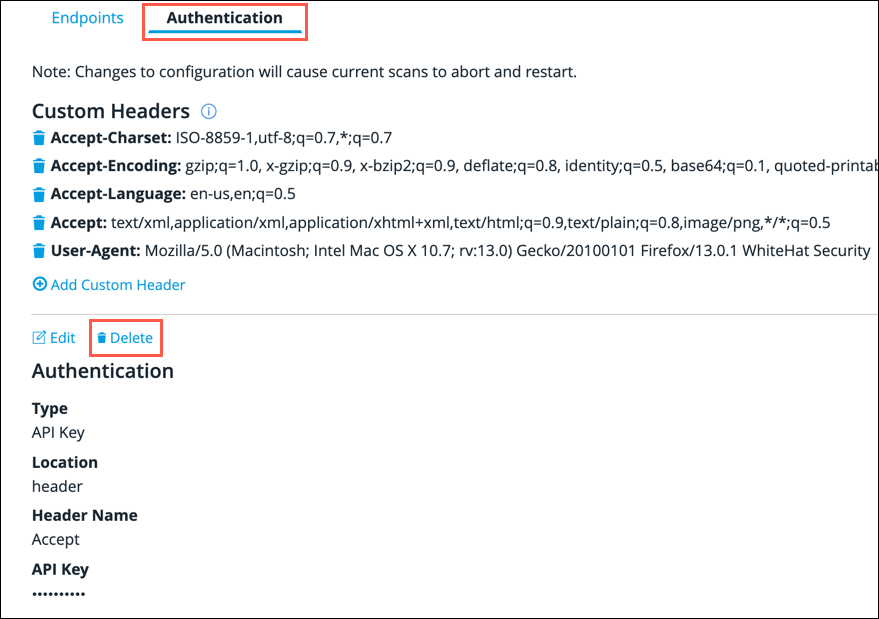
Editing API Authentication
To edit the authentication credentials for the API:
-
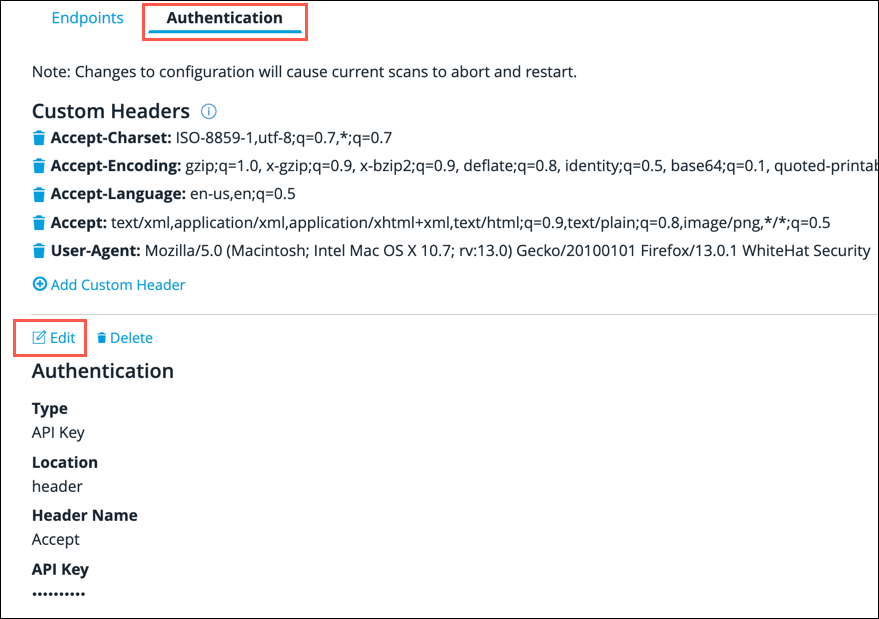
From the API Configuration screen, click on the Authentication sub-tab.
-
Click the Edit button.
For security reasons, the API Key, Client Secret and Password fields are masked. -
Edit the fields as required.
If your authentication type is API Key, skip to the last step now. If your authentication type is OAuth, continue to the next step.
-
In the Check Authentication section, select a GET operation from the Operation dropdown. This is the operation that will be used to test that OAuth authentication works as expected.
-
Perform the test selected in the previous step by clicking Check.
Continuous Dynamic makes two API requests; one using the authentication credentials provided and one using no authentication credentials. The request and response details for each request are displayed so that you can confirm that authentication is working as expected, or so that you can resolve issues if authentication is not working as expected. This is a mandatory step for OAuth authentication. Once you are satisfied that authentication is working as expected, proceed to the next step.
-
Click Save to save your changes.
| You can click on the Cancel button at any time during the process to close the edit screen without making any changes to the exisiting authentication credentials. |