Editing Site Overview Information
To Edit an existing Site, perform the following steps:
-
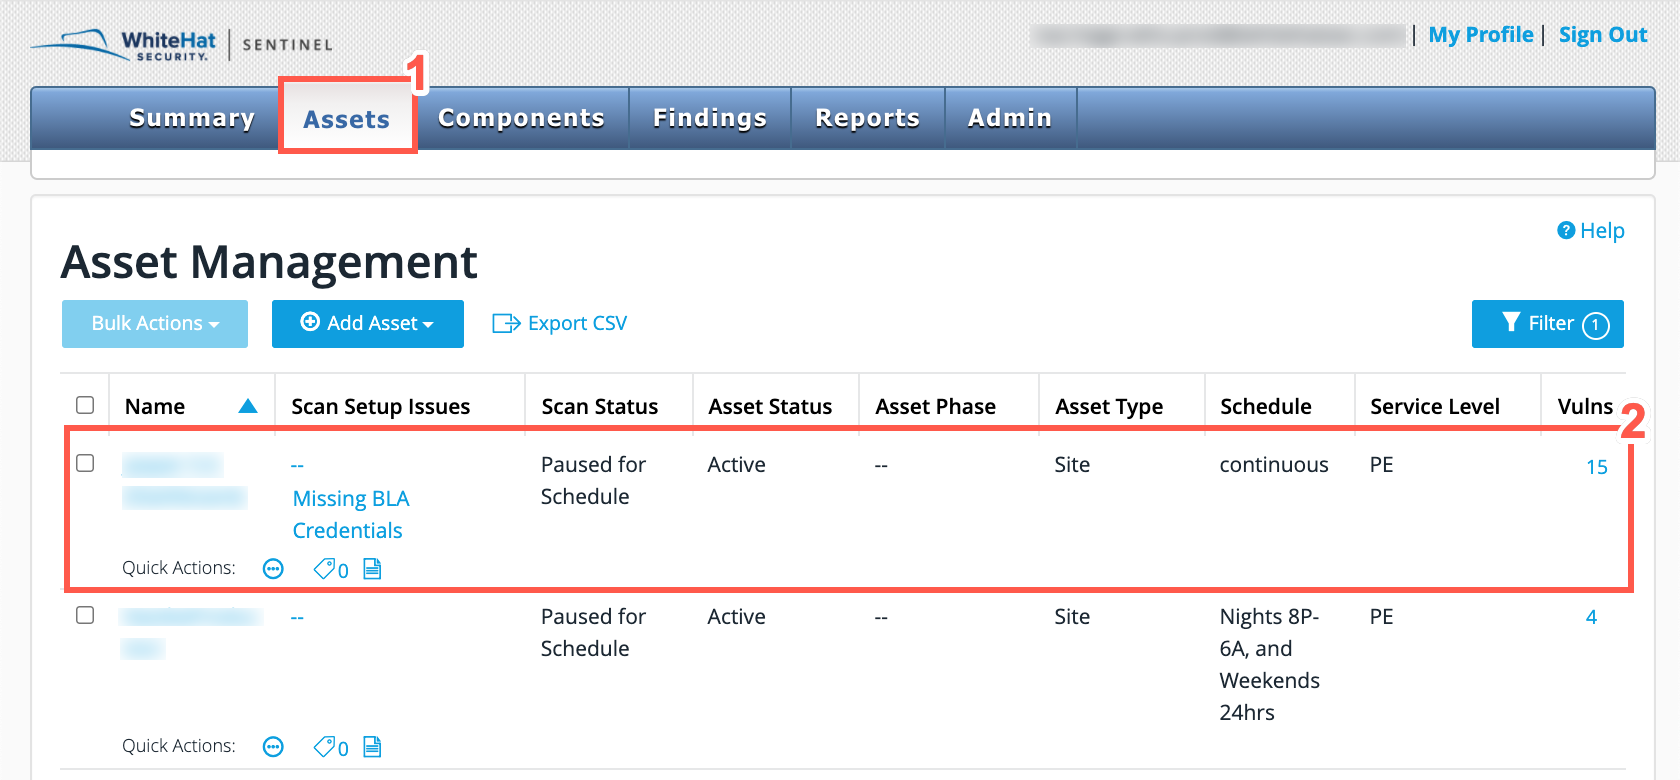
From the Continuous Dynamic Portal menu, click Assets.
-
Select a Site from the Asset Management page.
-
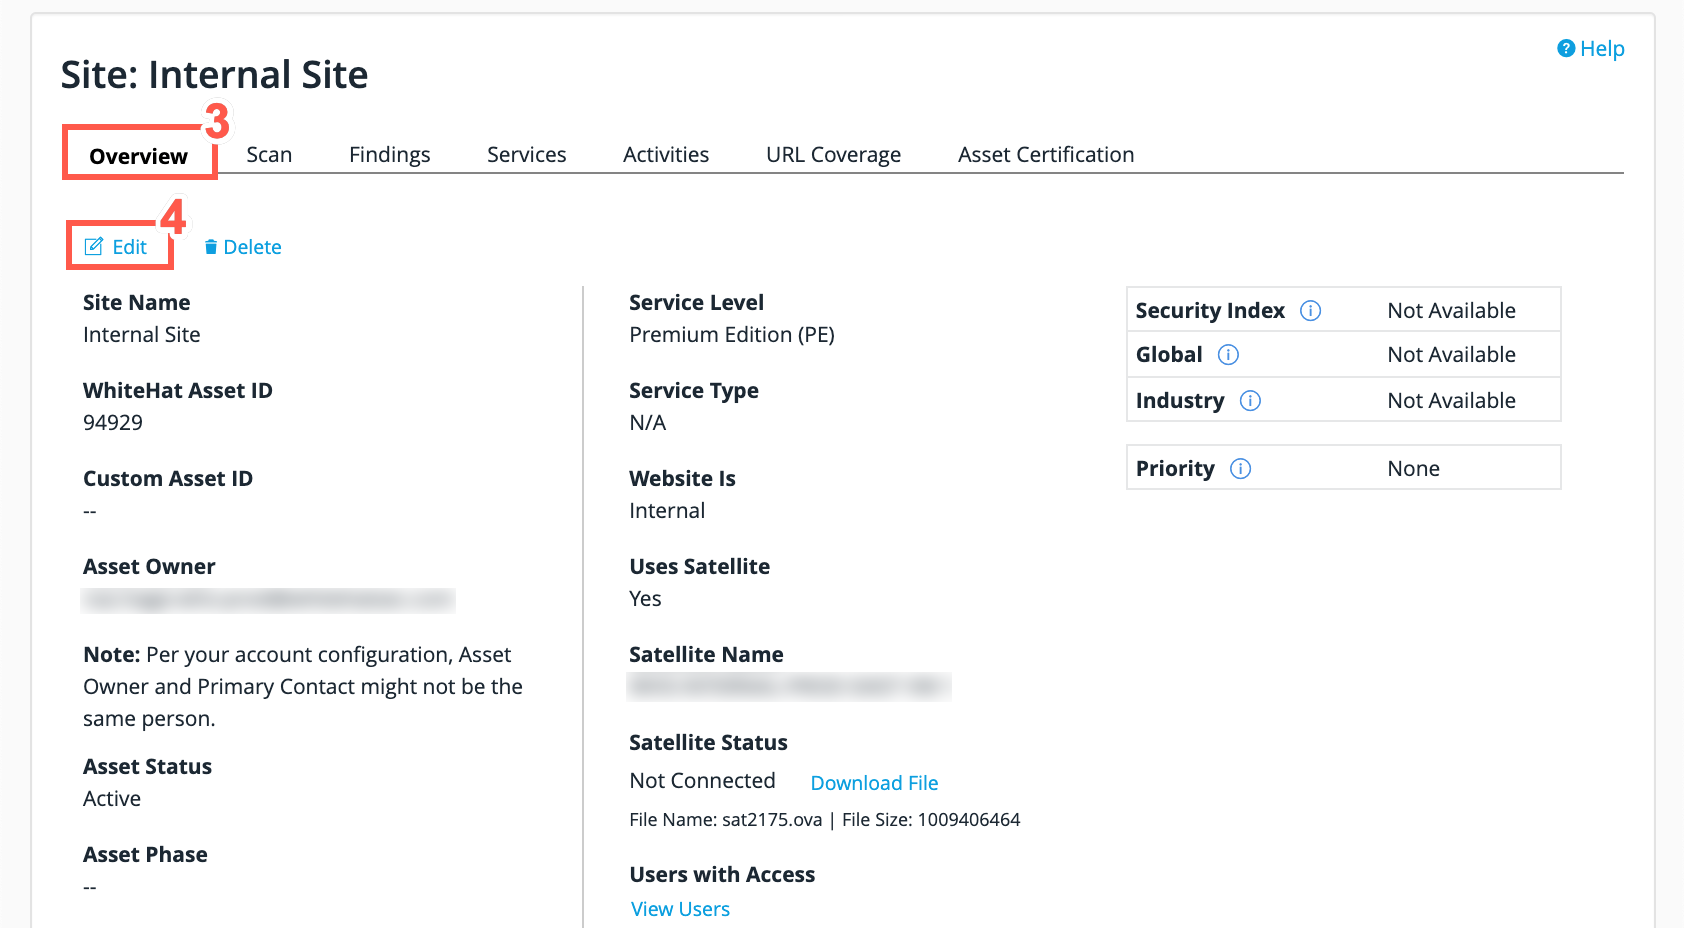
From the tabs displayed, select the Overview tab.
-
Click on Edit in the Site Overview tab.
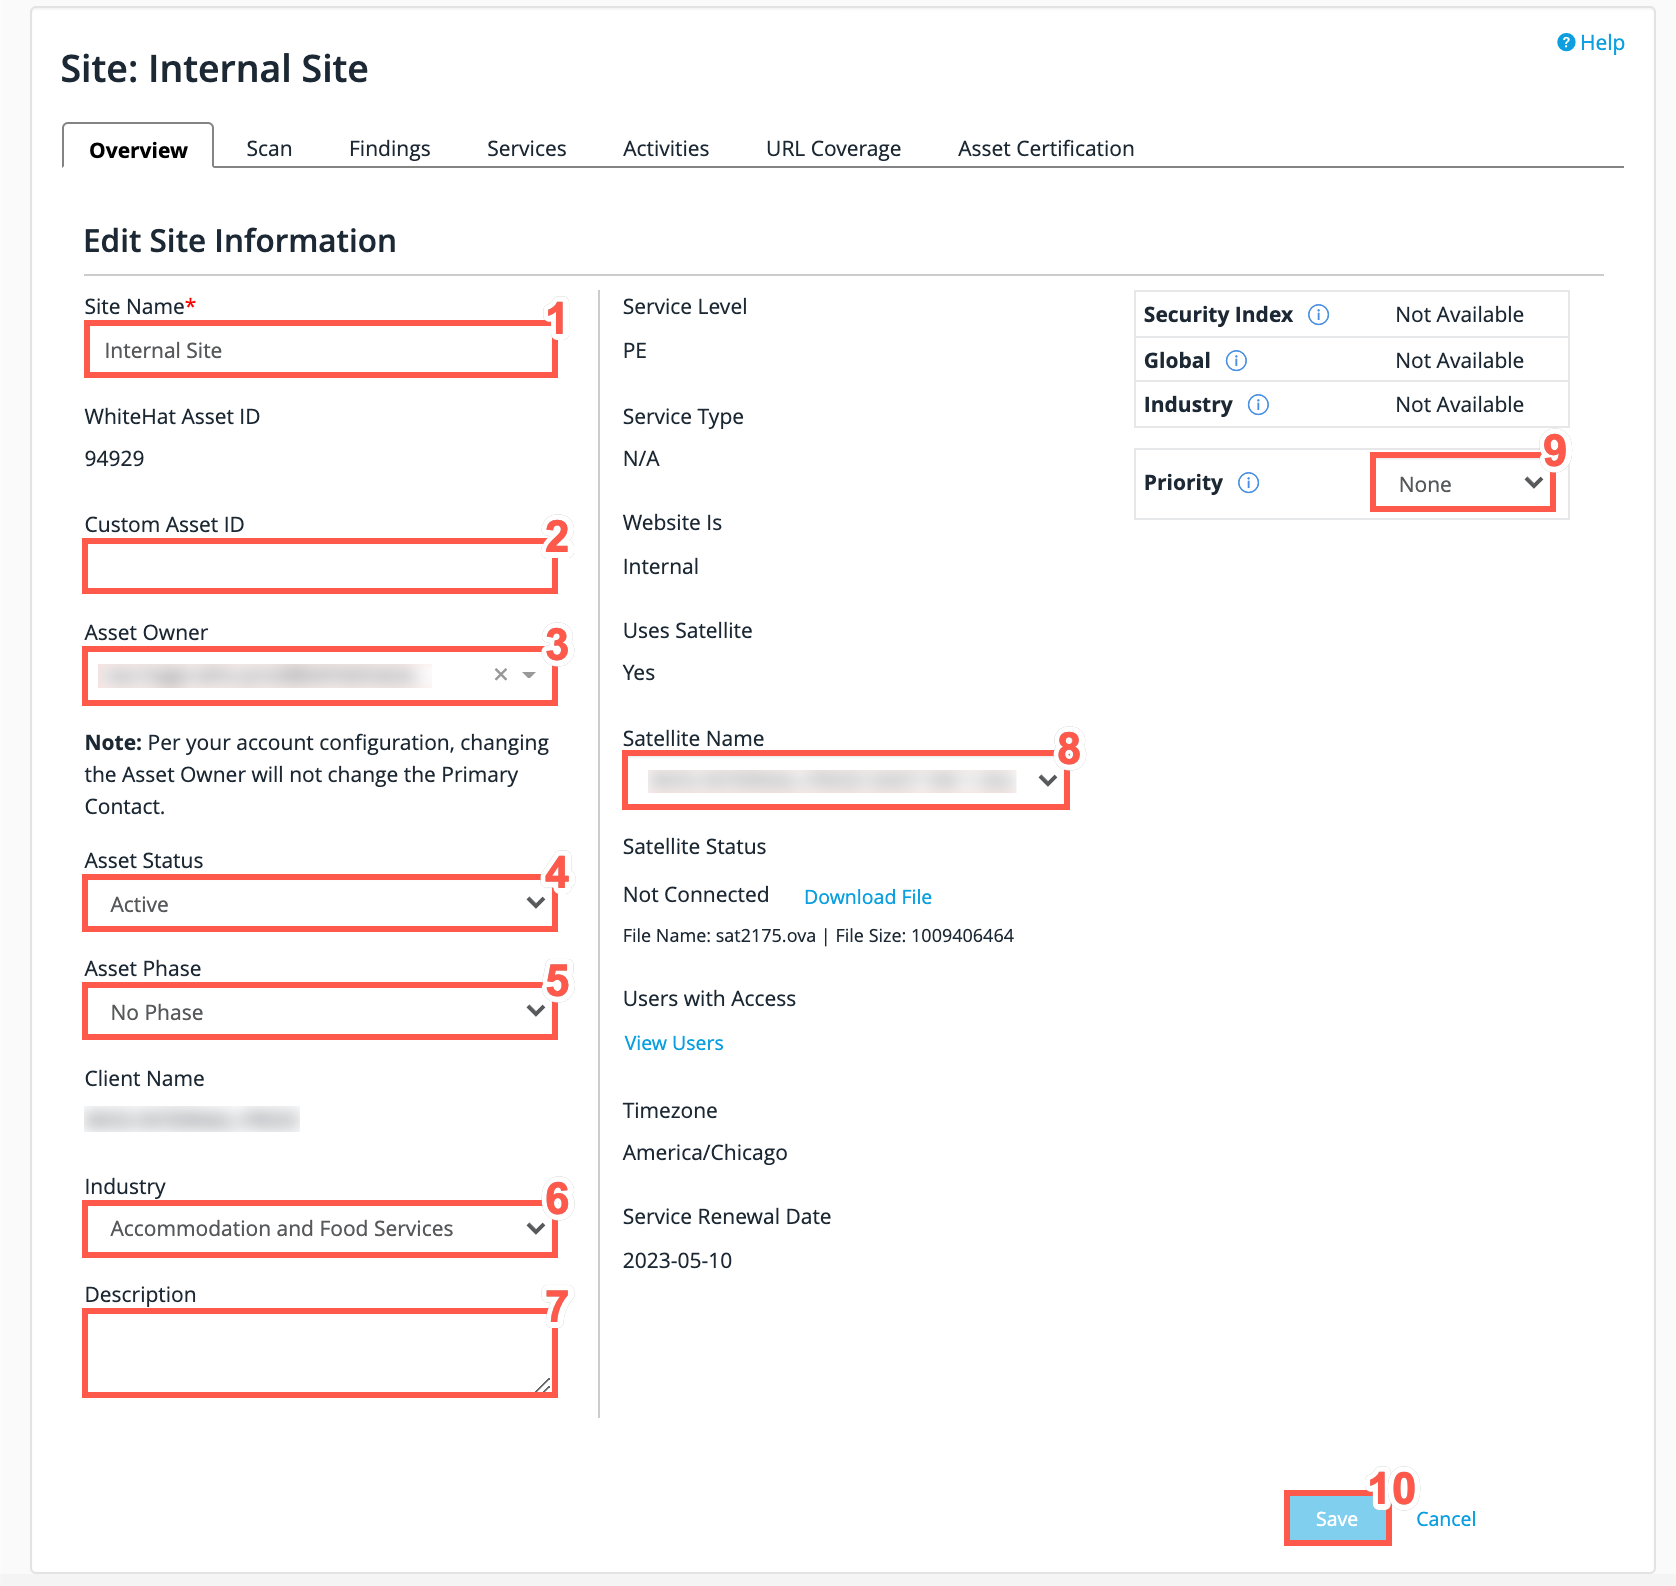
From here, you can edit the Site information.
| Field No. | Field Name | Description |
|---|---|---|
1 |
Site Name |
This is the name that you wish to use for the Site, which will display in list of assets on the Asset Management screen. |
2 |
Custom Asset ID |
This is used if you have an Asset ID that you wish to associate with the Site. It’s displayed in reports in parentheses after the Site Name. |
3 |
Asset Owner |
Select the Asset Owner from the drop-down menu, this is to make filtering out your own assets easier. |
4 |
Asset Status |
An asset may be active or inactive. |
5 |
Asset Phase |
This may be pre-production, production, discontinued, or none. |
6 |
Industry |
This is required so that the Peer Benchmarking Dashboard provides information relevant to your company and its industry. |
7 |
Description |
Information typed in this field is displayed in the Portal and is available through the Continuous Dynamic API. |
8 |
Satellite Name |
Select a Satellite from the drop-down menu. The satellite must be for a valid DAST appliance on the site’s client. |
9 |
Priority |
The asset priority that you select will impact the rating displayed for vulnerabilities found on the Site. None means that there will be no adjustment to the rating displayed. |
10 |
Save |
After you have finished editing your Site information, click Save to save any changes that have been made. |