Configuring the Sentinel Appliance
| The Sentinel Appliance can no longer be used for SAST and SCA scanning of source code and binaries. This functionality has been deprecated. |
AWS-Hosted
Appliances hosted on AWS cannot be customer-configured. If you need configuration settings changed for you AWS-hosted appliance, including any DNS settings required to enable the appliance to access your assets (internal or preproduction sites, application source code, or binaries) by hostname rather than by IP address, please send an email to support@whitehatsec.com.
On-Premises
Once your on-premises Appliance has been deployed and started, you will have access to the Appliance Administration screens. To reach the Appliance Administration screen, press “Alt-Right-Arrow” from the VSphere Client Console tab. These screens allow you to manage or troubleshoot your Appliance.
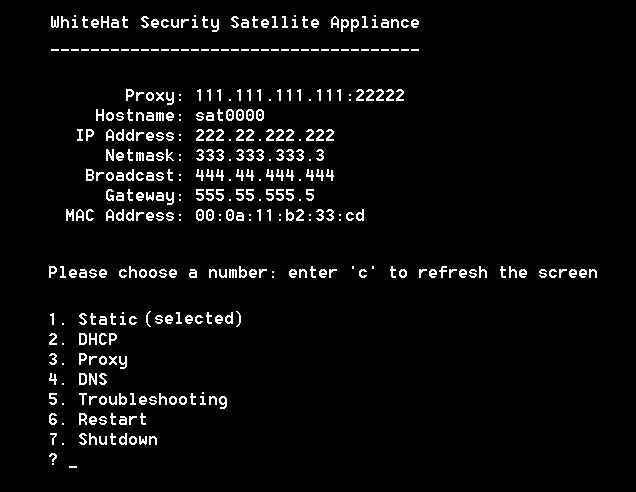
The main Black Duck Appliance Menu will show you the host name, IP address, MAC address, broadcast, netmask, and gateway for your Appliance. from this menu you can select the network configuration (Static or DHCP), access the Troubleshooting screen, or restart or shut down the appliance.
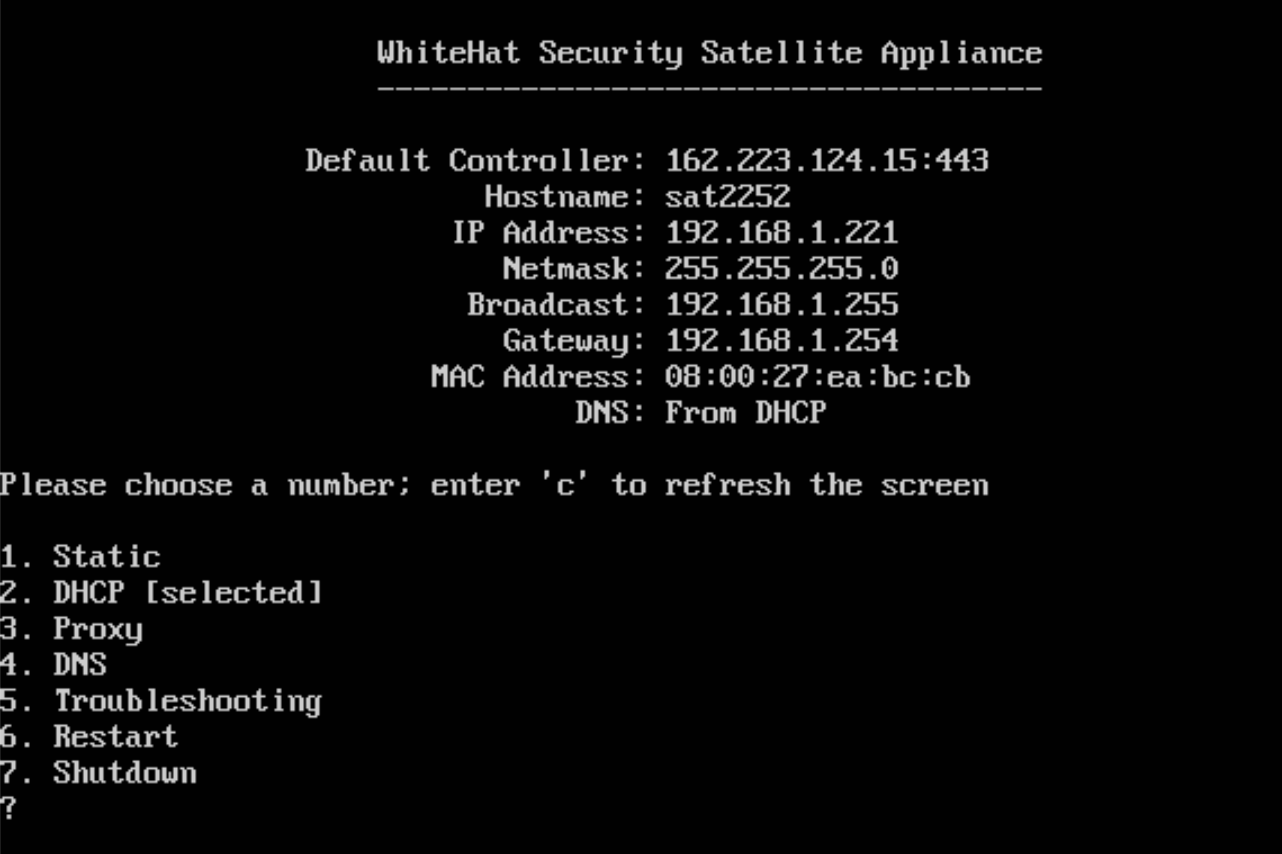
To select an action, enter the line number at the ? prompt.
IP Address Assignment
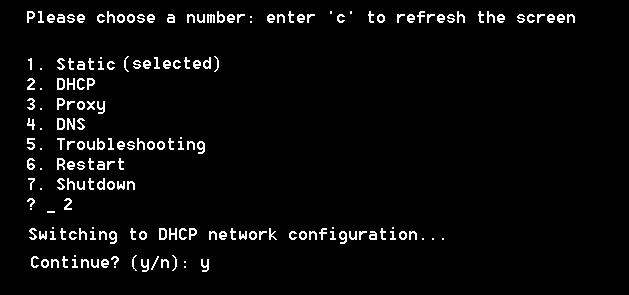
You may either set a static IP address or use DHCP (Dynamic Host Configuration Protocol).
If you use DHCP, the process of establishing the IP address is automated and managed centrally; the DHCP server maintains a pool of valid IP addresses and assigns them as needed, and addresses no longer in use are returned to the pool.
If you use a static IP address, you can control the IP address used; however, you will have to configure the IP address manually.
DHCP to Static
To change from DHCP to a static IP, enter 1 at the ? prompt and respond to the prompts with the correct IPv4 address, gateway, and netmask.
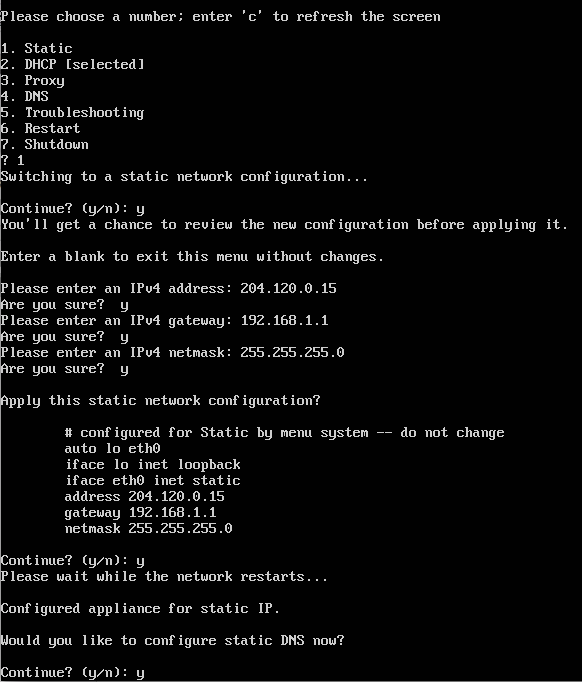
Type "n" to continue when you are prompted to configure static DNS. See DNS Configuration for information on how to configure static DNS.
Now the Admin screen shows that Static is selected.

Establishing a Proxy
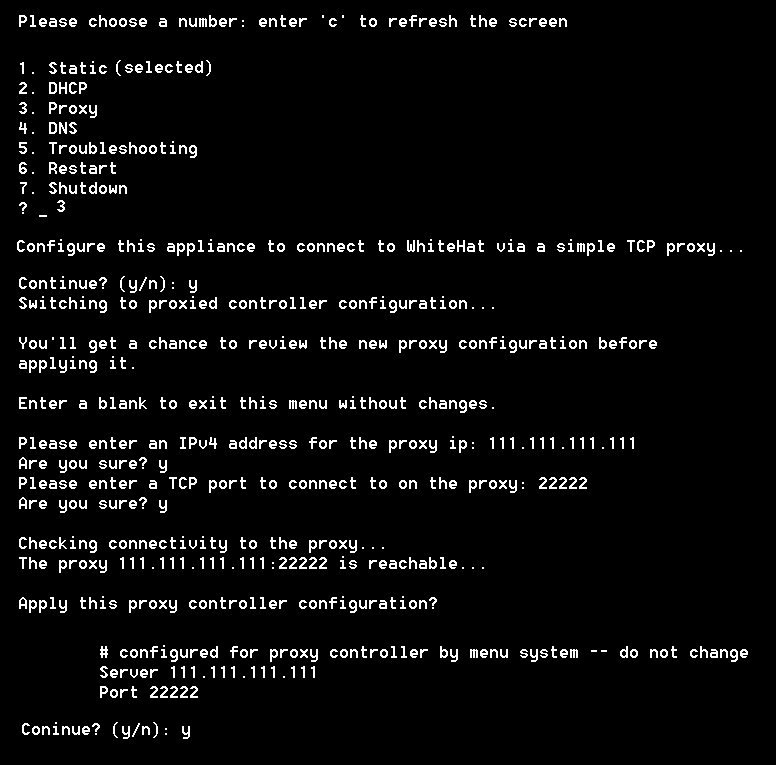
You may want to use a proxy server; if you use a proxy, then the proxy server’s IP address will be shown to external connections rather than the IP address of the VM itself. It’s important to note that the appliance only supports TCP; it does not support web or HTTP/s proxies.
To establish a Proxy, enter "3" from the main menu above and follow the command-line prompts. You will need to enter an IPv4 address for the proxy IP and a TCP port to connect to on the proxy.
Press return to return to the main screen.
Notice that the proxy address is now listed above the hostname, where the Controller was listed previously.
DNS Configuration
To enable the appliance to access your assets (internal or preproduction sites, application source code, or binaries) by hostname rather than by IP address, you can configure the appliance to use your DNS server. (This also allows you to associate multiple IP addresses to the Appliance VM.)
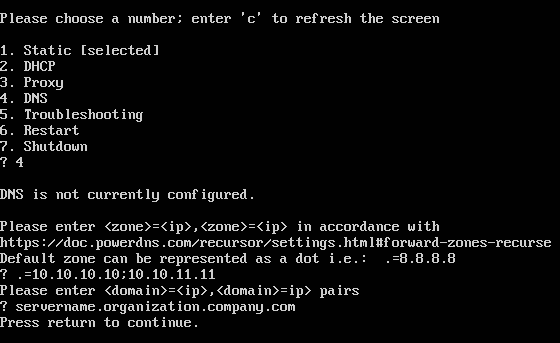
From the main Appliance Administration menu, select option 4, DNS.
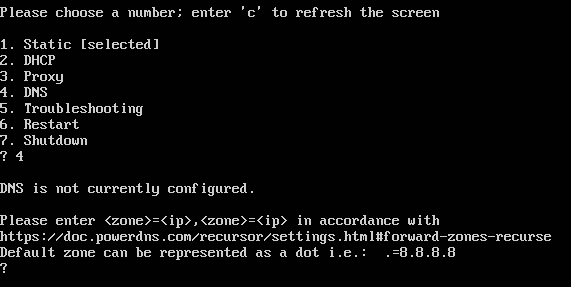
First, you will see a command line prompt asking you to enter specific IP addresses for your DNS Name Server. At the command line, enter up to two IP addresses separated by a semicolon; for example, "10.10.10.10;10.10.11.11". Next you will see a command line prompt asking for a DNS Search List. Enter the domain names, separated by commas (256 characters total, maximum). Press enter; enter yes to confirm that the correct list was entered and press the enter key again to accept.
Once you have confirmed the DNS configuration, the appliance will be able to access the DNS to locate the host name(s) for your assets as previously entered in the Continuous Dynamic Portal.
Troubleshooting
From the main Appliance Administration menu, select option 5, Troubleshooting.
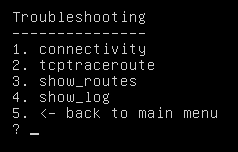
From the Troubleshooting menu you can check connectivity, perform a tcptraceroute, show routes, or return to the main menu.

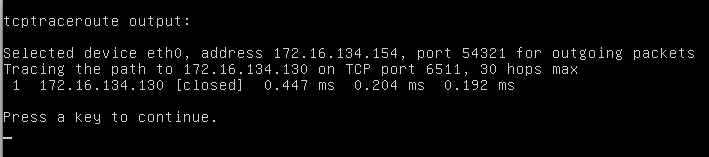
Routes:
This screen shows you the traceroute output for your appliance.

This screen shows you the current routes from the kernel IP routing table (destination, gateway, genmask, flags, MSS Window, and IRTT Iface).
Show Log
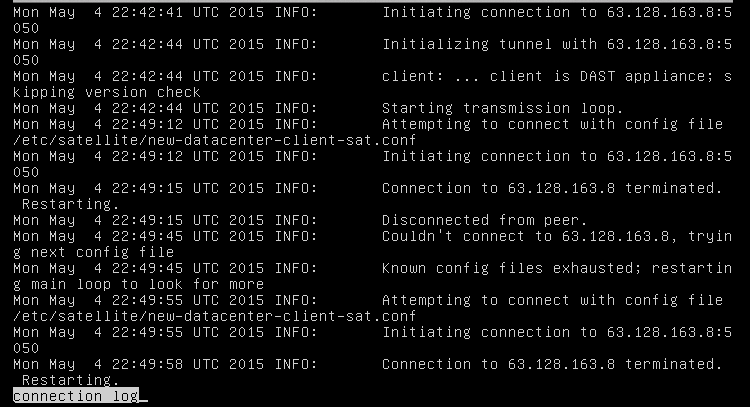
This screen will show you a log of your prior connections.
If you need additional help with setting up or configuring your appliance, please contact the Customer Support team at support@whitehatsec.com.