Configure Global Settings
To configure the Continuous Dynamic Plugin for Jira Data Center perform the following steps:
-
From the Jira System Dashboard click the gear icon.

-
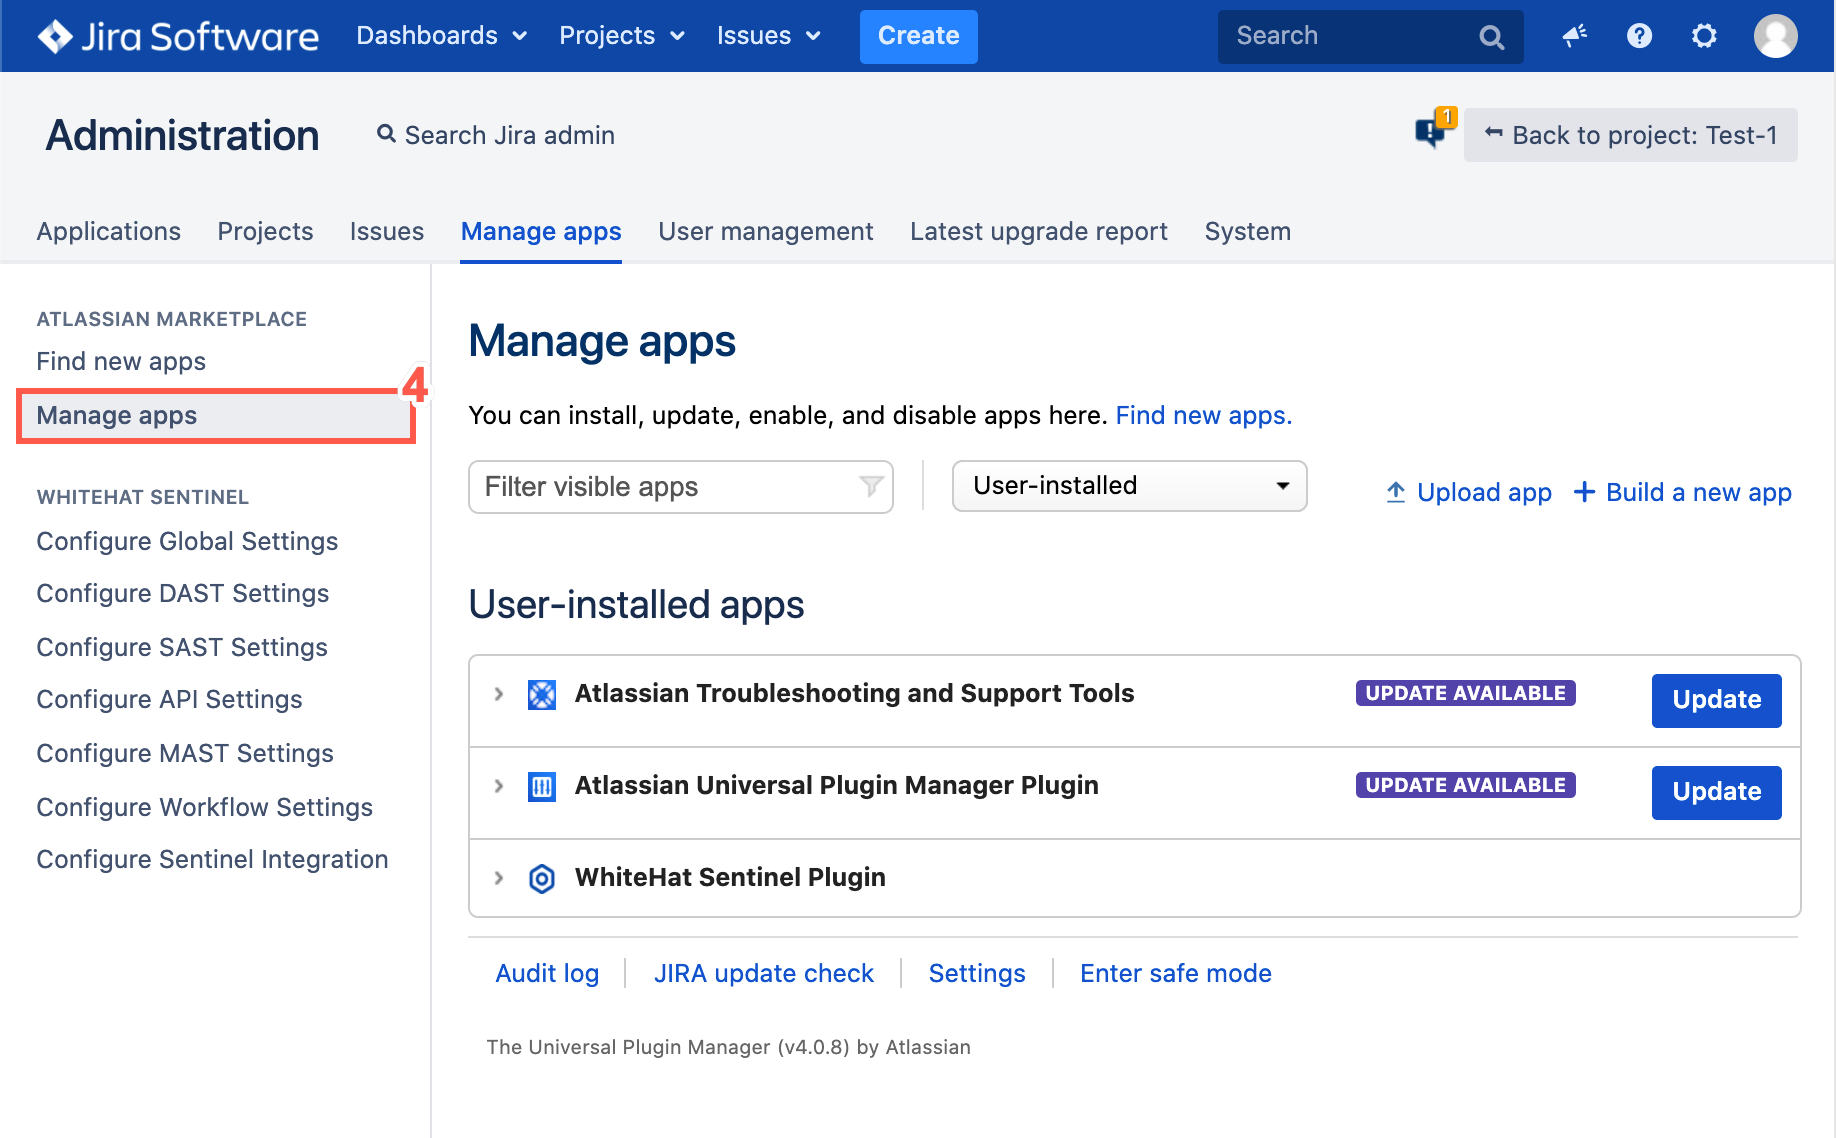
Click Manage apps.
-
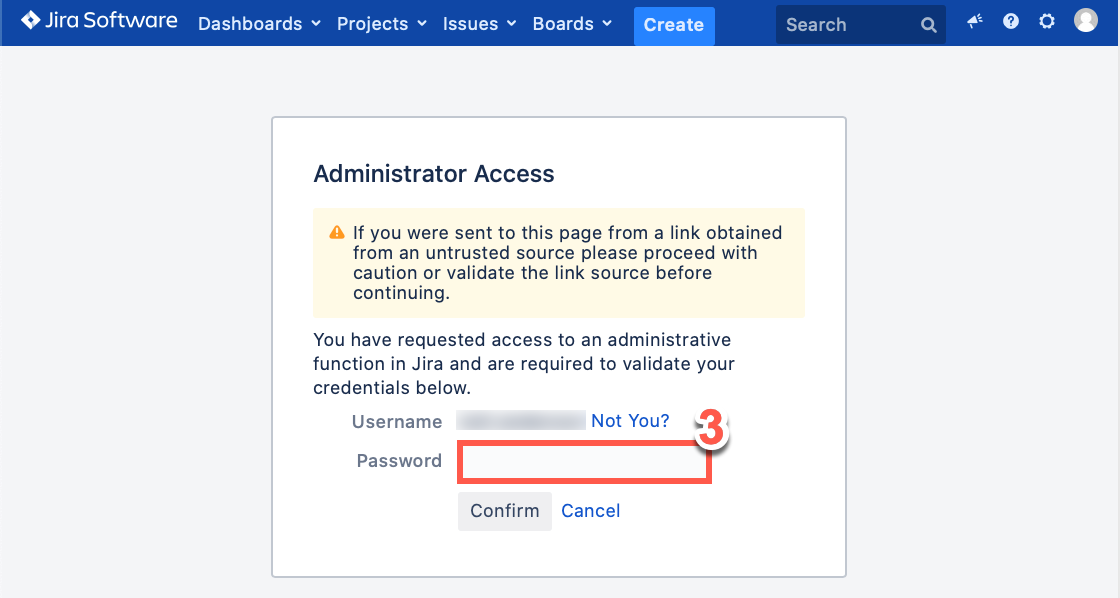
Log into an Admin account to manage the apps installed on Jira.
-
Click Manage apps.
-
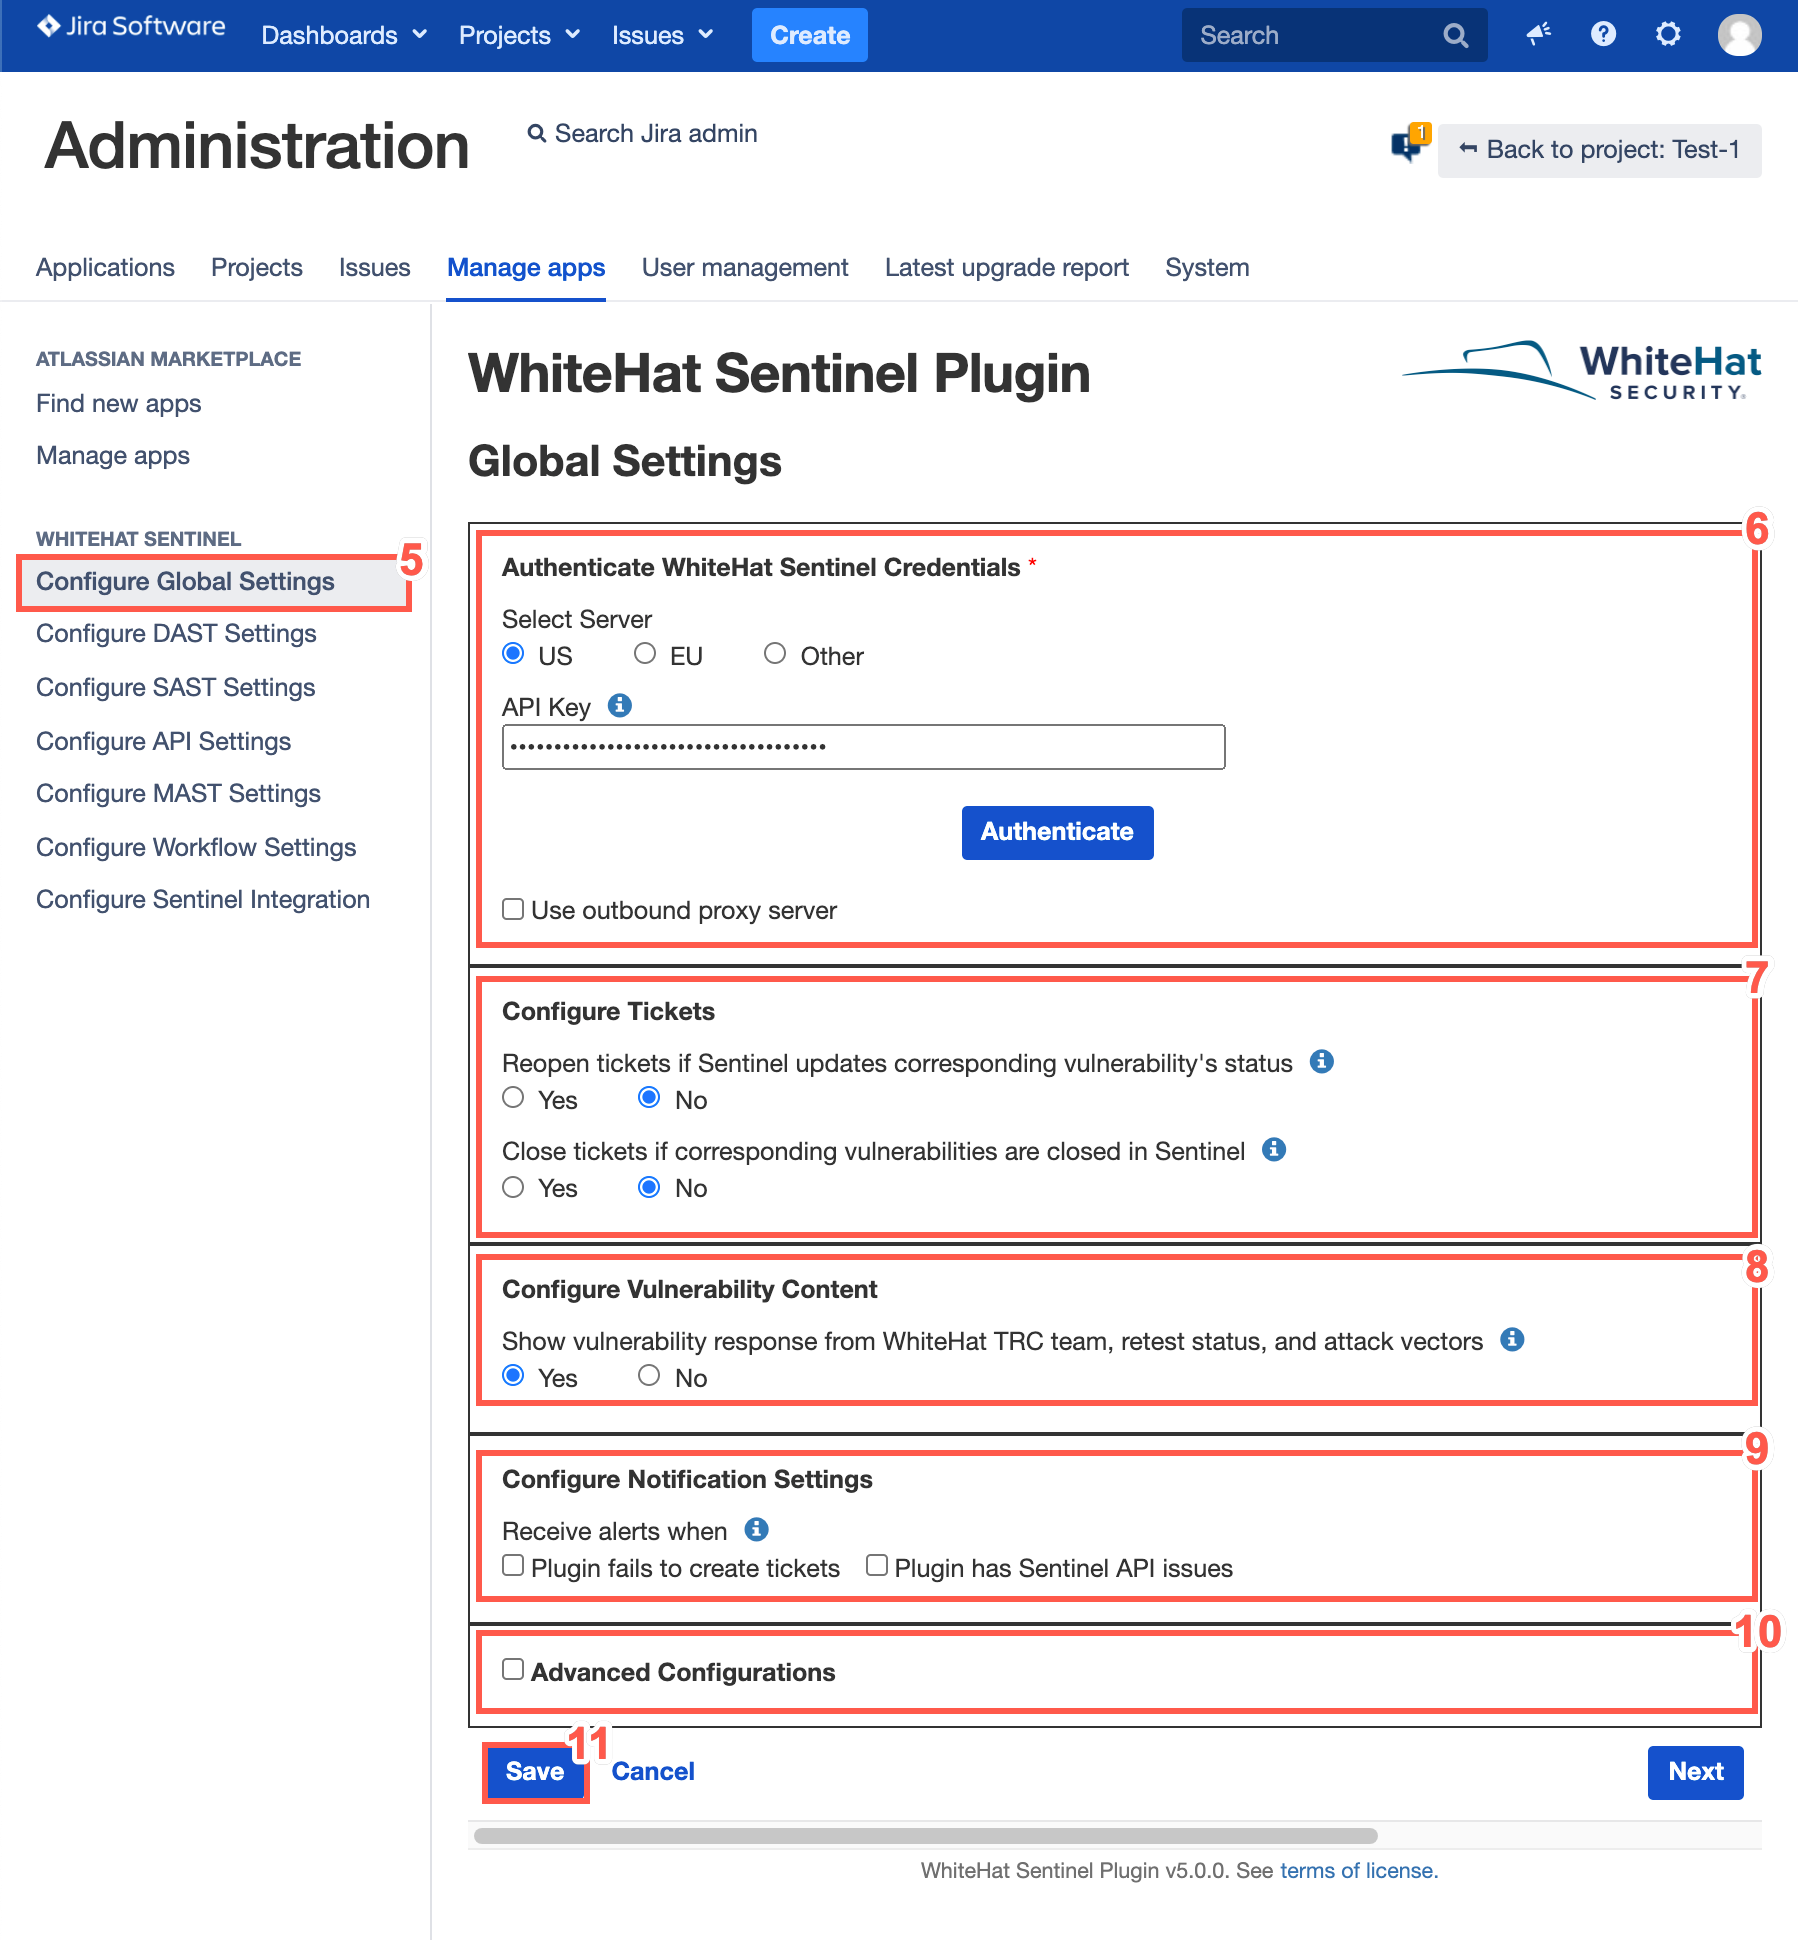
Select Configure Global Settings to configure the plugin connection to Continuous Dynamic. The following page is displayed.
-
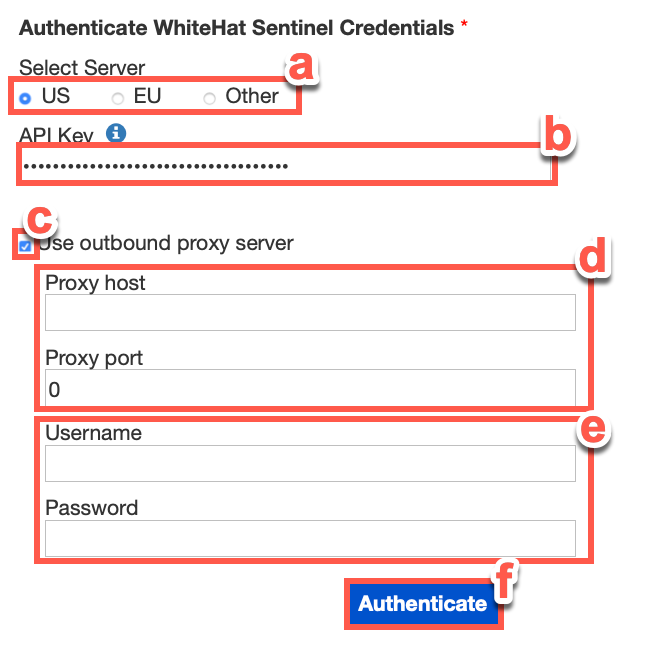
Authenticate Continuous Dynamic Credentials.
-
Select a US, EU, or Other server.
-
Enter your API key.
A valid API key must be entered before the plugin can be used. -
To use an outbound proxy server, click the radio button.
-
Type in the Proxy Host name and the Proxy Port number.
-
Type in your Username and Password to log into the proxy server.
-
Click Authenticate to check your connection.
-
-
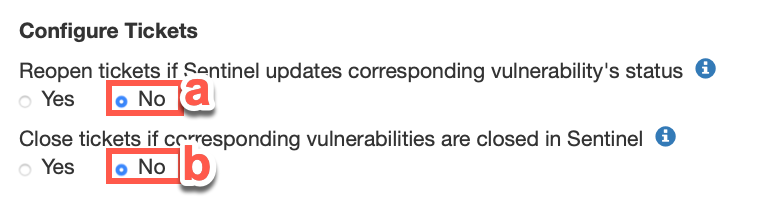
Optionally, Configure Jira Tickets. Select the relevant radio buttons to configure default updates for your tickets.
-
To reopen closed tickets whenever a vulnerability’s status is updated in the Portal.
-
To close your existing tickets automatically if corresponding vulnerabilities are closed in the Portal.
-
-
Optionally, configure the Vulnerability Content.
Additionally, you can configure your tickets to view the retest status and notes or tags associated with a vulnerability.
-
Select the relevant radio button to show responses from the Black Duck TRC, when your team members ask questions about a vulnerability.

-
-
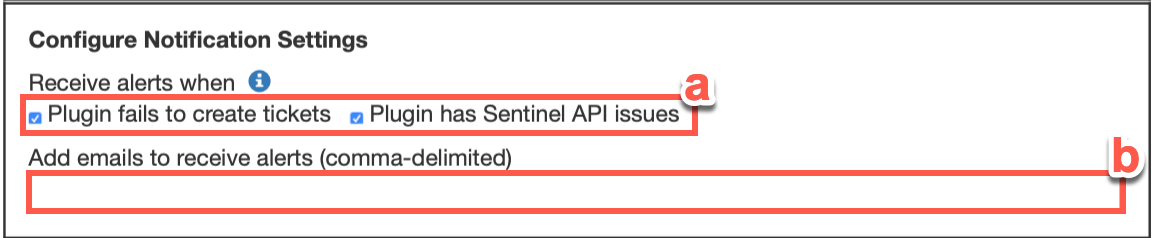
Optionally, configure Notification Settings.
-
Select the relevant radio button to determine when alerts should be sent.
-
Then enter a comma-delimited list of the emails that should receive alerts.
-
-
Optionally, make changes to the Advanced Configurations.
Each of the following actions can cause the Plugin to consume more system resources to the expense of the Jira server and its other components or plugins: -
Setting too small a syncing interval.
-
Setting too high a value for the maximum number of worker threads for the Continuous Dynamic API.
-
Setting too high a limit on total vulnerabilities returned per API request.
-
Setting too small a time interval between ticket updates.
-
Setting too high a maximum character limit for issue fields.
-
Select the Advanced Configurations checkbox.

-
Set Synching Interval (in minutes) set the interval at which Continuous Dynamic and Jira will be synched.
-
Pause Synching for time interval set one or two daily time intervals during which synching will be paused. Select the Pause syncing for time interval 1 checkbox, to see the start and end time boxes for the first and, optionally, second period during which you want to pause synchronization.
-
To pause synchronization between 8:30 and 9:30 a.m. and between 4:45 and 5:45 p.m., your entry should look like this.
Each start and end time should be entered in hours (0-23) and minutes (0-59). -
Set Maximum Number of Worker Threads cap the number of API requests that can be in process at once.
-
Ignore Certification for Continuous Dynamic API allows you to ignore any cert issues between your server and Continuous Dynamic.
Do not enable the option to Ignore Certification for Continuous Dynamic API, unless troubleshooting connectivity issues with the Continuous Dynamic server. -
Set Limit on Total Vulnerabilities Returned per API Request limit the number of tickets that can be created from a single request.
-
Set Time Interval Between Ticket Updates set the minimum interval (in milliseconds) between ticket updates from the Continuous Dynamic API.
-
Maximum character limit for issue fields set a maximum character length for your Summary, Description, and Comments fields. Tick the checkbox to set your preferred maximum. The default value for this field will match Jira’s global character limit, which is stored in 'jira.text.field.character.limit' and can be accessed from Administration>System>Advanced Settings. If you customize this value, it must be set to a value between zero and the maximum character limit set in 'jira.text.field.character.limit'.
-
Configure Logging set the Logging level to the detail level desired from:
-
-
INFO
-
DEBUG
-
TRACE
-
Log buffer size (lines) set the number of lines that will be retained in the log buffer.
The Configure Logging default values are a Logging Level of INFO and a log buffer size of 1000 lines. 
-
-
-
When you have completed the Global Configuration process, click Save.