Continuous Dynamic Workflow Settings
This section will define how issues will be created, reopened and closed. The workflow scheme in Jira is highly configurable, and it can be difficult to account for all possible statuses and transitions created by an organization. This section allows you to define what each status should do based on the action of creating, closing, or reopening an issue in Jira.
You must use the Jira workflow that is associated to your projects (as defined in DAST and API configurations) and define the pertinent information. You must be using a single workflow, and that workflow must be associated to all your projects.
-
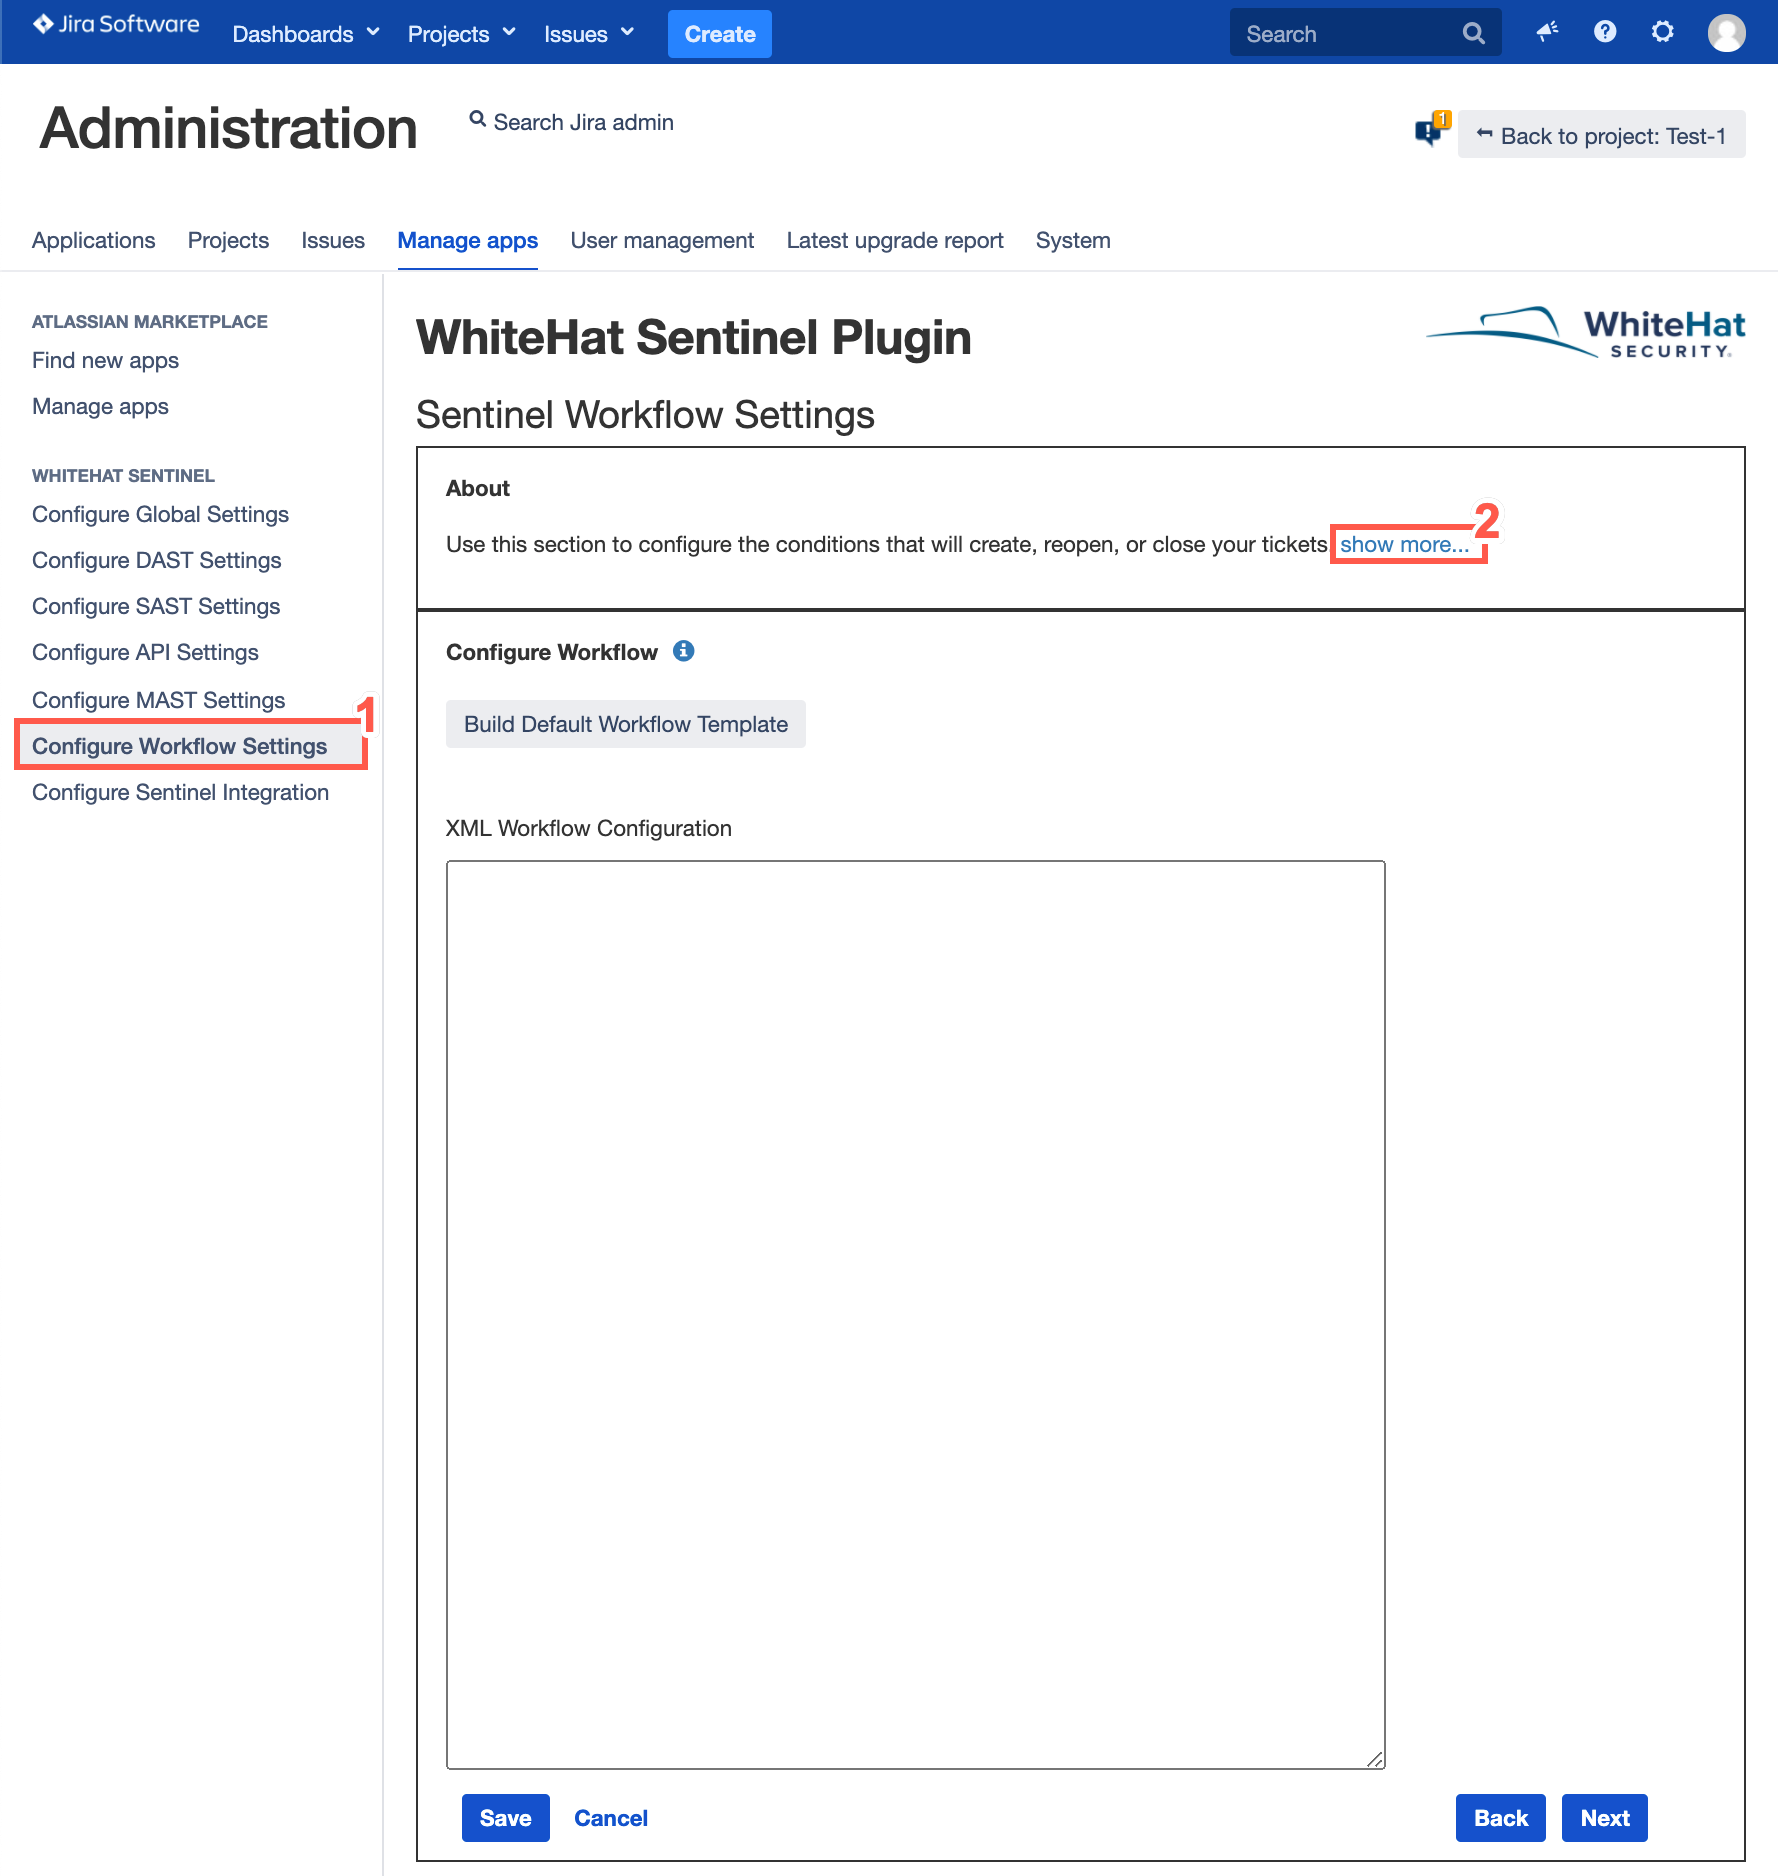
Select Configure Workflow Settings.
-
Optionally, select show more… to view the following information regarding creating a custom workflow and configuration parameters.
About
Use this section to configure the conditions that will create, reopen, or close your tickets. Using your custom workflow, you can define the actions that a status can perform whenever a ticket is created, closed, or reopened.
-
Select the workflow associated with your projects (defined in the DAST configuration).
-
Create an XML file and add required configuration parameters. See the table below to learn about these parameters.
The workflow scheme in is an advanced configuration and therefore you must be aware of all the possible statuses and transitions between these statuses before you configure your custom workflow.
See configuration parameters:
| Parameter | Description |
|---|---|
<workflow> |
Define the workflow so that Continuous Dynamic add-on can create tickets. |
<transition_action id=""> |
In order to transition into another status you must define the transition ID. The workflow provides you a list of all transitions for a given status when you use the workflow editor in text view. |
<transition type=""> |
Define the type of transition for ticket. For example, you can define whether you want to close, reopen, or create the issue on a given transition. |
<status_map> |
Use this tag to define the state of each status within your workflow. The state can be either Opened or Closed. This allows the Continuous Dynamic add-on to make appropriate transition based on the ticket’s status. |
<status name="" state=""> |
Define the name of the status and the state your ticket to be considered Opened or Closed. |
<projects> |
Define each project that you want to associate within a workflow. This tag must be defined inside the tag. |
<project name="" key=""> |
Define the name and key for the project. |
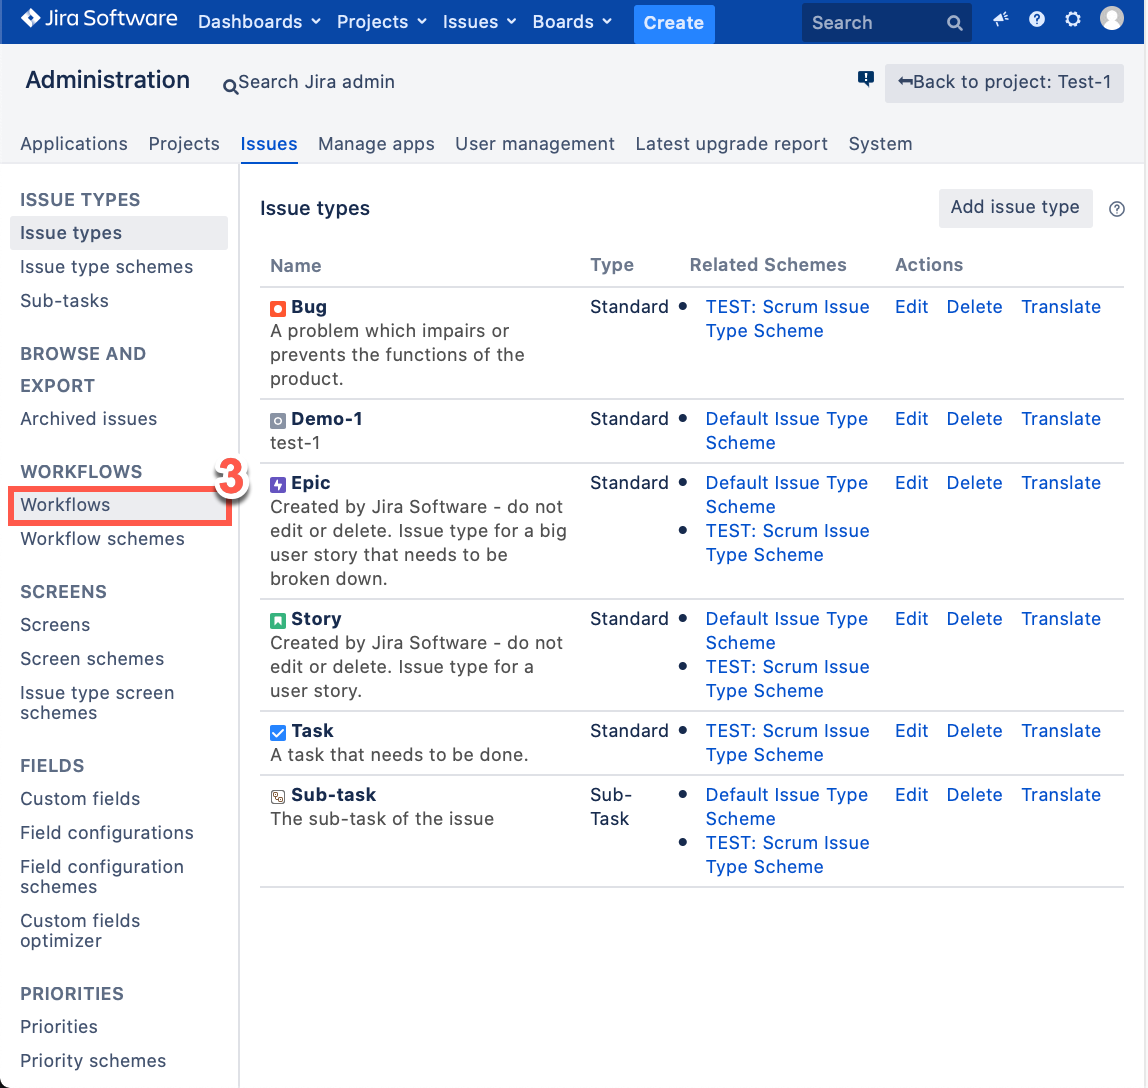
<issue_type id=""> |
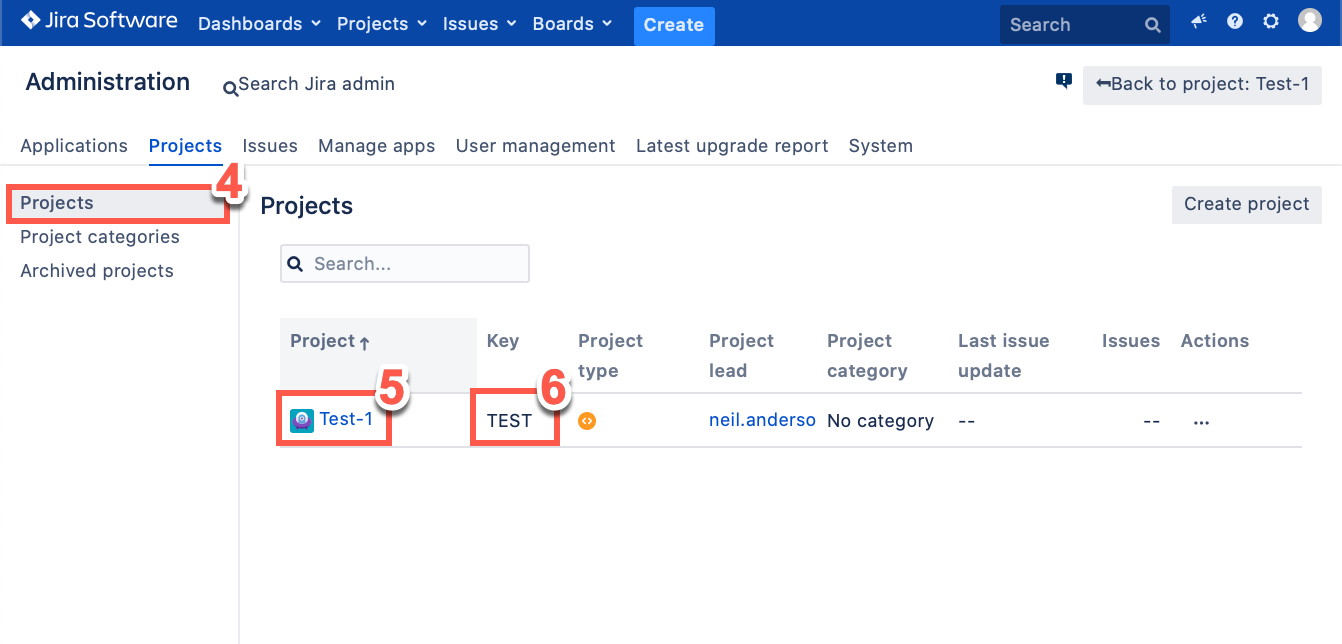
Define the ID to use whenever new tickets are created by the Continuous Dynamic add-on. To find this ID, go to Administration → Issues → Issue Types. Hover over the Related Schemes column for that issue. This should show you the scheme ID for that issue. This is the ID that you will use for the issue_type tag. |
<field name="" value=""> |
In some cases certain fields are required to be filled in order to transition a ticket. Any required fields can be hard-coded values that will be filled in on making the transition defined by the parent tags. |
Configure Workflow
To configure your workflow perform the following steps:
-
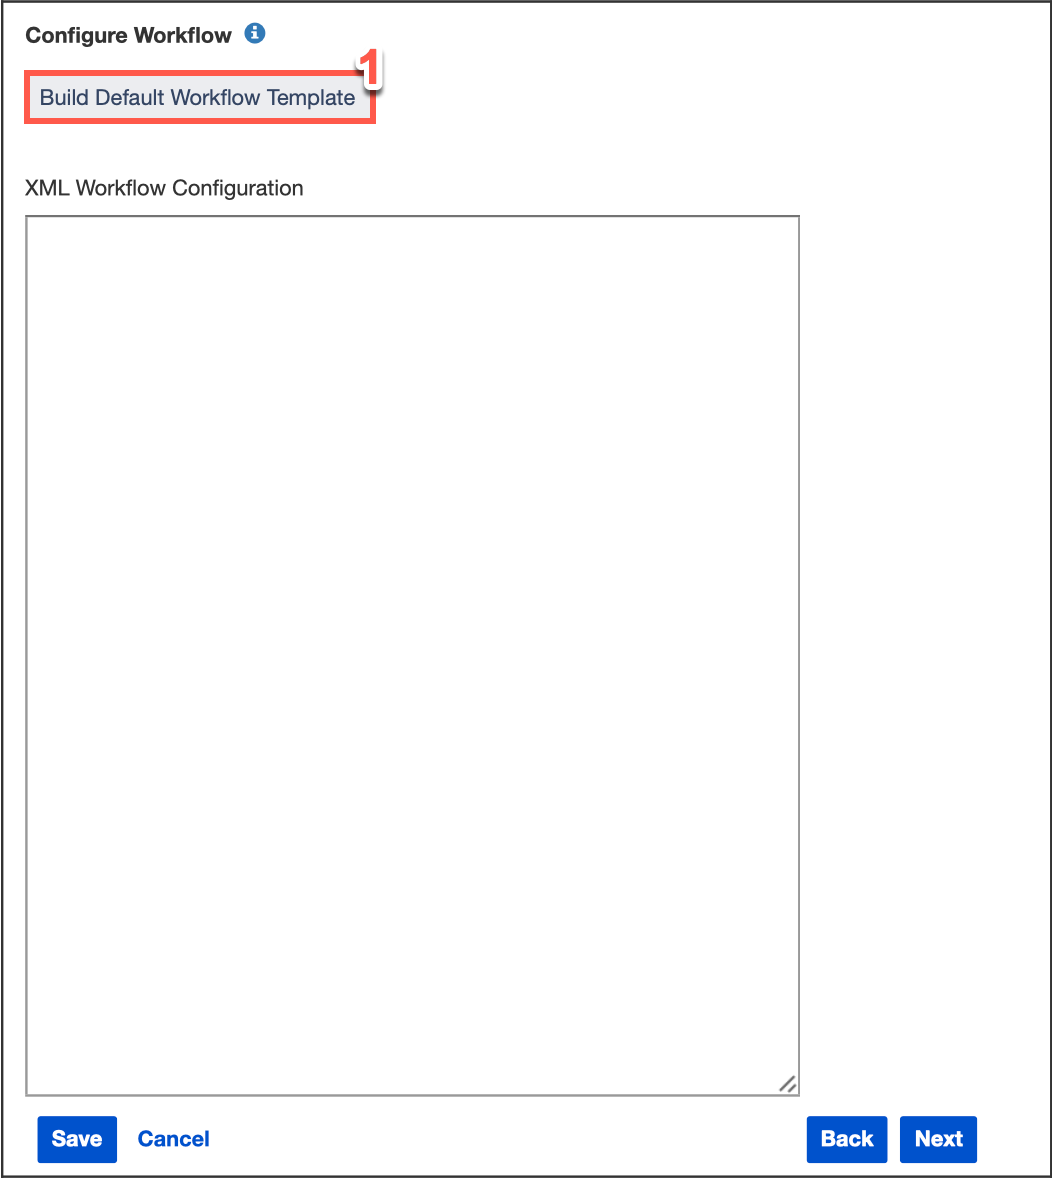
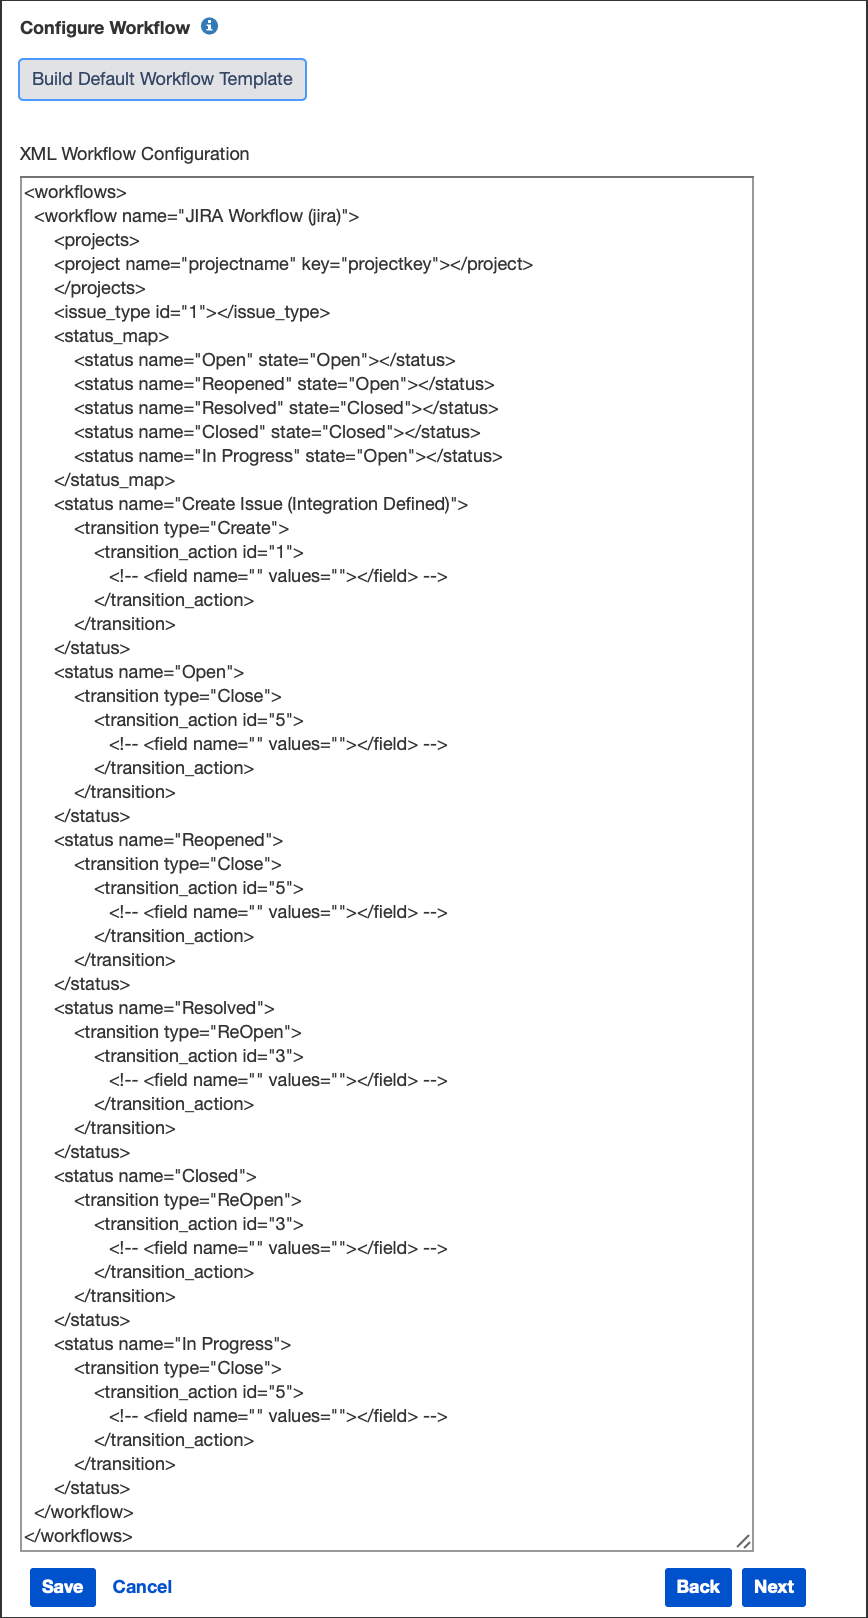
Click Build Default Workflow Template button to generate a generic template workflow XML file. This will generate a default XML workflow template that you can customize to match your chosen workflow. The XML will be generated under the XML Workflow Configuration section, and will be a starting point for the workflow configuration.
-
In the XML Workflow Configuration, provide a Workflow Name, Project Name, and Key values. This will be the name of the Jira workflow you are using and the name and key of the Jira project where the issues will be created. An example of this is shown below:
<workflows>
  <workflow name="DEMO:Simple Issue Tracking Workflow">
    <projects>
      <project name= "DEMO" key= "DEMO"></project>
    </projects>
Issue Type ID
Define the issue type IDs to be used for Jira tickets, based on Continuous Dynamic Portal vulnerability data. The Issue Type is available in Jira.
<issue_type id="5"></issue_type>The issue type ID in Jira can be located by performing the following steps:
-
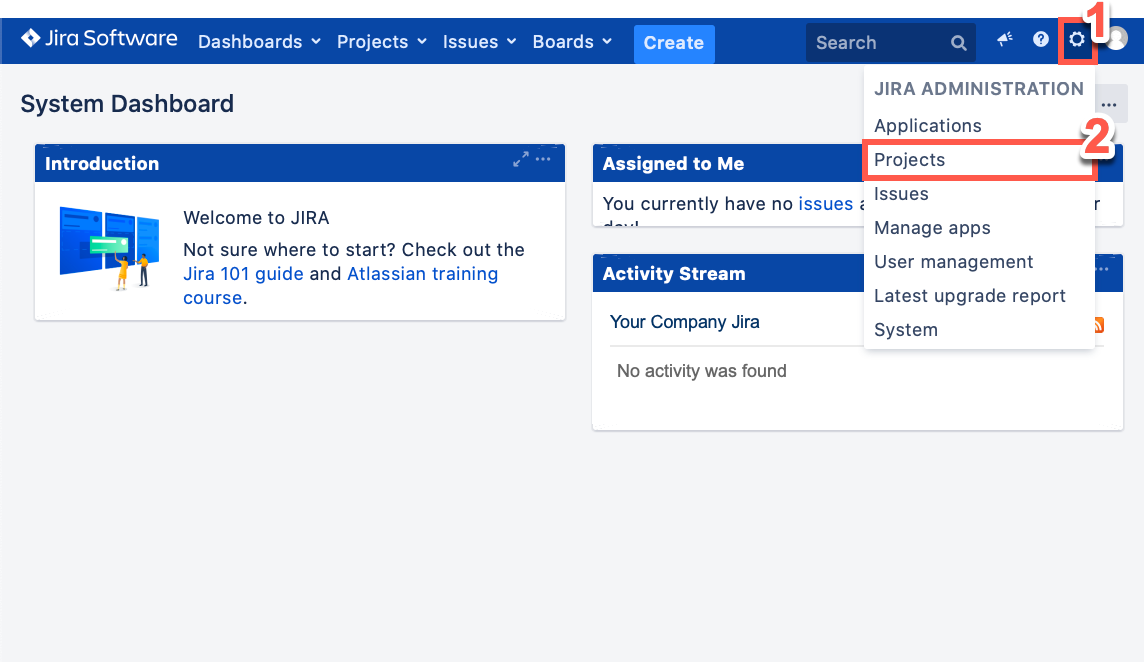
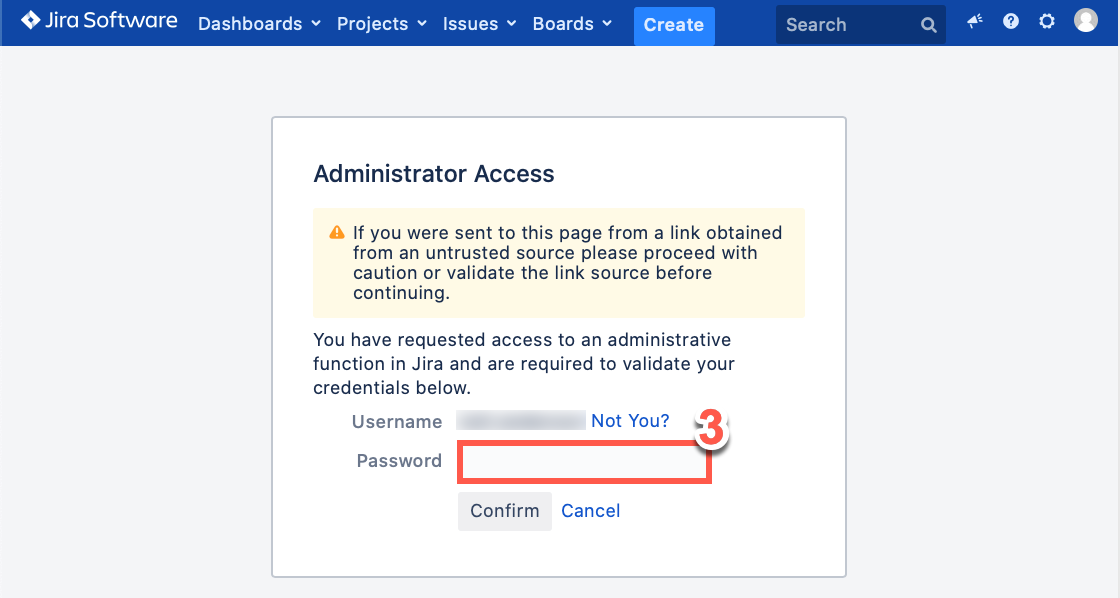
From the Jira System Dashboard click the gear icon.

-
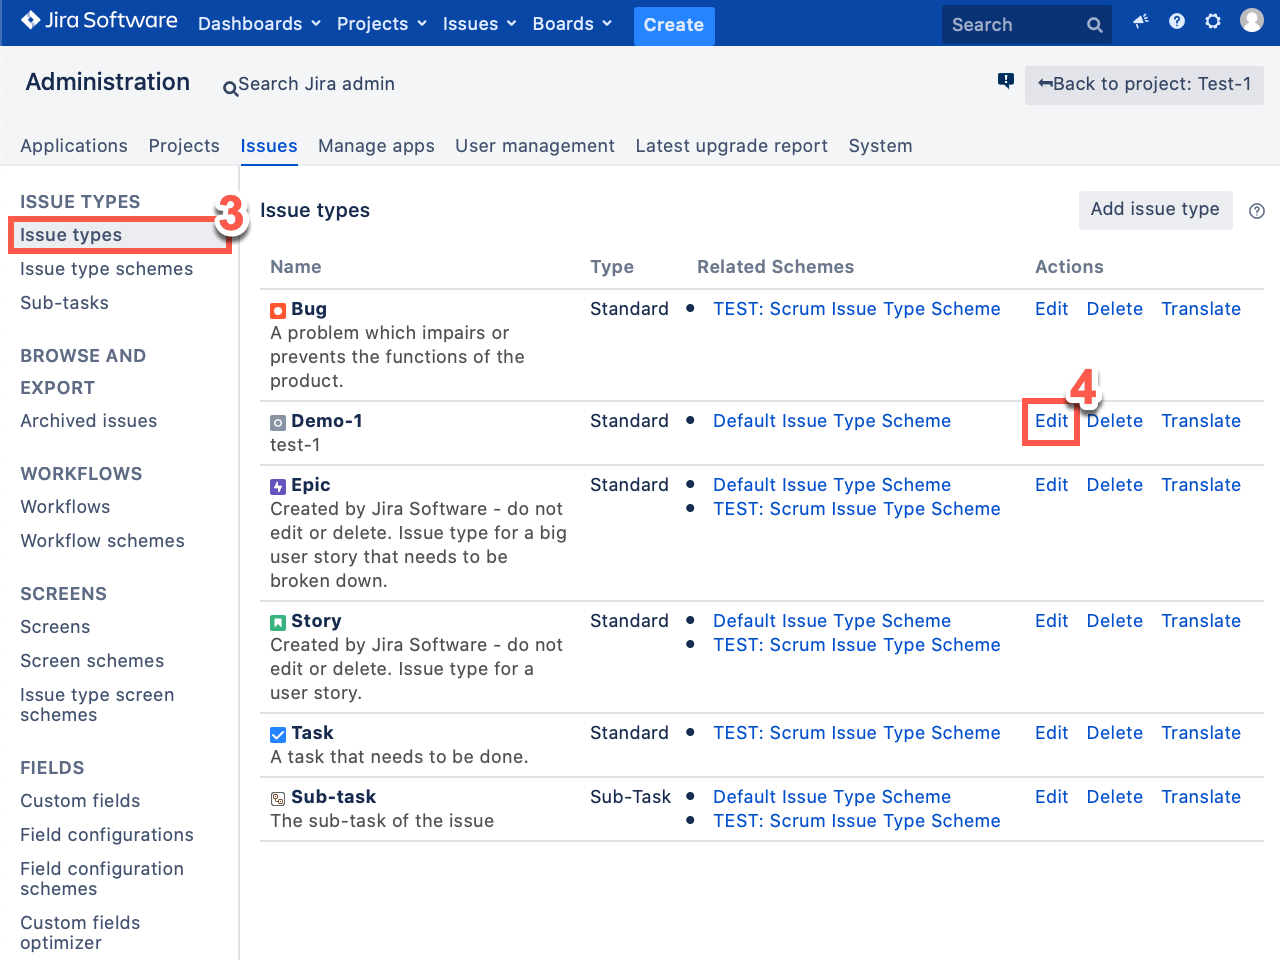
Click Issues.
-
Click Issue types.
-
Click Edit on any of the Issue types.
-
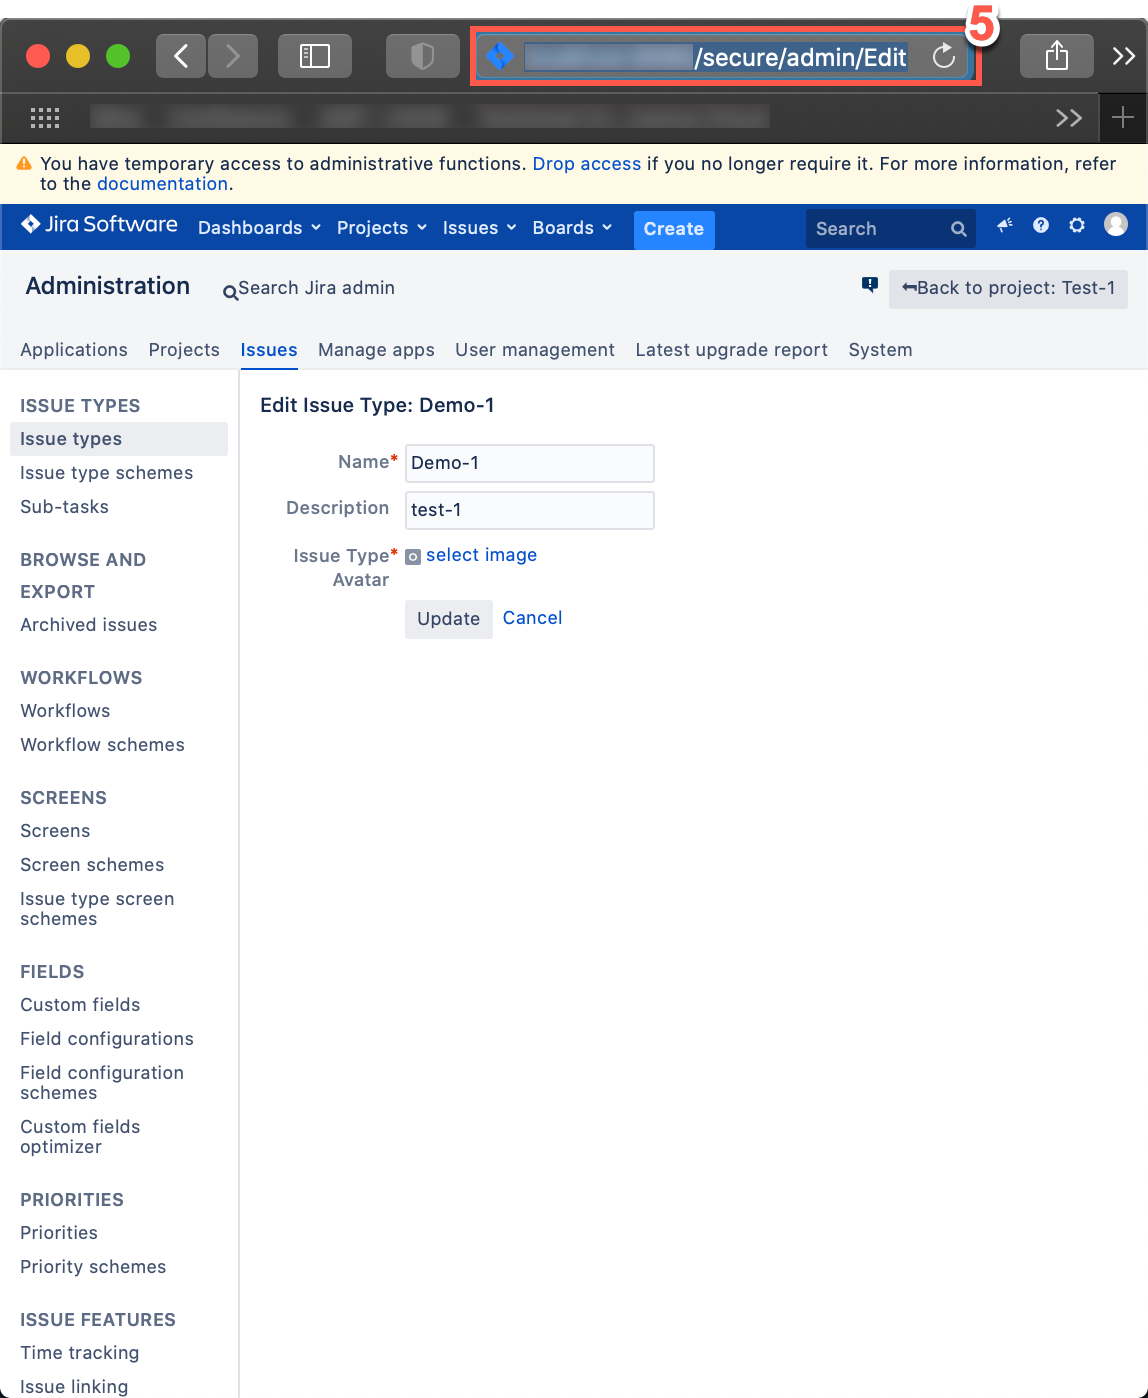
To view the issue type ID click the URL.
-
The issue type ID is shown at the end of the URL.

Status Names & Transition ID’s
Define the statuses that an issue can belong to, every status state must be defined in the workflow. The status names can be found in Jira.
<status_map>
<status name="To Do" state="Open"></status>
<status name="In Progress" state="Open"></status>
<status name="Done" state="Closed"></status>
</status_map>| The status names given here are case sensitive and must exactly match the status name given in Jira. |
The status names in Jira can be located by performing the following steps:
-
From the Jira System Dashboard click the gear icon.
-
Click Issues.
-
Click Workflows.
-
Click the View link on any workflow.
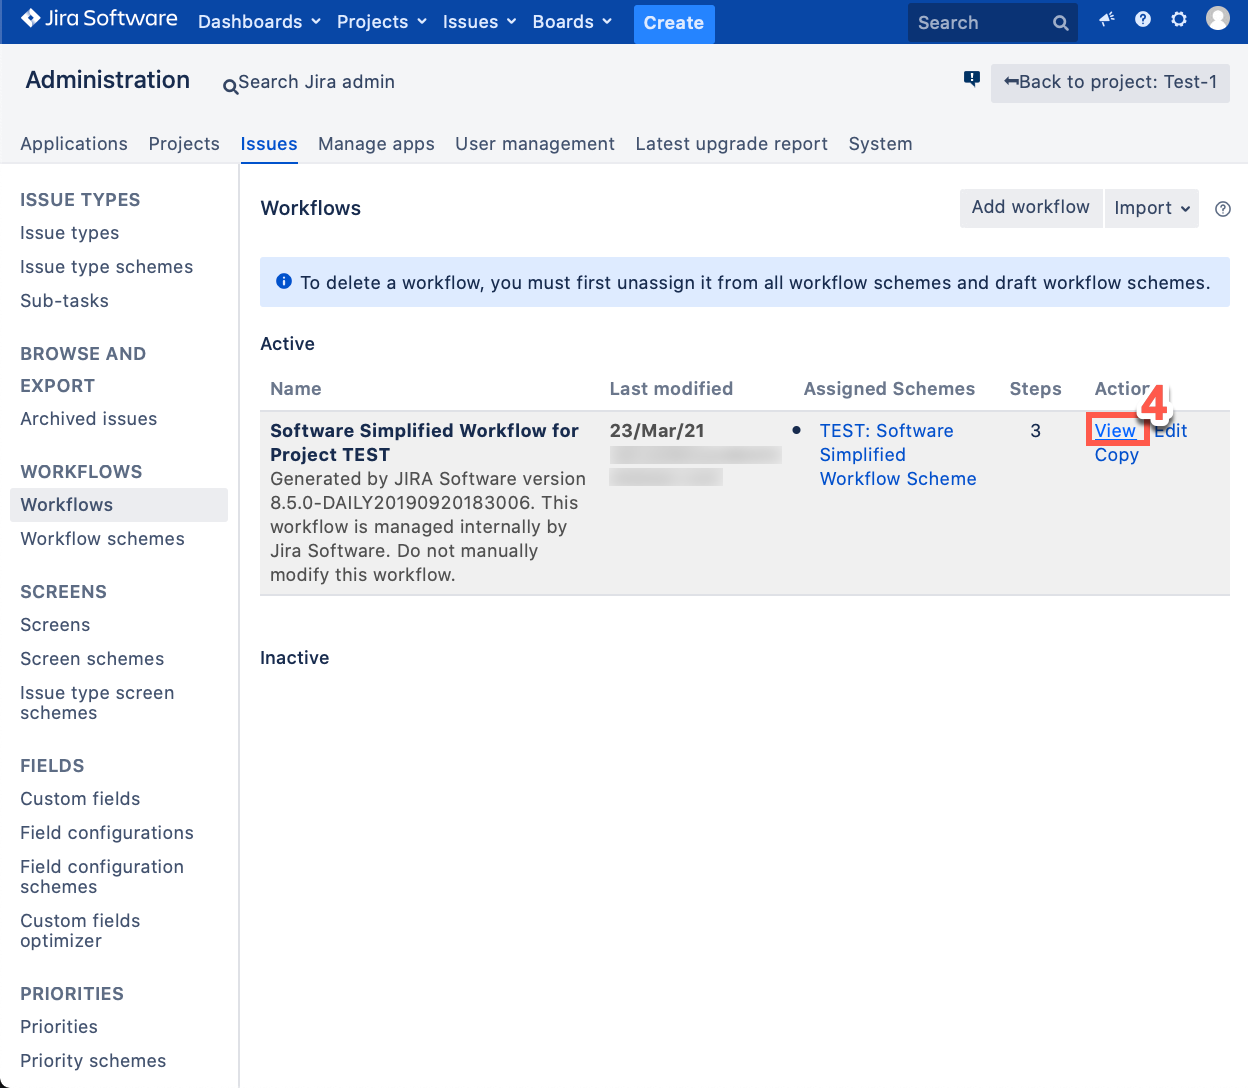
-
Click Text to see the list of statuses contained in the workflow.

-
The Jira Workflow has a list of all transitions that are possible for a given Status.
-
Transitions (id) shows each possible transition out of that state with the transition ID in parentheses. The transition ID for moving from a status of To Do to a status of Done is 31.
-
Step Name (id) and Linked Status show each status and its status ID in parentheses.
-
-
Define the
transition_action idfor each relevant status change in the workflow. Every status will include atransition typeandtransition_action id, any required fields must be included.For example, to move a Jira ticket from a state of To Do (as shown above) to a state of Done, your XML may look like this:
<status name="To Do">
  <transition type="Close">
    <transition_action id="31">
    </transition_action>
  </transition>
</status>
If any transition has a required field, that field must be included in the XML for the transition. If the transition above had a required field called
Resolved, and you want to configure the field value to beYes, the XML above would become:<status name="To Do"> <transition type="Close"> <transition_action id="31"> <field name="Resolved" values="Yes"></field> </transition_action> </transition> </status>
The Create Issue (Integration Defined) Status
The default XML Workflow includes the status Create Issue (Integration Defined) which is a custom status for the Continuous Dynamic to Jira integration.
-
If any custom fields are required to create an issue, include them here. Otherwise please do not edit the
Create Issue (Integration Defined)status.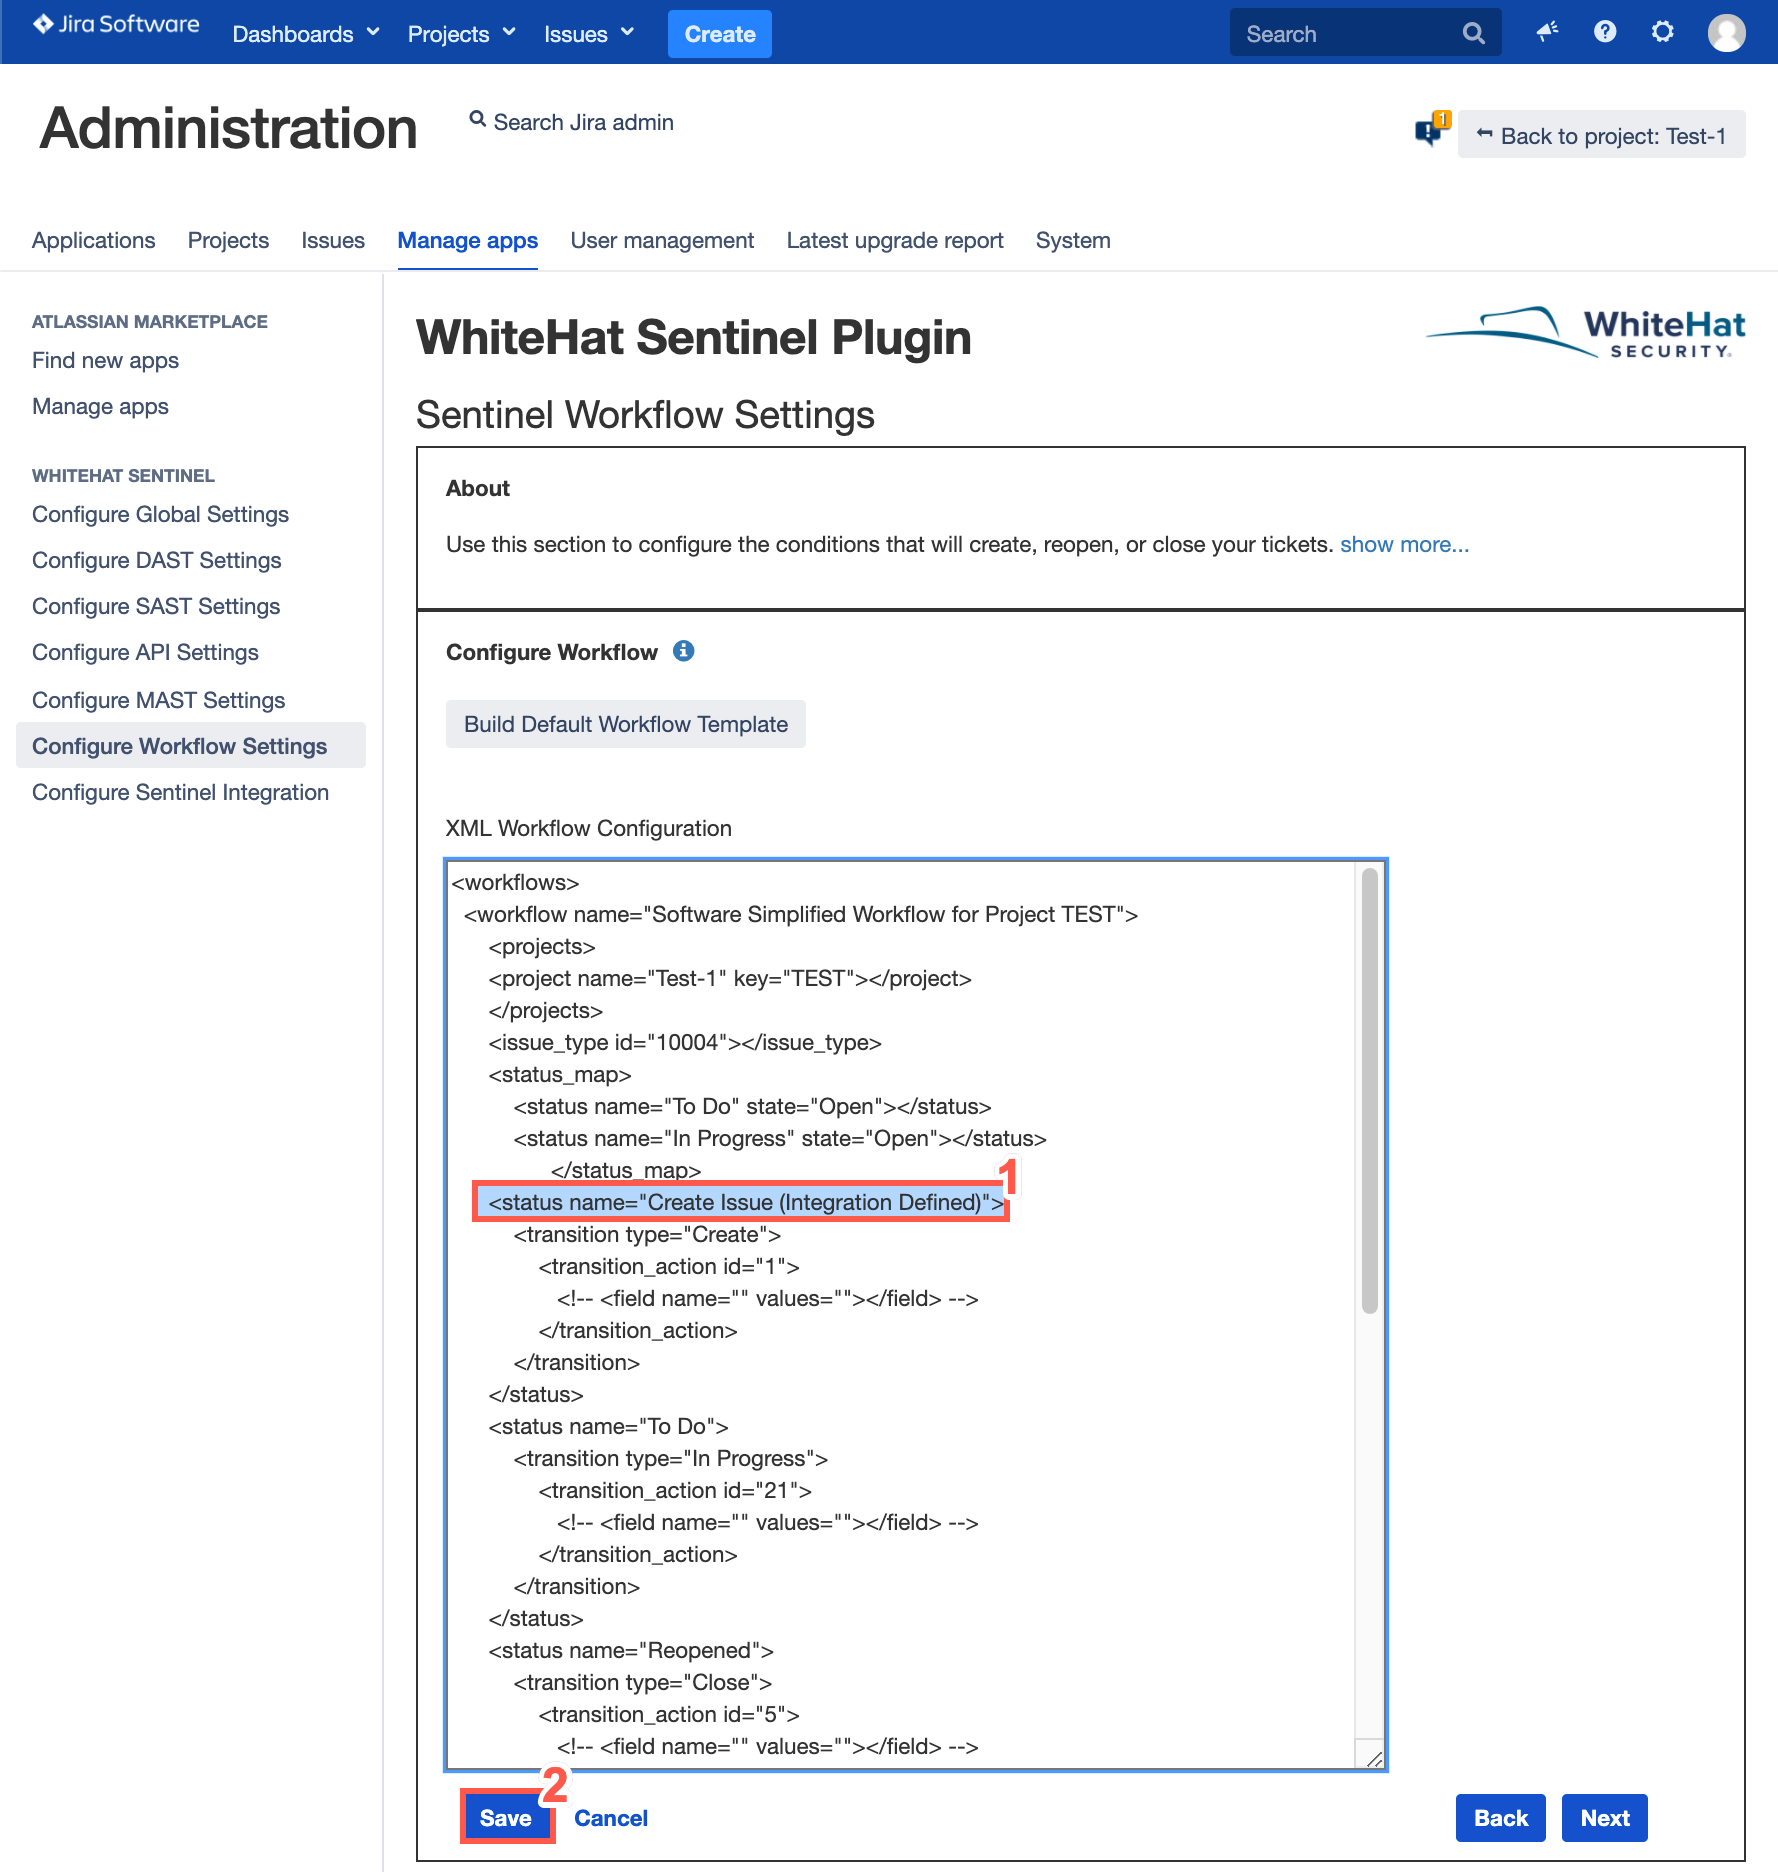
-
When you have defined the XML workflow configuration, click Save.
For an example of a completed XML Workflow configuration, please see Sample Workflow.