Adding Your API
This section provides instructions on how to add an API to your asset. To add an API:
-
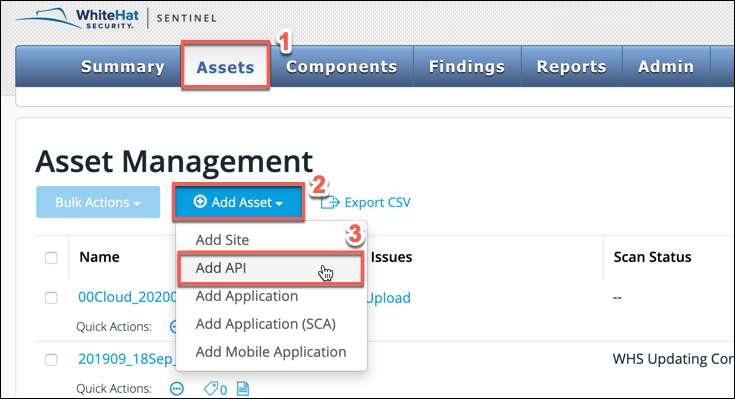
In the main Continuous Dynamic Portal toolbar, select the Assets tab to open the Asset Management page.
-
Click the Add Asset button.
-
Select Add API from the dropdown list.
-
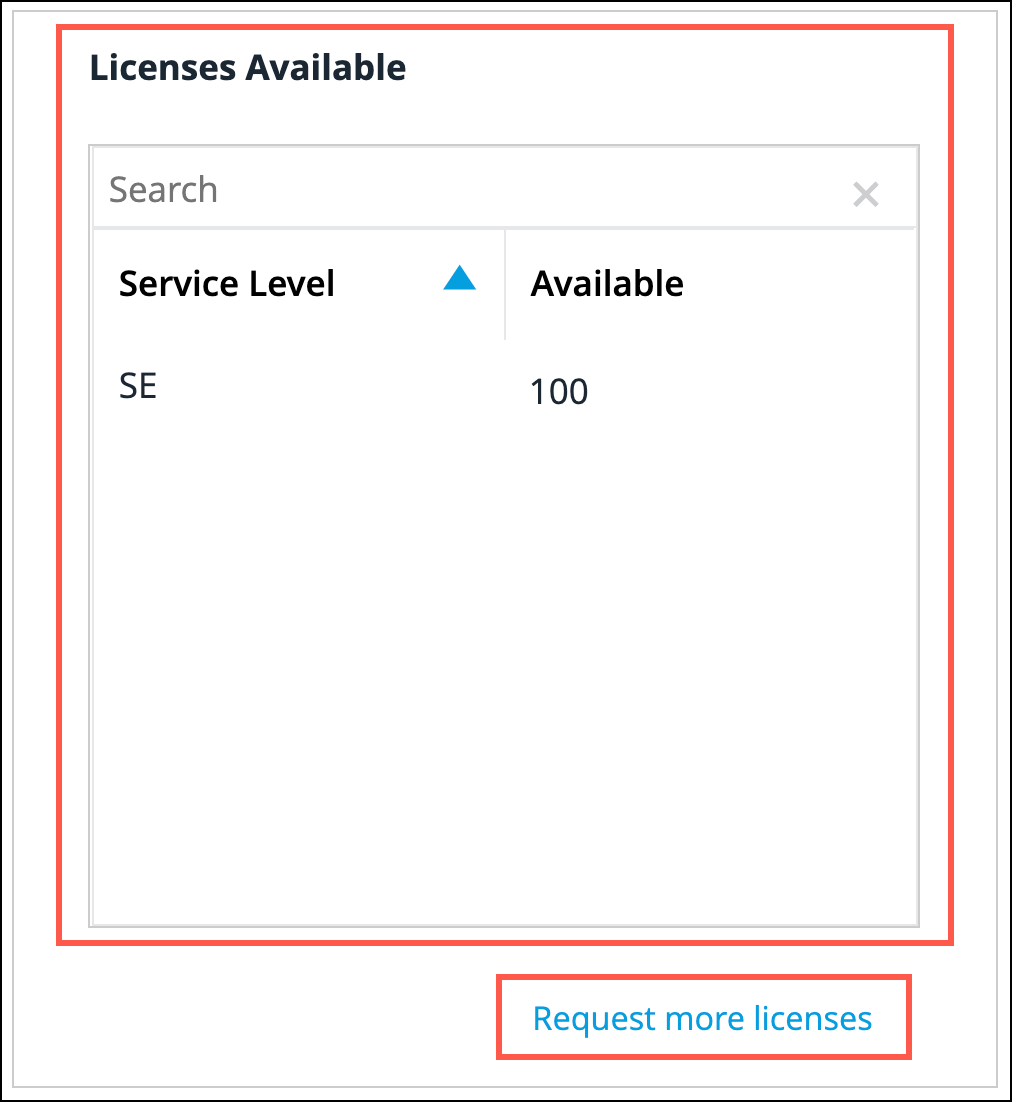
Review the Licenses Available section and if more licenses are required, an administrator can click Request More Licenses. This creates a Salesforce case regarding your license request.
-
In the Add API screen, populate the fields with information about the API that you are adding.

Field Name Description Asset Name
This is the name that you wish to use for the API, which will display in list of assets on the Asset Management screen.
Primary hostname URL
This is the URL used to call the API.
AutoAPI does not support primary hostname URLs that use ".local" top-level domains.
Industry
This is required so that the Peer Benchmarking Dashboard provides information relevant to your company and its industry.
Additional information from Black Duck
You can include information here for Black Duck’s reference. Please note that this information will not be displayed in the Portal or available through the API.
Internal asset
You will need to download and configure a satellite appliance on the Appliance Management screen before onboarding an internal asset.
Custom Asset ID
This is used if you have an asset ID that you wish to associate with the API. It’s displayed in reports after the Asset Name.
Asset priority
The asset priority that you select will impact the rating displayed for vulnerabilities found on the API. None means that there will be no adjustment to the rating displayed.
Scan speed
This can be used to limit the number of requests per second made to the API.
Enable throttling
When enabled, the scanner pauses for one hour following detection of a 420 or 429 response code. Request throttling reduces the load on the server and allows the maximum number of vulnerabilities to be found.
Internal Description
Information typed in this field is displayed in the Portal and is available through the Continuous Dynamic API.
-
There are two options to choose from for scan scheduling. Choose between the following:
-
Click Skip and Create Now to add the asset with the default scan schedule selected. If you select this option, you have now completed adding your API.

-
Click Next to proceed to select a scan schedule.
-
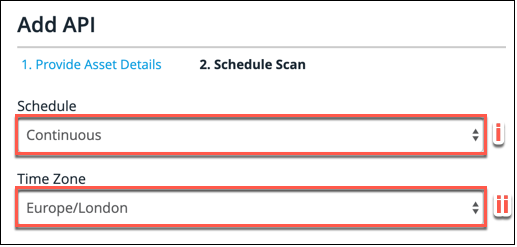
Select a scan schedule from the Schedule dropdown options:
-
Never Scan
-
Continuous (default selection)
-
Nights 8P-6A, and Weekends 24hrs
-
Scan Once Now
-
-
Select a time zone from the Time Zone dropdown. Your local time zone is selected by default.
-
-
-
Click on Create Now to add the API as an asset.
-
An information message is displayed to remind you that full scanning will not start until you have configured endpoints for the API. Click OK to acknowledge the message.
Once you have added the API as an asset, Continuous Dynamic displays a message to tell you that the asset was created successfully. If any errors were encountered during asset creation, these error messages are displayed along with associated remedial information. You can close this message by clicking on the X.
Video Tutorial - Onboarding an API Asset
| Your next step is API Configuration. |