Cloud Mobile Upload
Introduction to Mobile Application Security Testing
Sentinel Mobile Application Security Testing combines dynamic and static automated scanning as well as optional manual mobile application-layer penetration testing by the expert security engineers at our Threat Research Center (TRC).
The Sentinel Mobile Standard Edition (SE) provides analyses of developer-signed binaries and assess mobile web view applications and includes the following features:
-
Platform and language agnostic
-
Supports iOS and Android
-
Fast results with binaries scans ready to go to market or code in development
-
No source code required, but can be automated into the CI/CD environment
The Sentinel Mobile Business Logic Assessment (BLA) provides hands-on mobile application penetration testing, including data flow analysis and dynamic testing between the client and server:
-
Deeper cryptography-related checks
-
Analysis of client and server interaction
-
Review of application business logic and workflows
-
Deeper application-layer penetration testing of information storage and data leakage
-
Inter-process communication checks
| All cloud upload scan results are deleted after 15 days, regardless of success or failure, and the Asset Management page displays the last five scan results. |
Uploading Files During Application Onboarding
To upload files during application onboarding, perform the following steps:
-
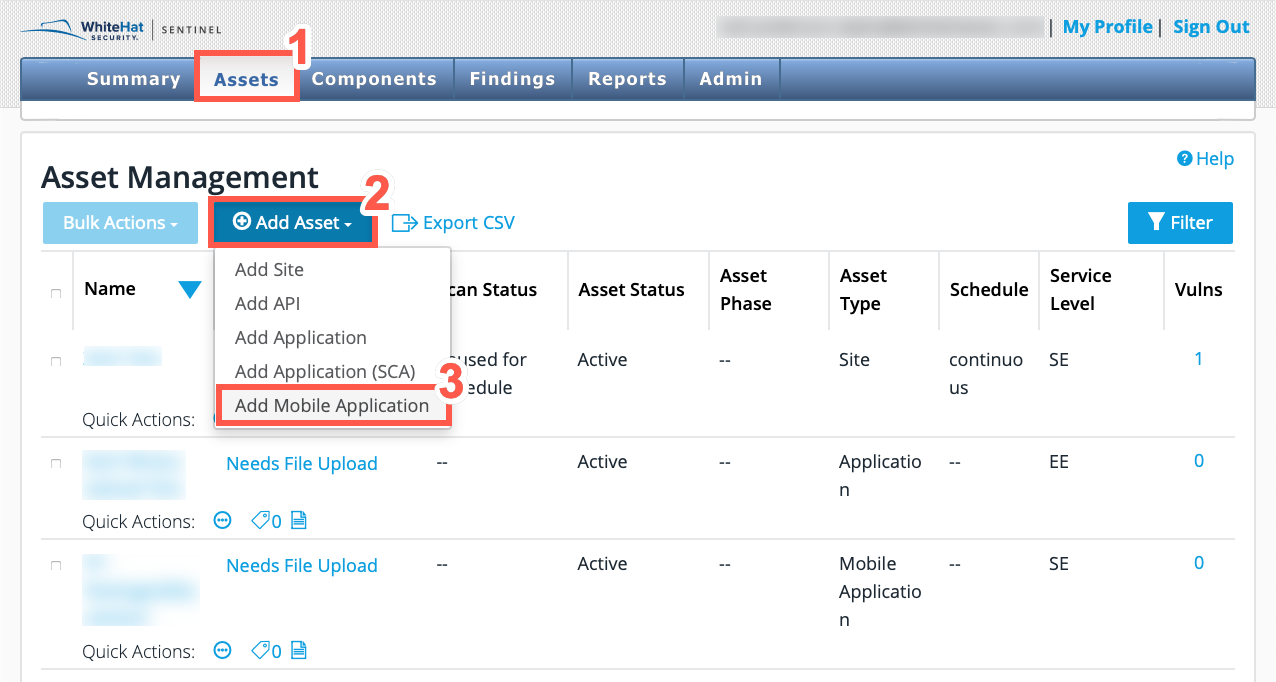
In the Continuous Dynamic Portal, select Assets.
-
Click Add Asset.
-
Click Add Mobile Application.
-
Select a Service Level from:
-
Standard Edition (SE)
-
Express Edition (EE)
The service level choices depend on the Licenses Available displayed on the right hand side of the page. 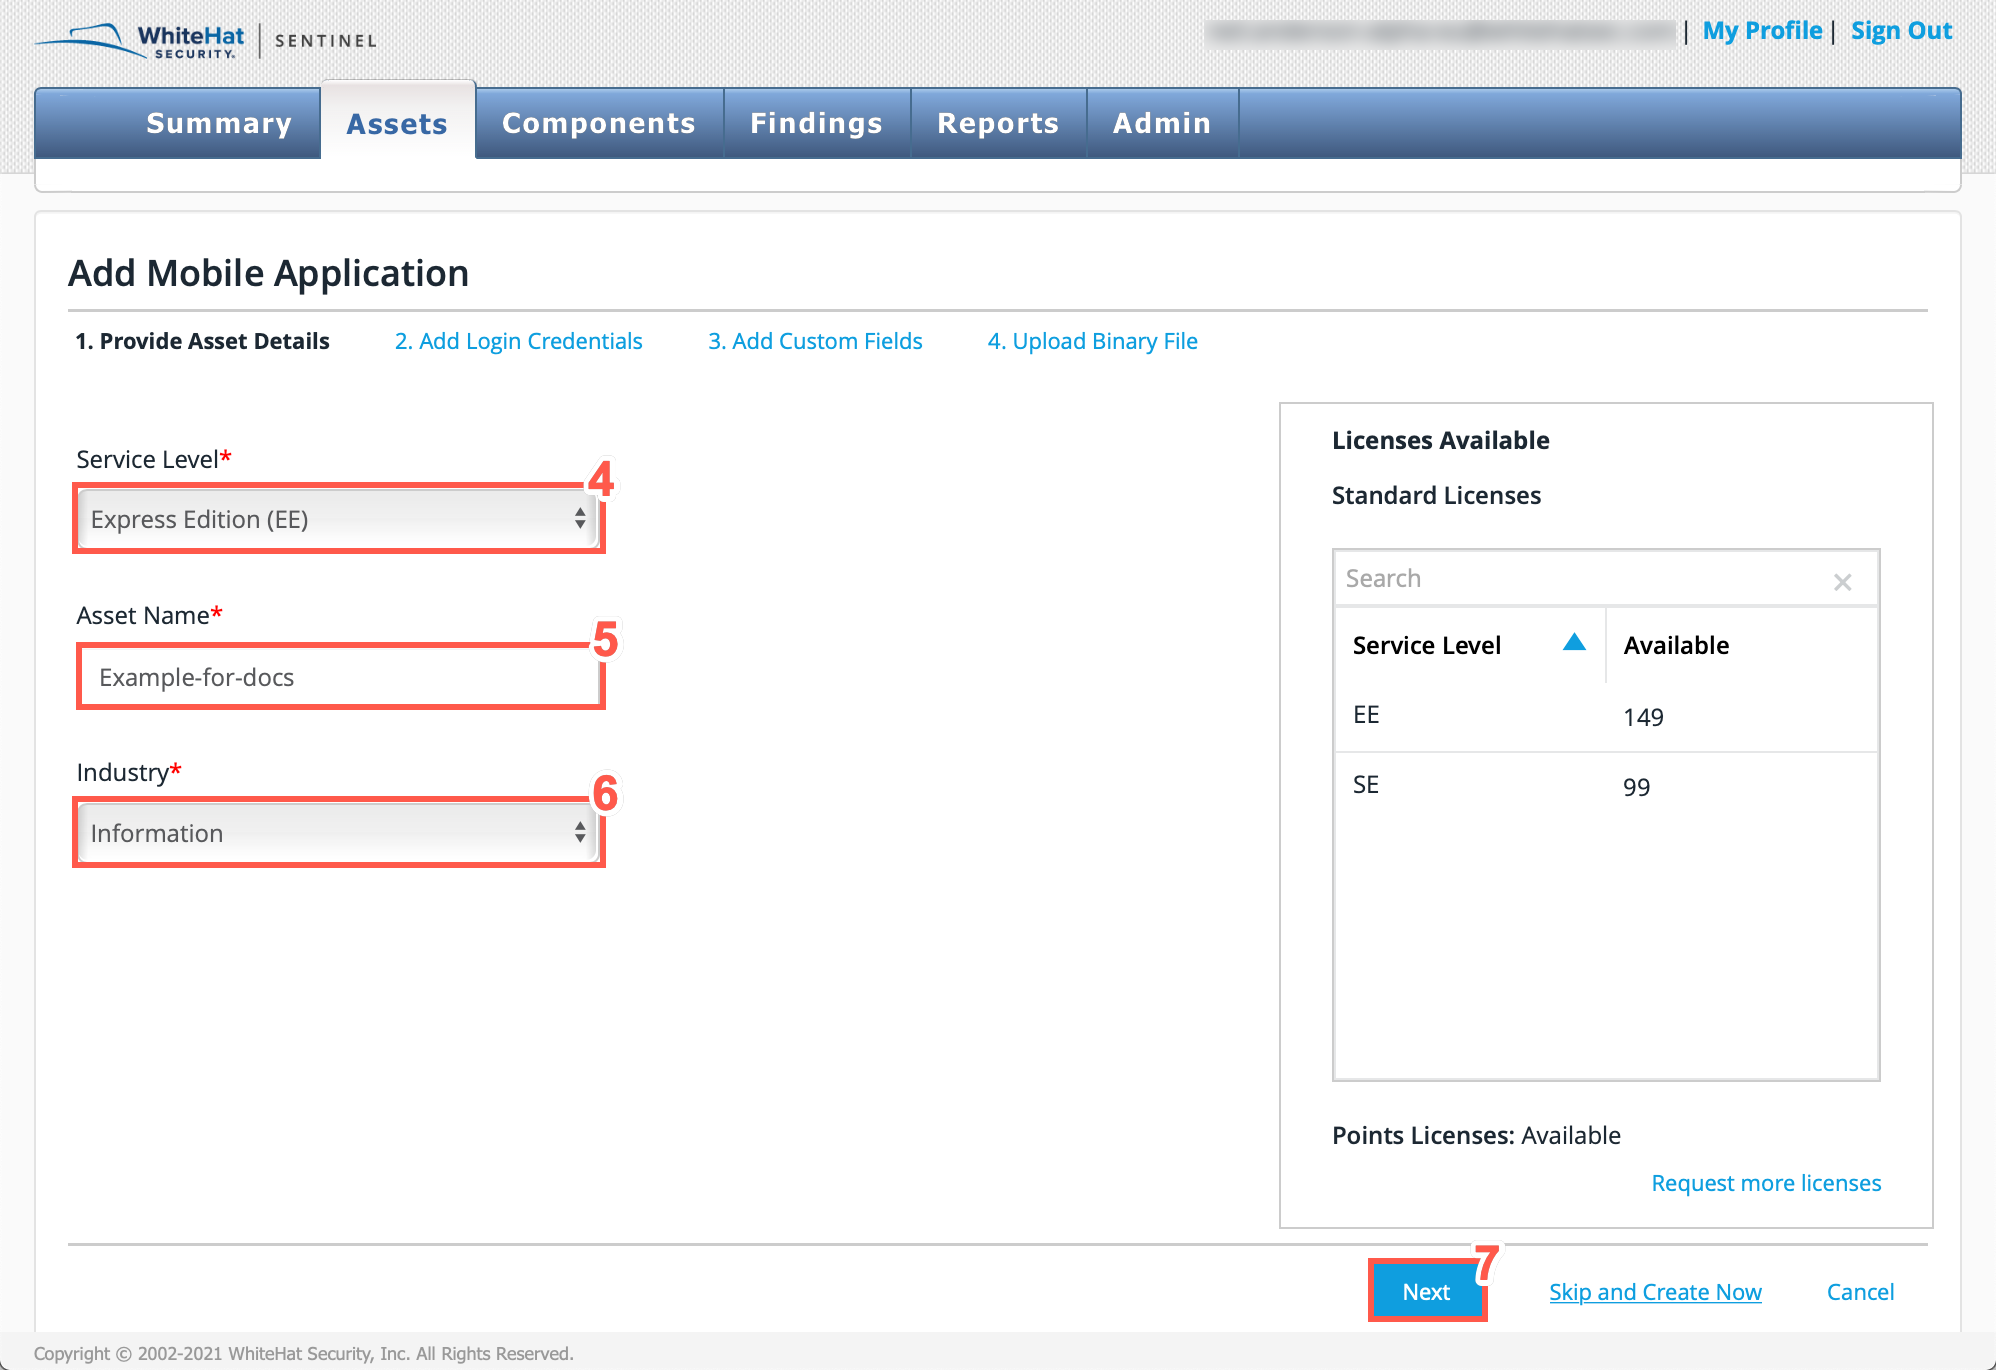
-
-
Type a Asset Name in the text field.
-
Select an Industry that best describes the asset.
-
Click Next.
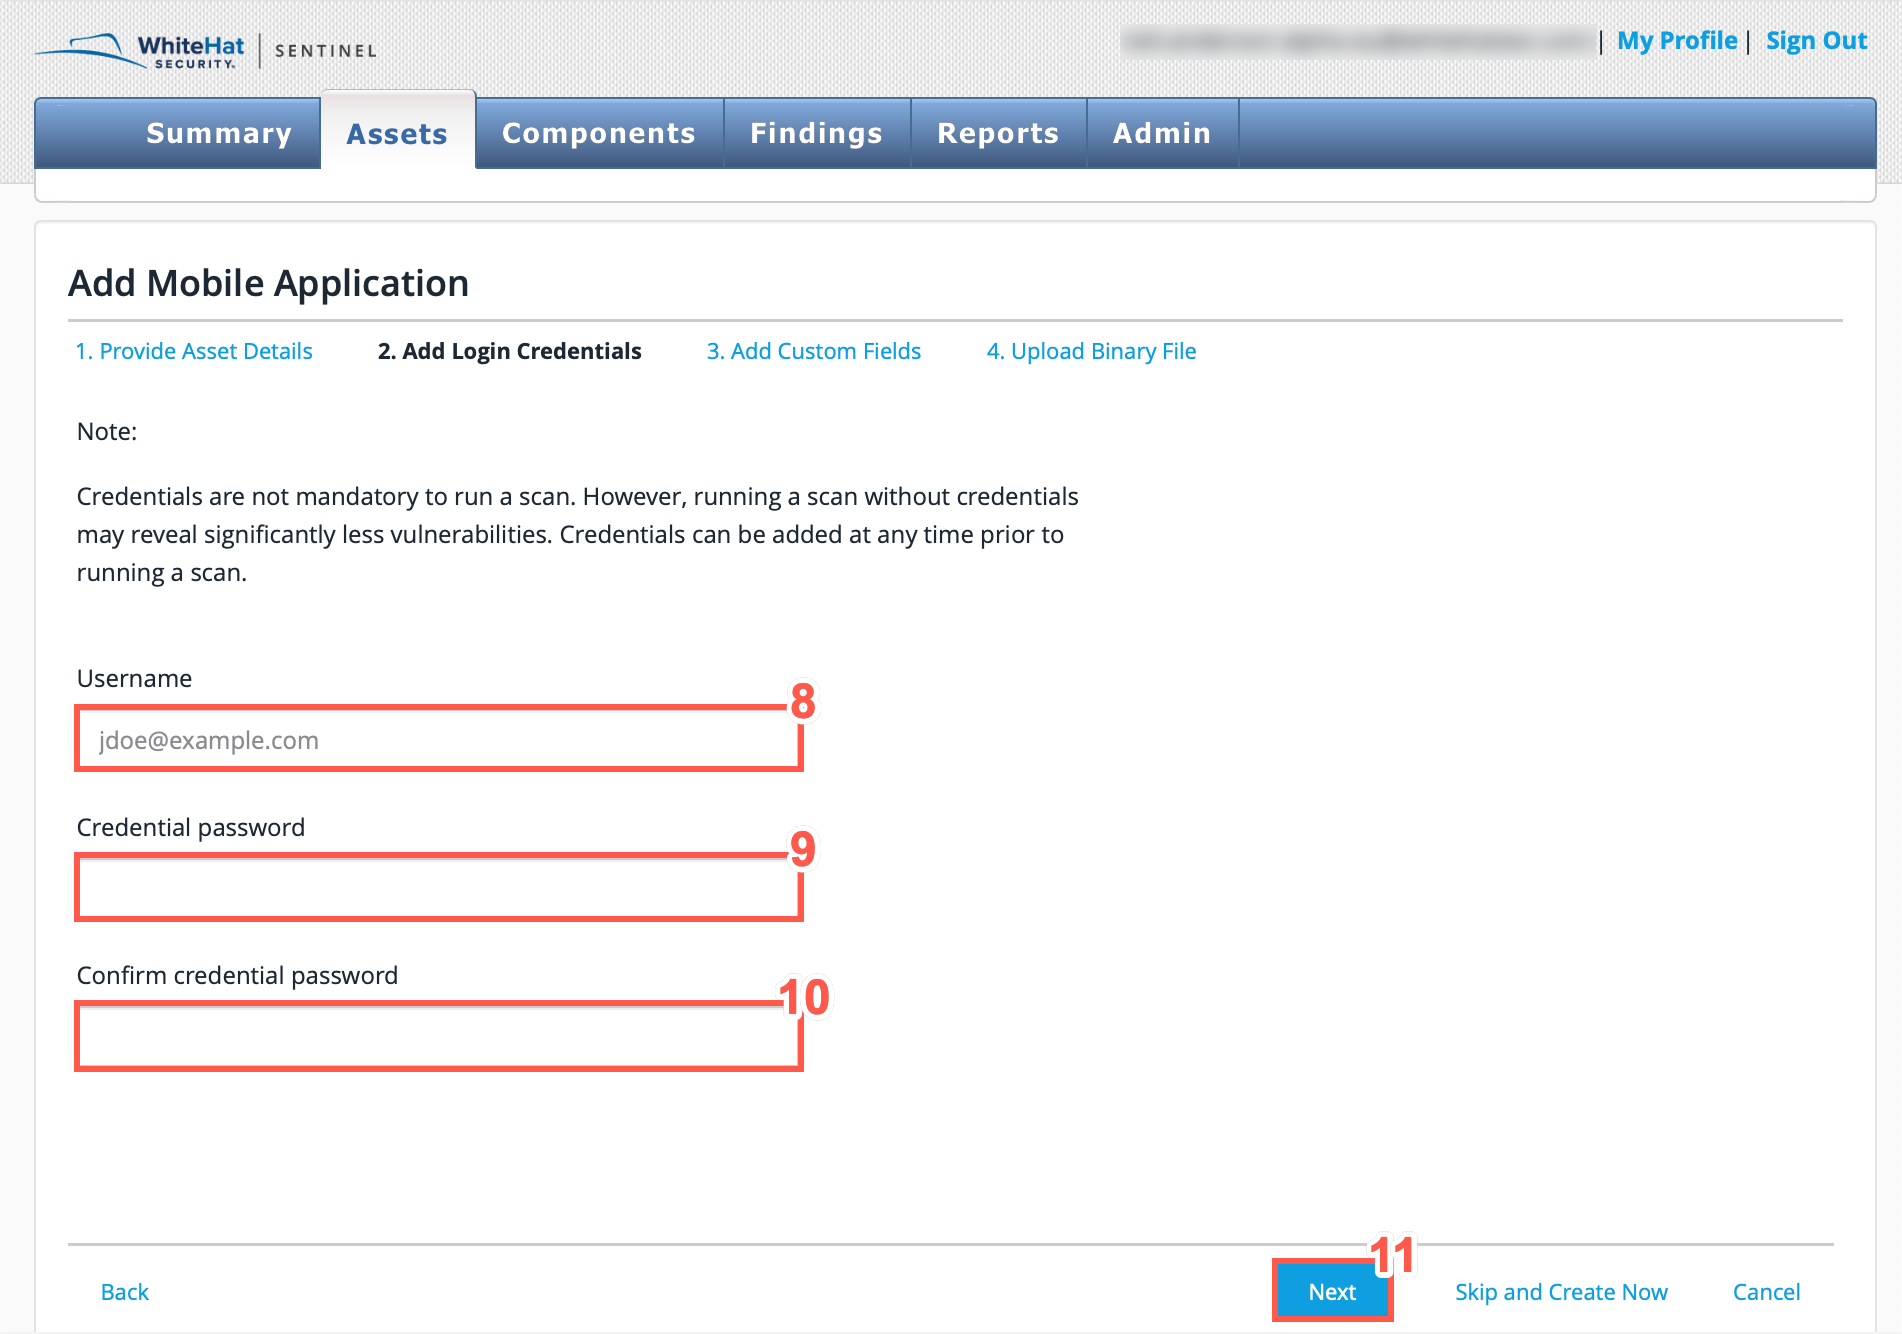
Steps 8-10 are only applicable to users running a scan with credentials. -
Type the credential Username in the text field.
-
Type the Credential password in the text field.
-
Type the Credential password in the text field again to confirm.
-
Click Next.
-
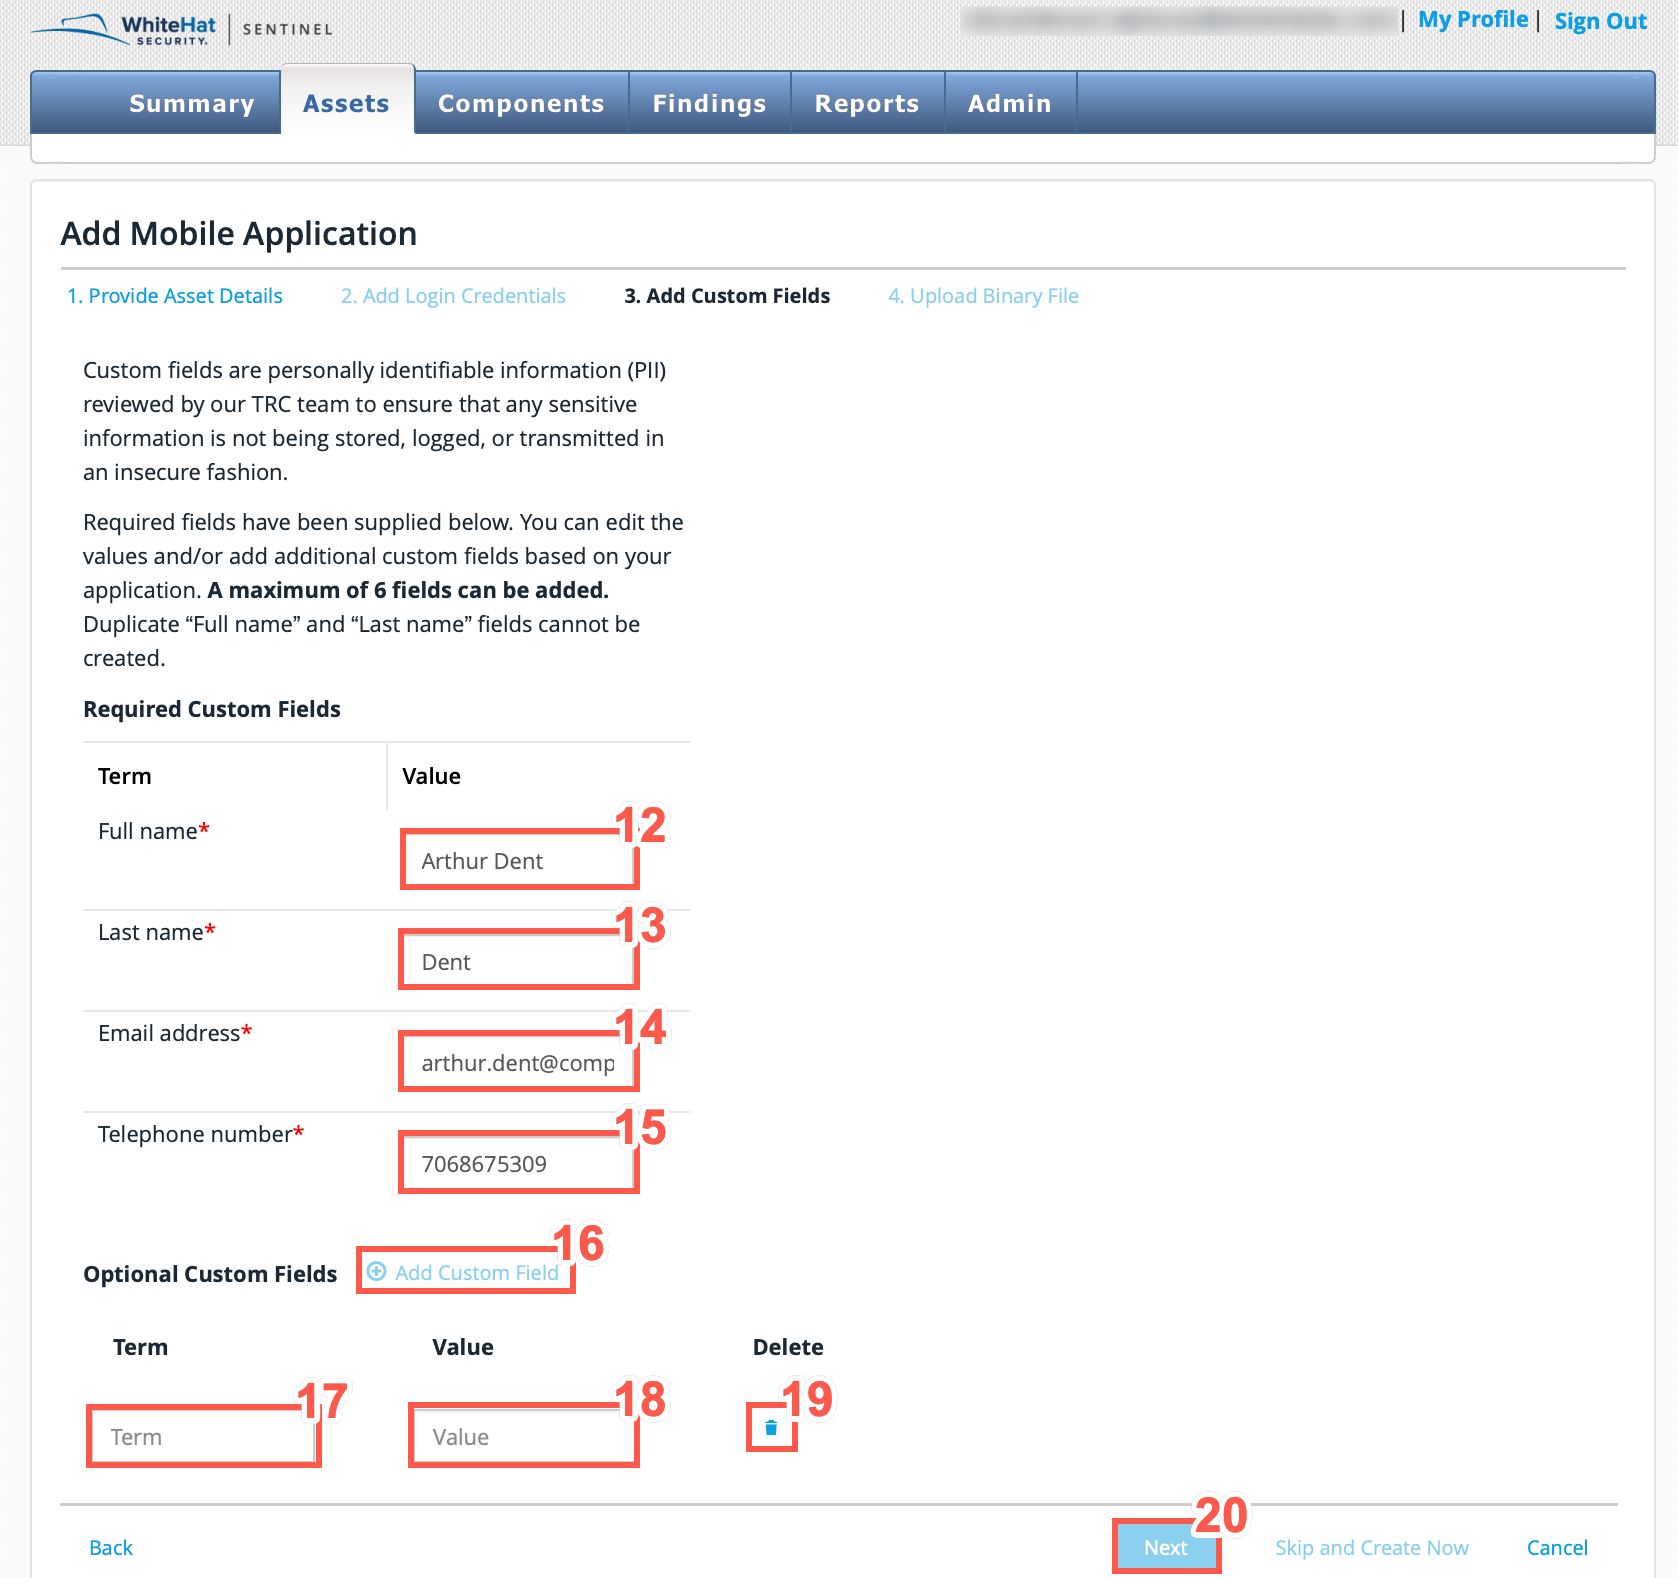
Type your Full name in the text field.
-
Type your Last name in the text field.
-
Type your Email address in the text field.
-
Type your Telephone number in the text field.
-
Optionally, click Add Custom Field to add custom fields.
-
Optionally, type a Term in the text field.
-
Optionally, type a Value in the text field.
-
To delete custom field, click the bin/trash can icon.
-
Click Next.
-
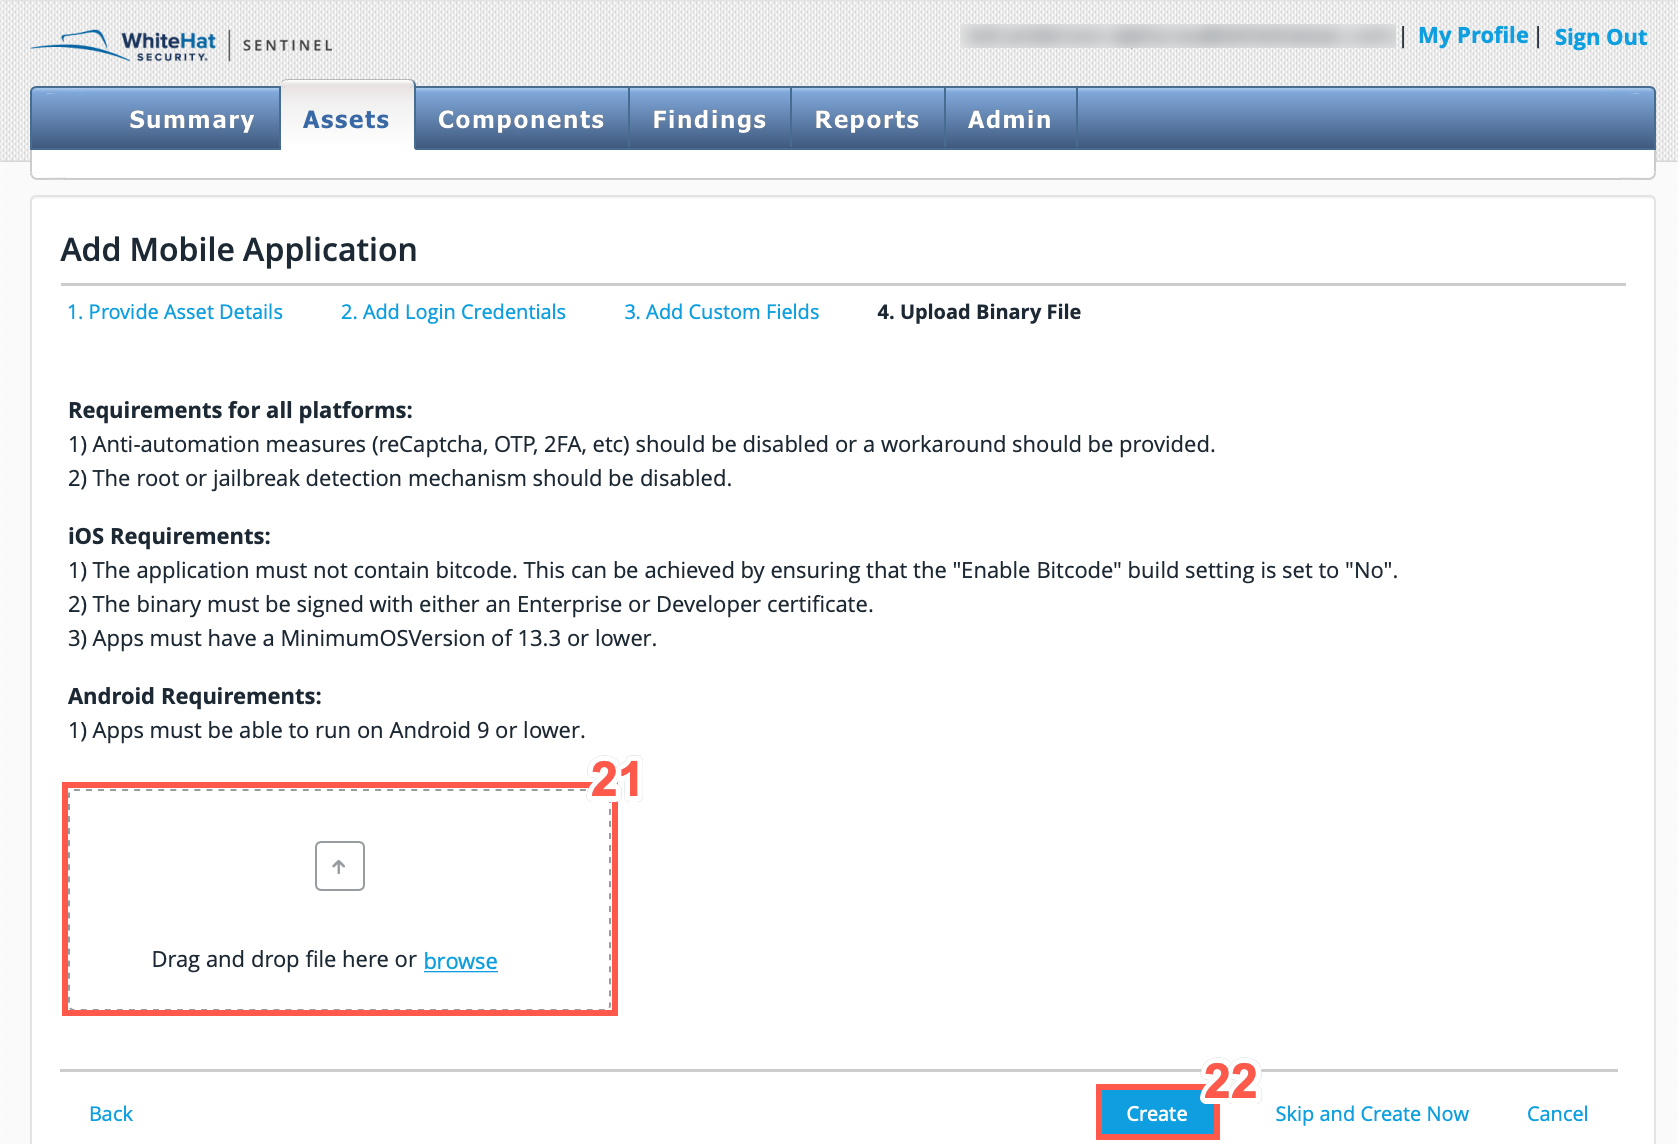
To upload the binary file you want to scan, Drag and drop the file into the displayed box or, click browse to browse to the location of your files and select a file to upload.
Ensure to follow the binary requirements displayed above. -
Click Create to finish creating the mobile asset.
Rescanning Files
To rescan a mobile file that you have already uploaded:
-
In the Portal, click Assets.
-
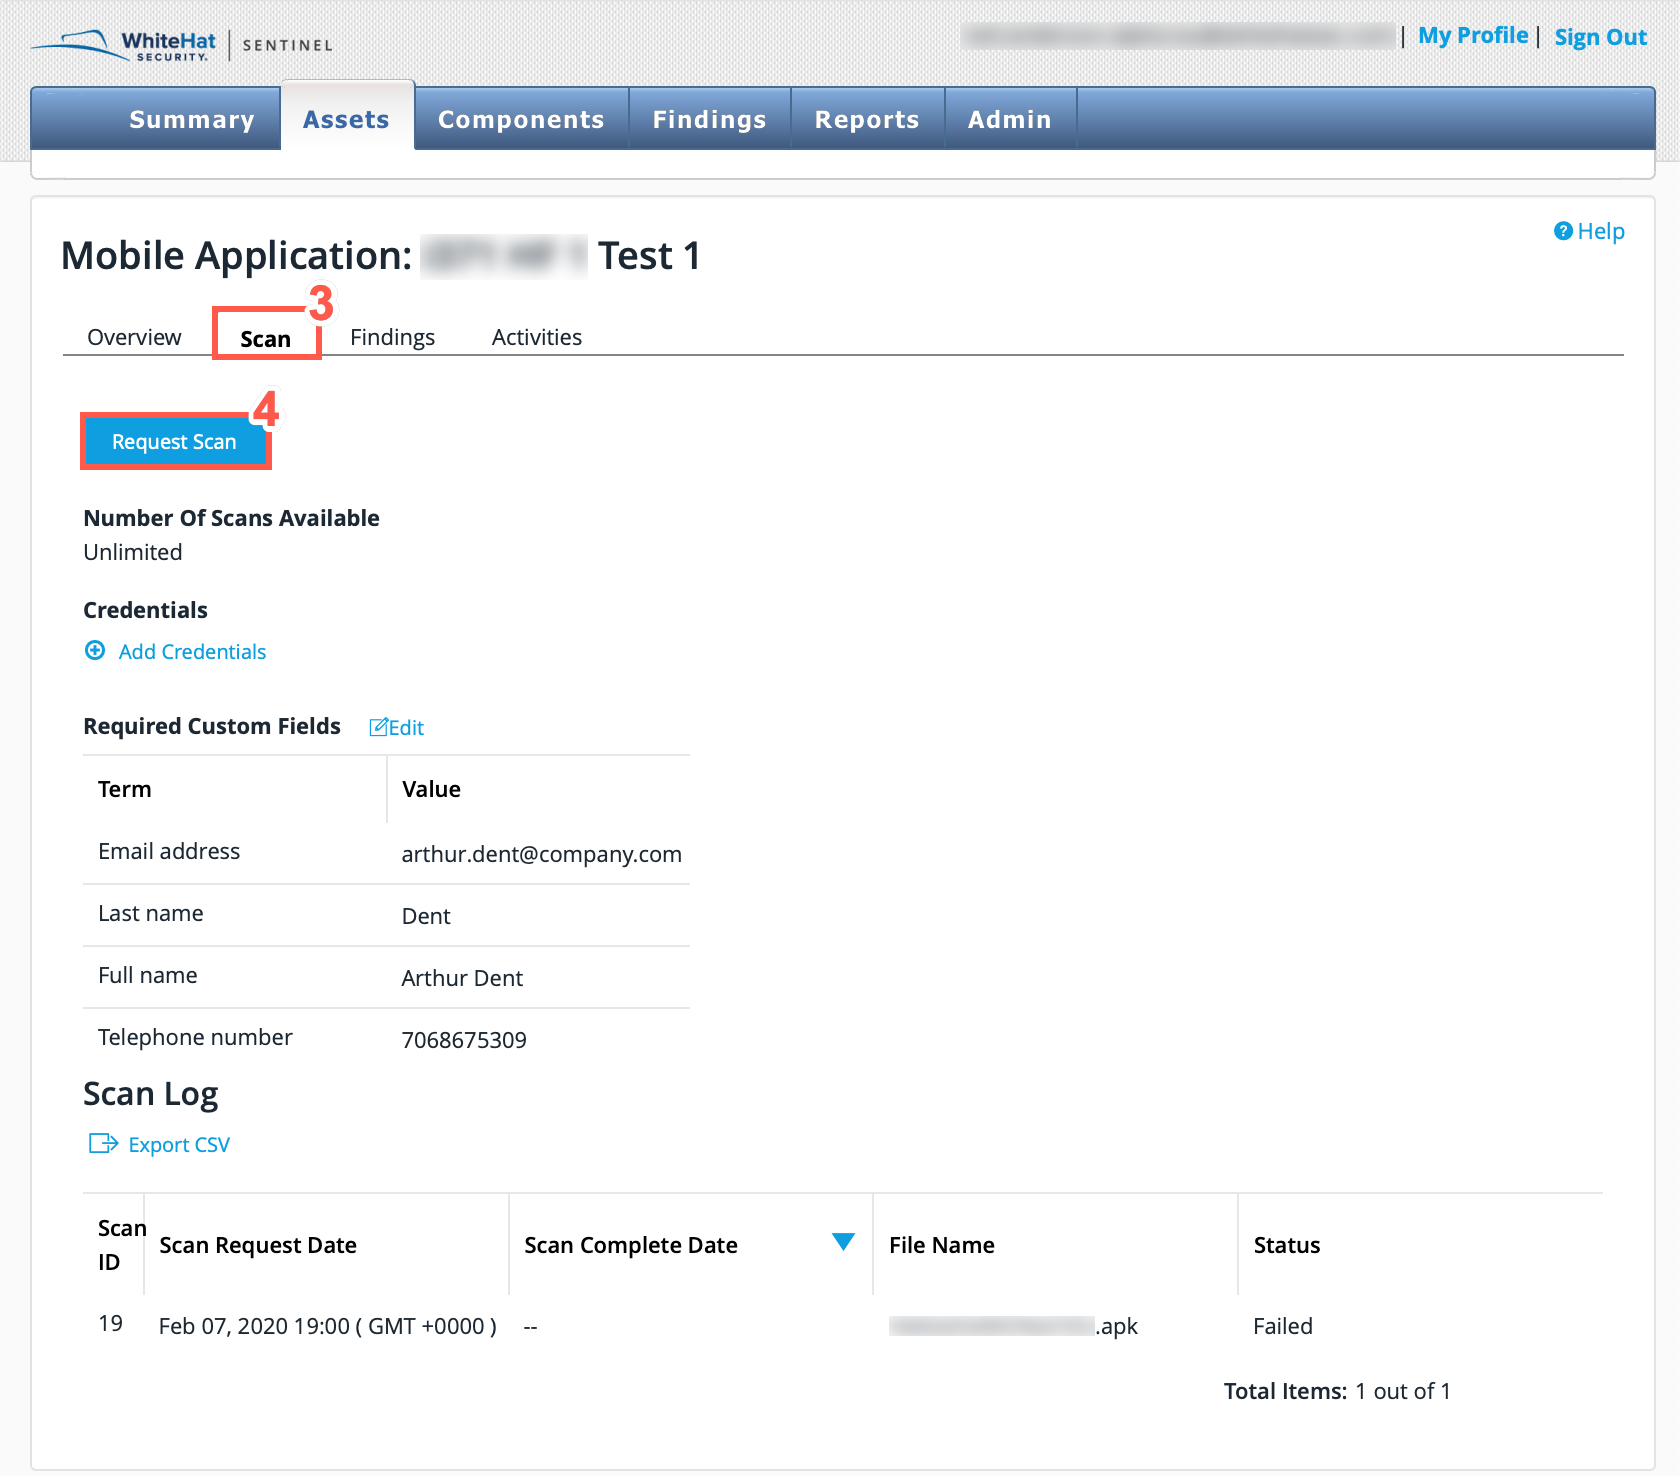
On the Asset Management page, click the name of the cloud upload asset you want to rescan.
-
Click the Scan tab.
-
Click the Request Scan button.
The previous scans are listed under Scan Log.
Filtering Mobile Upload Assets
To filter results by mobile application:
-
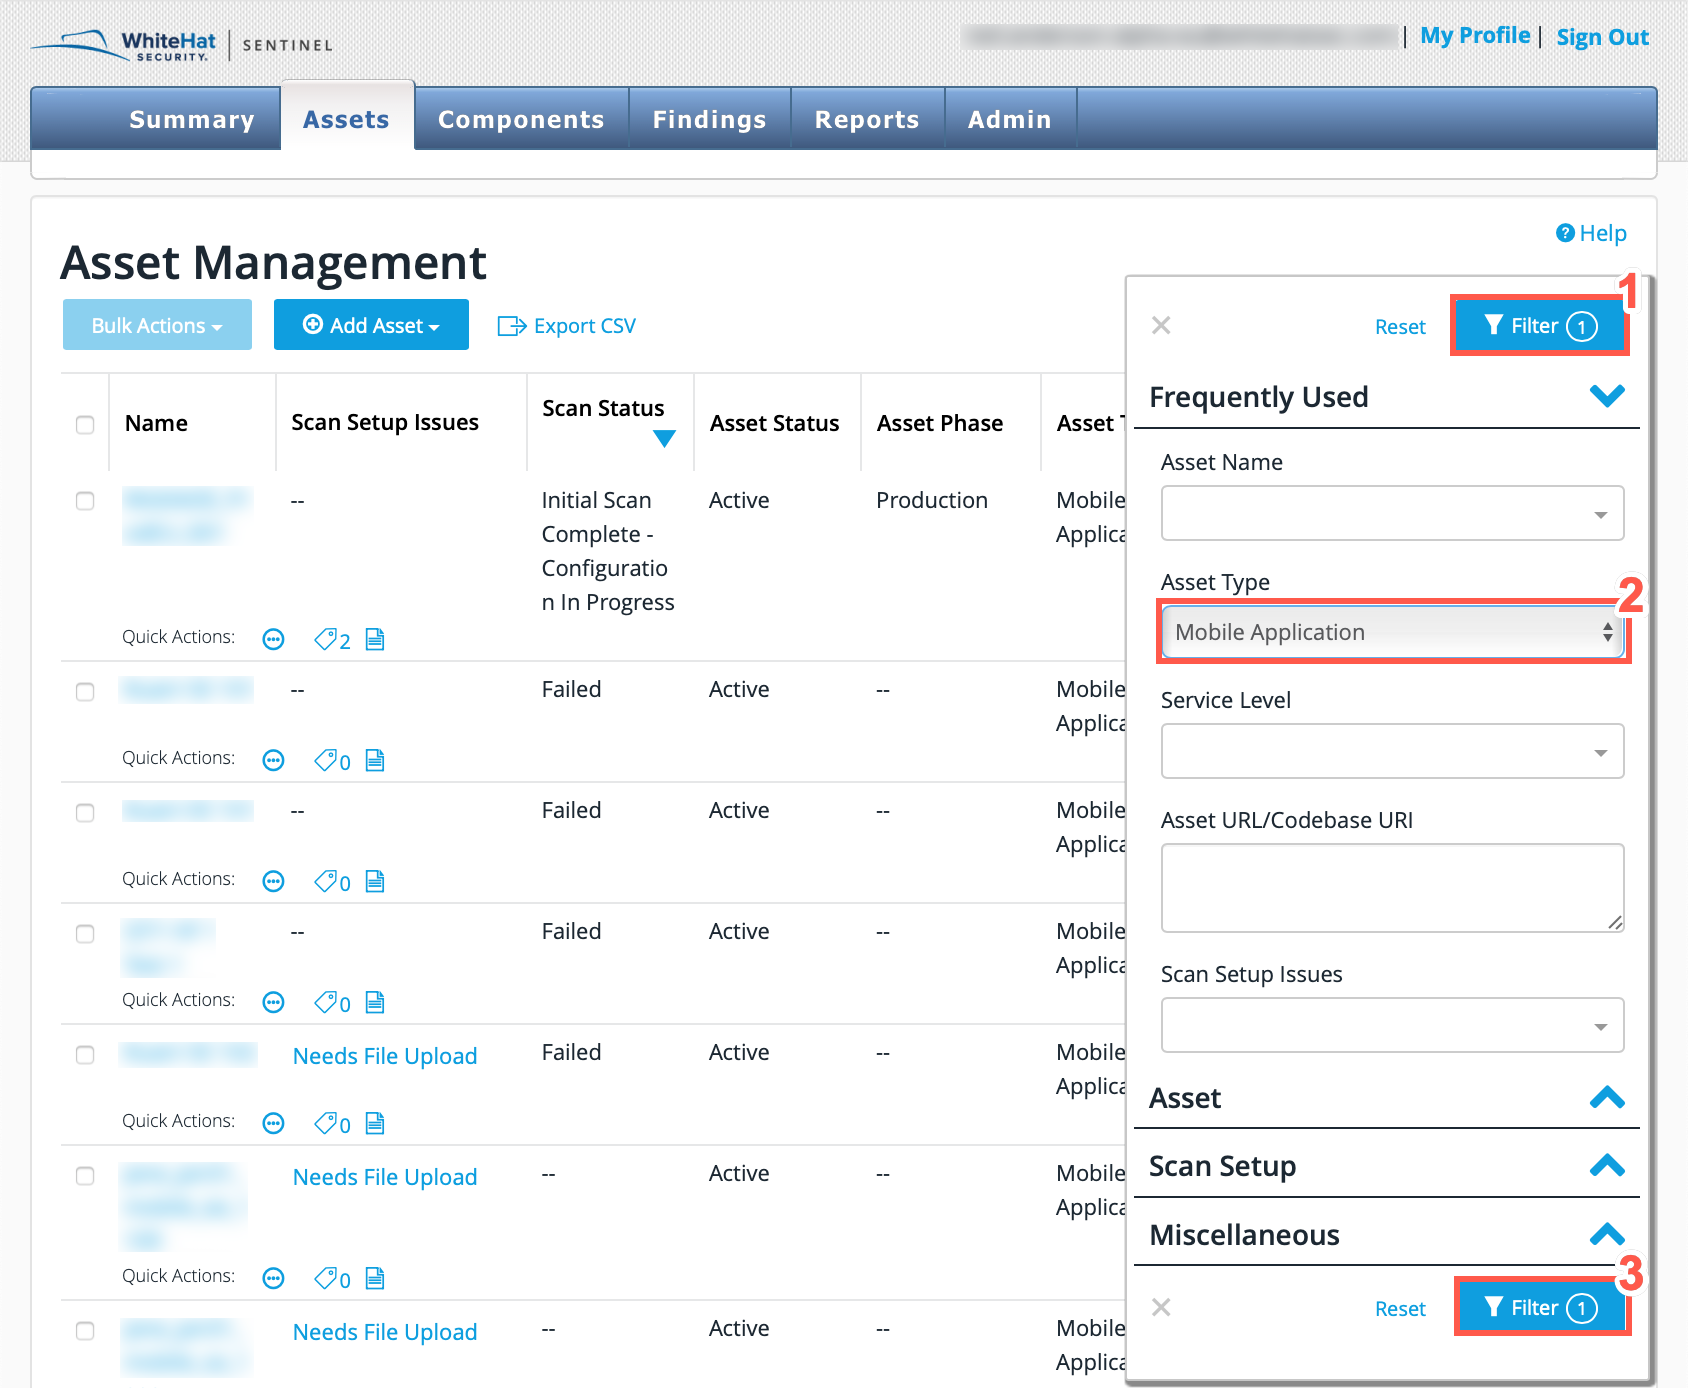
Click the Filter button on the Asset Management page.
-
From the Filter pane, select Mobile Application from the Asset Type dropdown.
-
Select any other parameters by which you want to filter and click the Filter button.
| Failure to reset the filter means that the filtered results will display the next time that you access the Asset Management tab. The filter remains in place even after logging out of the Portal and logging back in again. So if you have finished with the filter, use Reset button. |
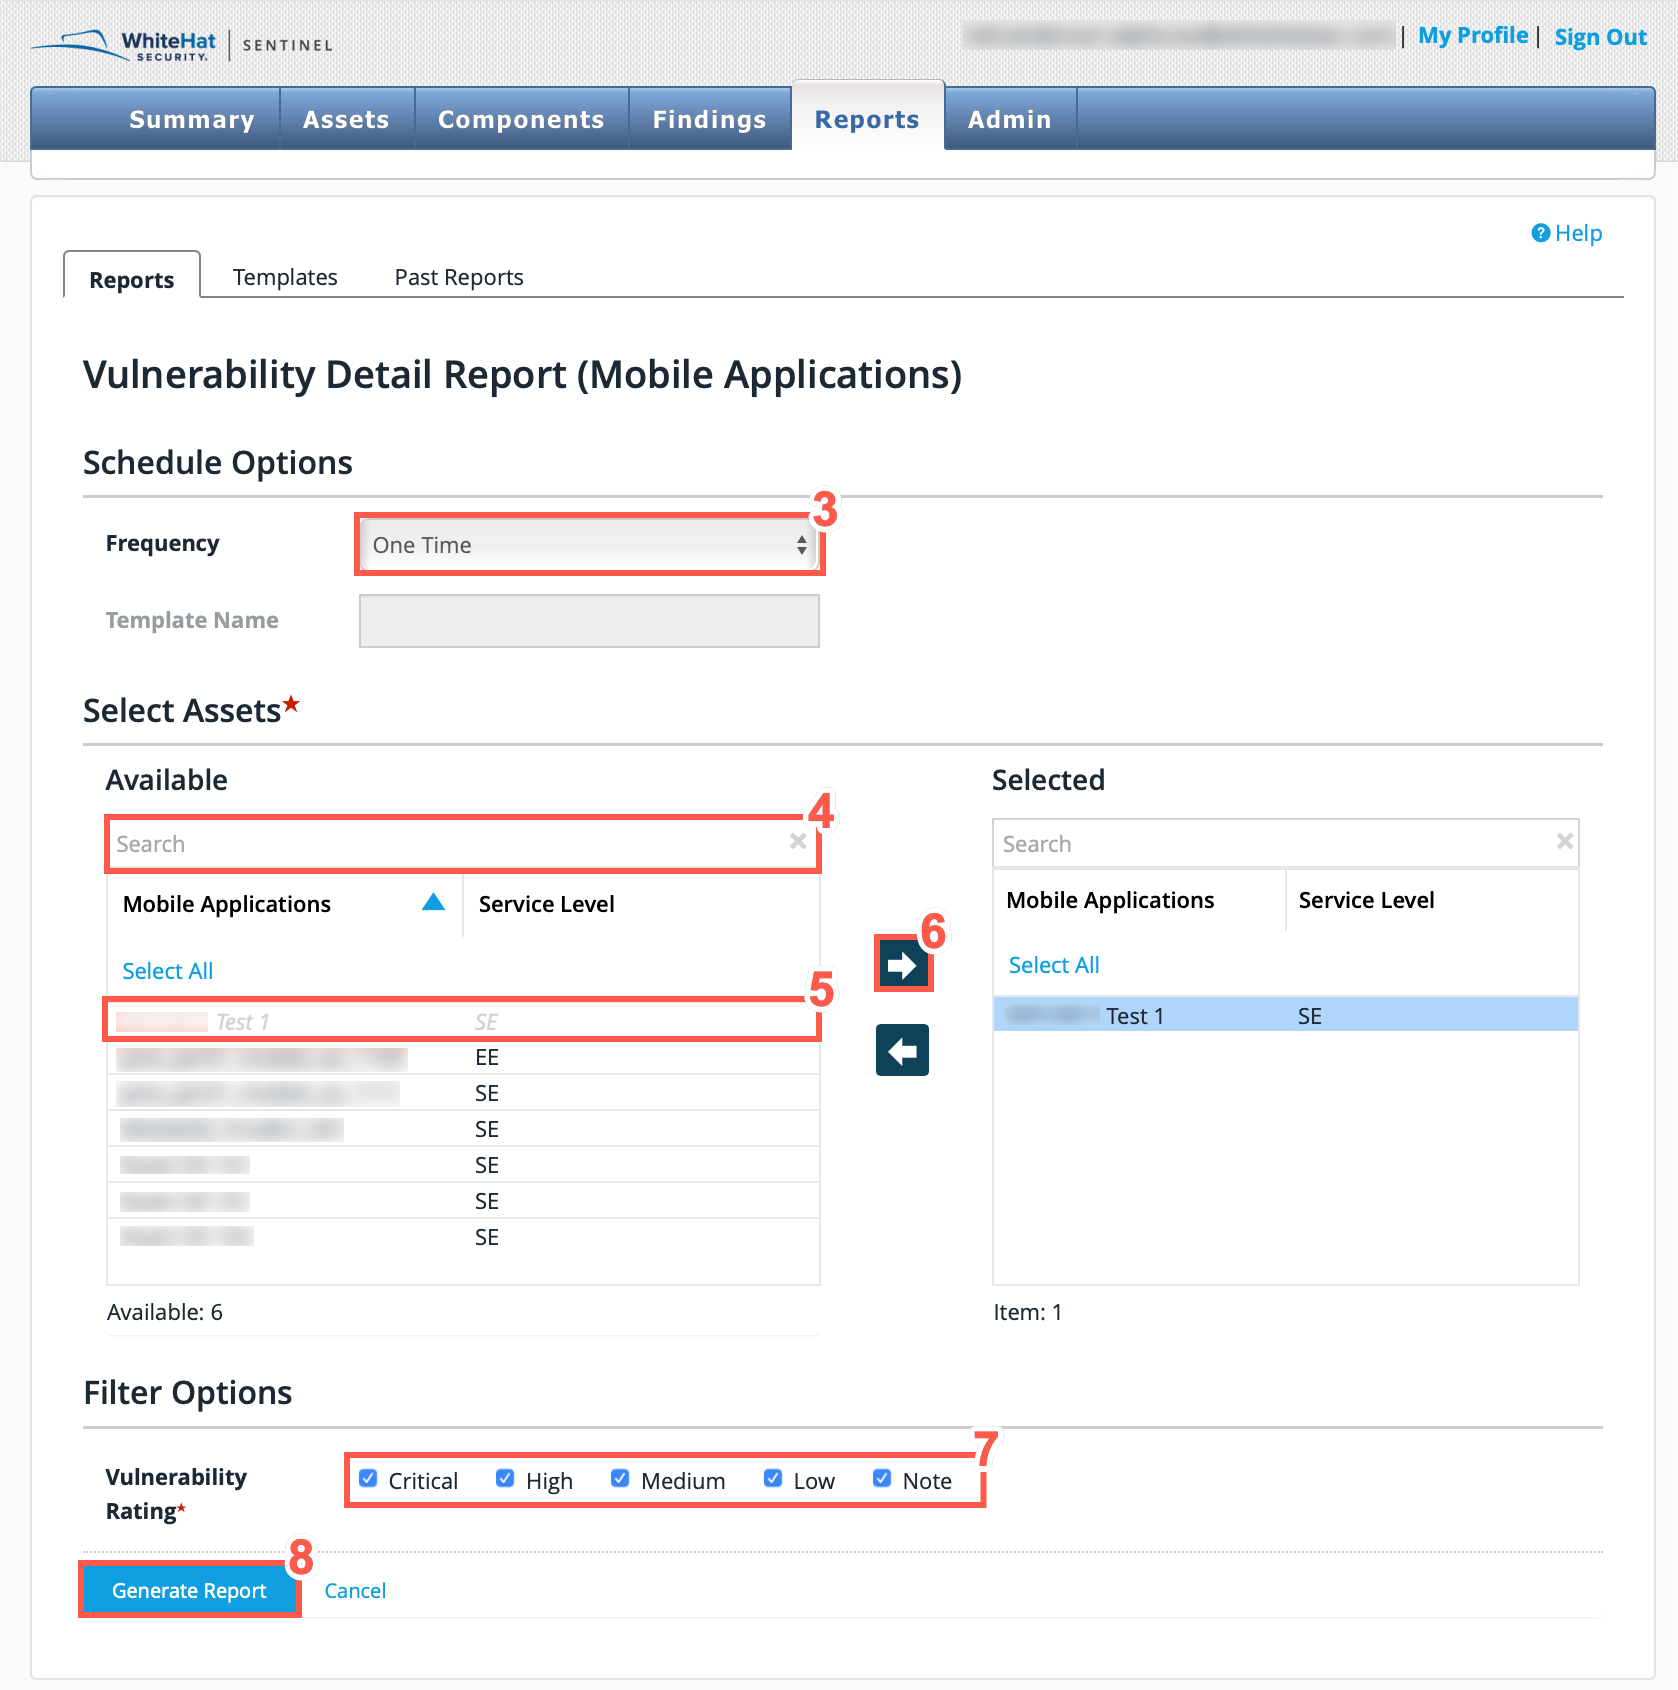
Reporting Mobile Upload Asset Results
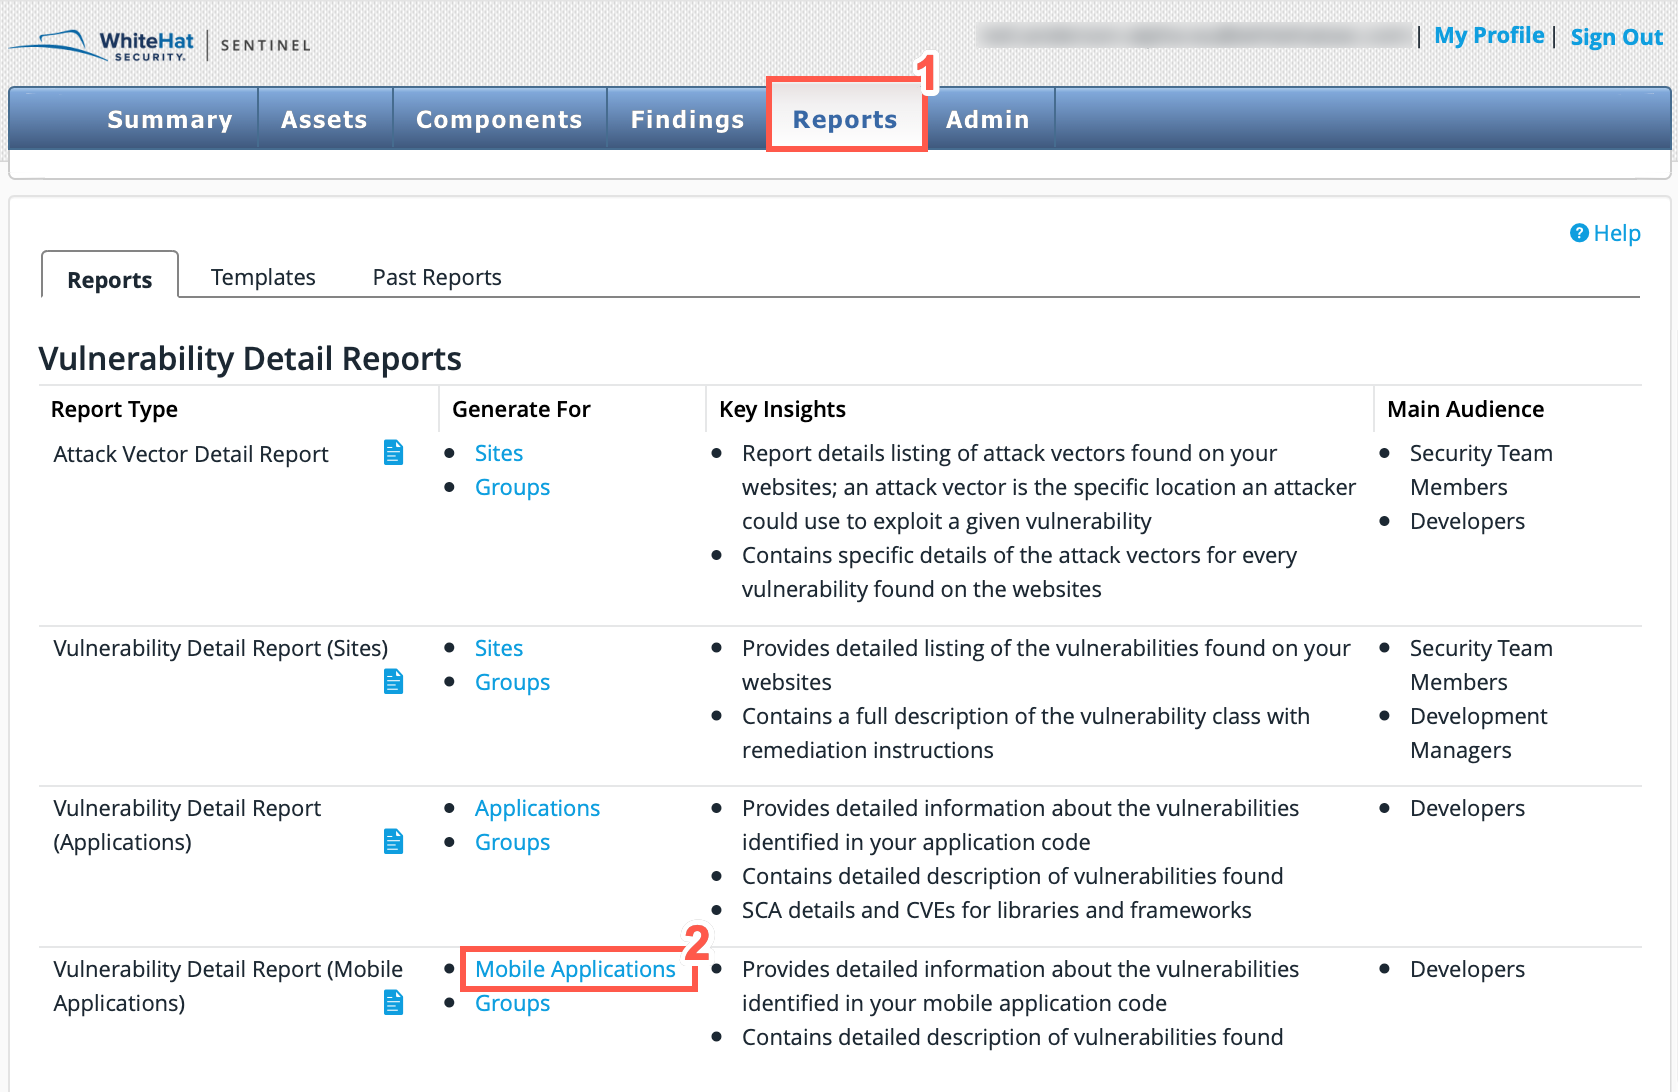
The Portal includes a Vulnerability Detail Report for Mobile Applications. To access this report:
-
Click Reports.
-
Select Mobile Applications or Groups from the Vulnerability Detail Reports section.
-
Select the report Frequency from:
-
One Time
-
Daily
-
Weekly
-
Monthly
-
| For all reports other than the One Time report, a template name must be entered here. |
-
To locate specific assets, use the Search bar at the top of the Available or Selected columns.
-
From the Available table, select the assets that you want to include in the report. You can also click Select All to select all available assets.
-
Select the right facing arrow to move the selected Assets from the Available table to the Selected table.
-
Select the Vulnerability Status of the Assets to be included in the report.
-
Click Generate Report to generate the report for the selected Assets.
| If you have selected a one-time report, report generation will begin and you will be notified when it is complete. If you have selected a repeating report, the template you have created will be saved in the Templates tab and it will be run at the next scheduled time. |