Managing Site Coverage
The ability to create customized scanning rules allows users to specify which URLs are appropriate for dynamic application security testing (DAST). Depending on the type and function of sites, your security policy may be to test (whitelist) or not test (blacklist) specific URLs. In addition to the rules you can set with the help of the TRC, you can now add, edit, test, and delete custom whitelists and blacklists to suit your company’s security needs. You can also track any changes to the rules, including which admin made the changes and when it was done.
Creating Global Whitelist and Blacklist Rules
To view, set, or edit global whitelist and blacklist rules:
-
Select the Asset Management tab and click on the name of a DAST asset.
-
Click the URL Coverage subtab and then click Scan Rules. The window will show you any existing scanning rules, whether set by the TRC or by the user.
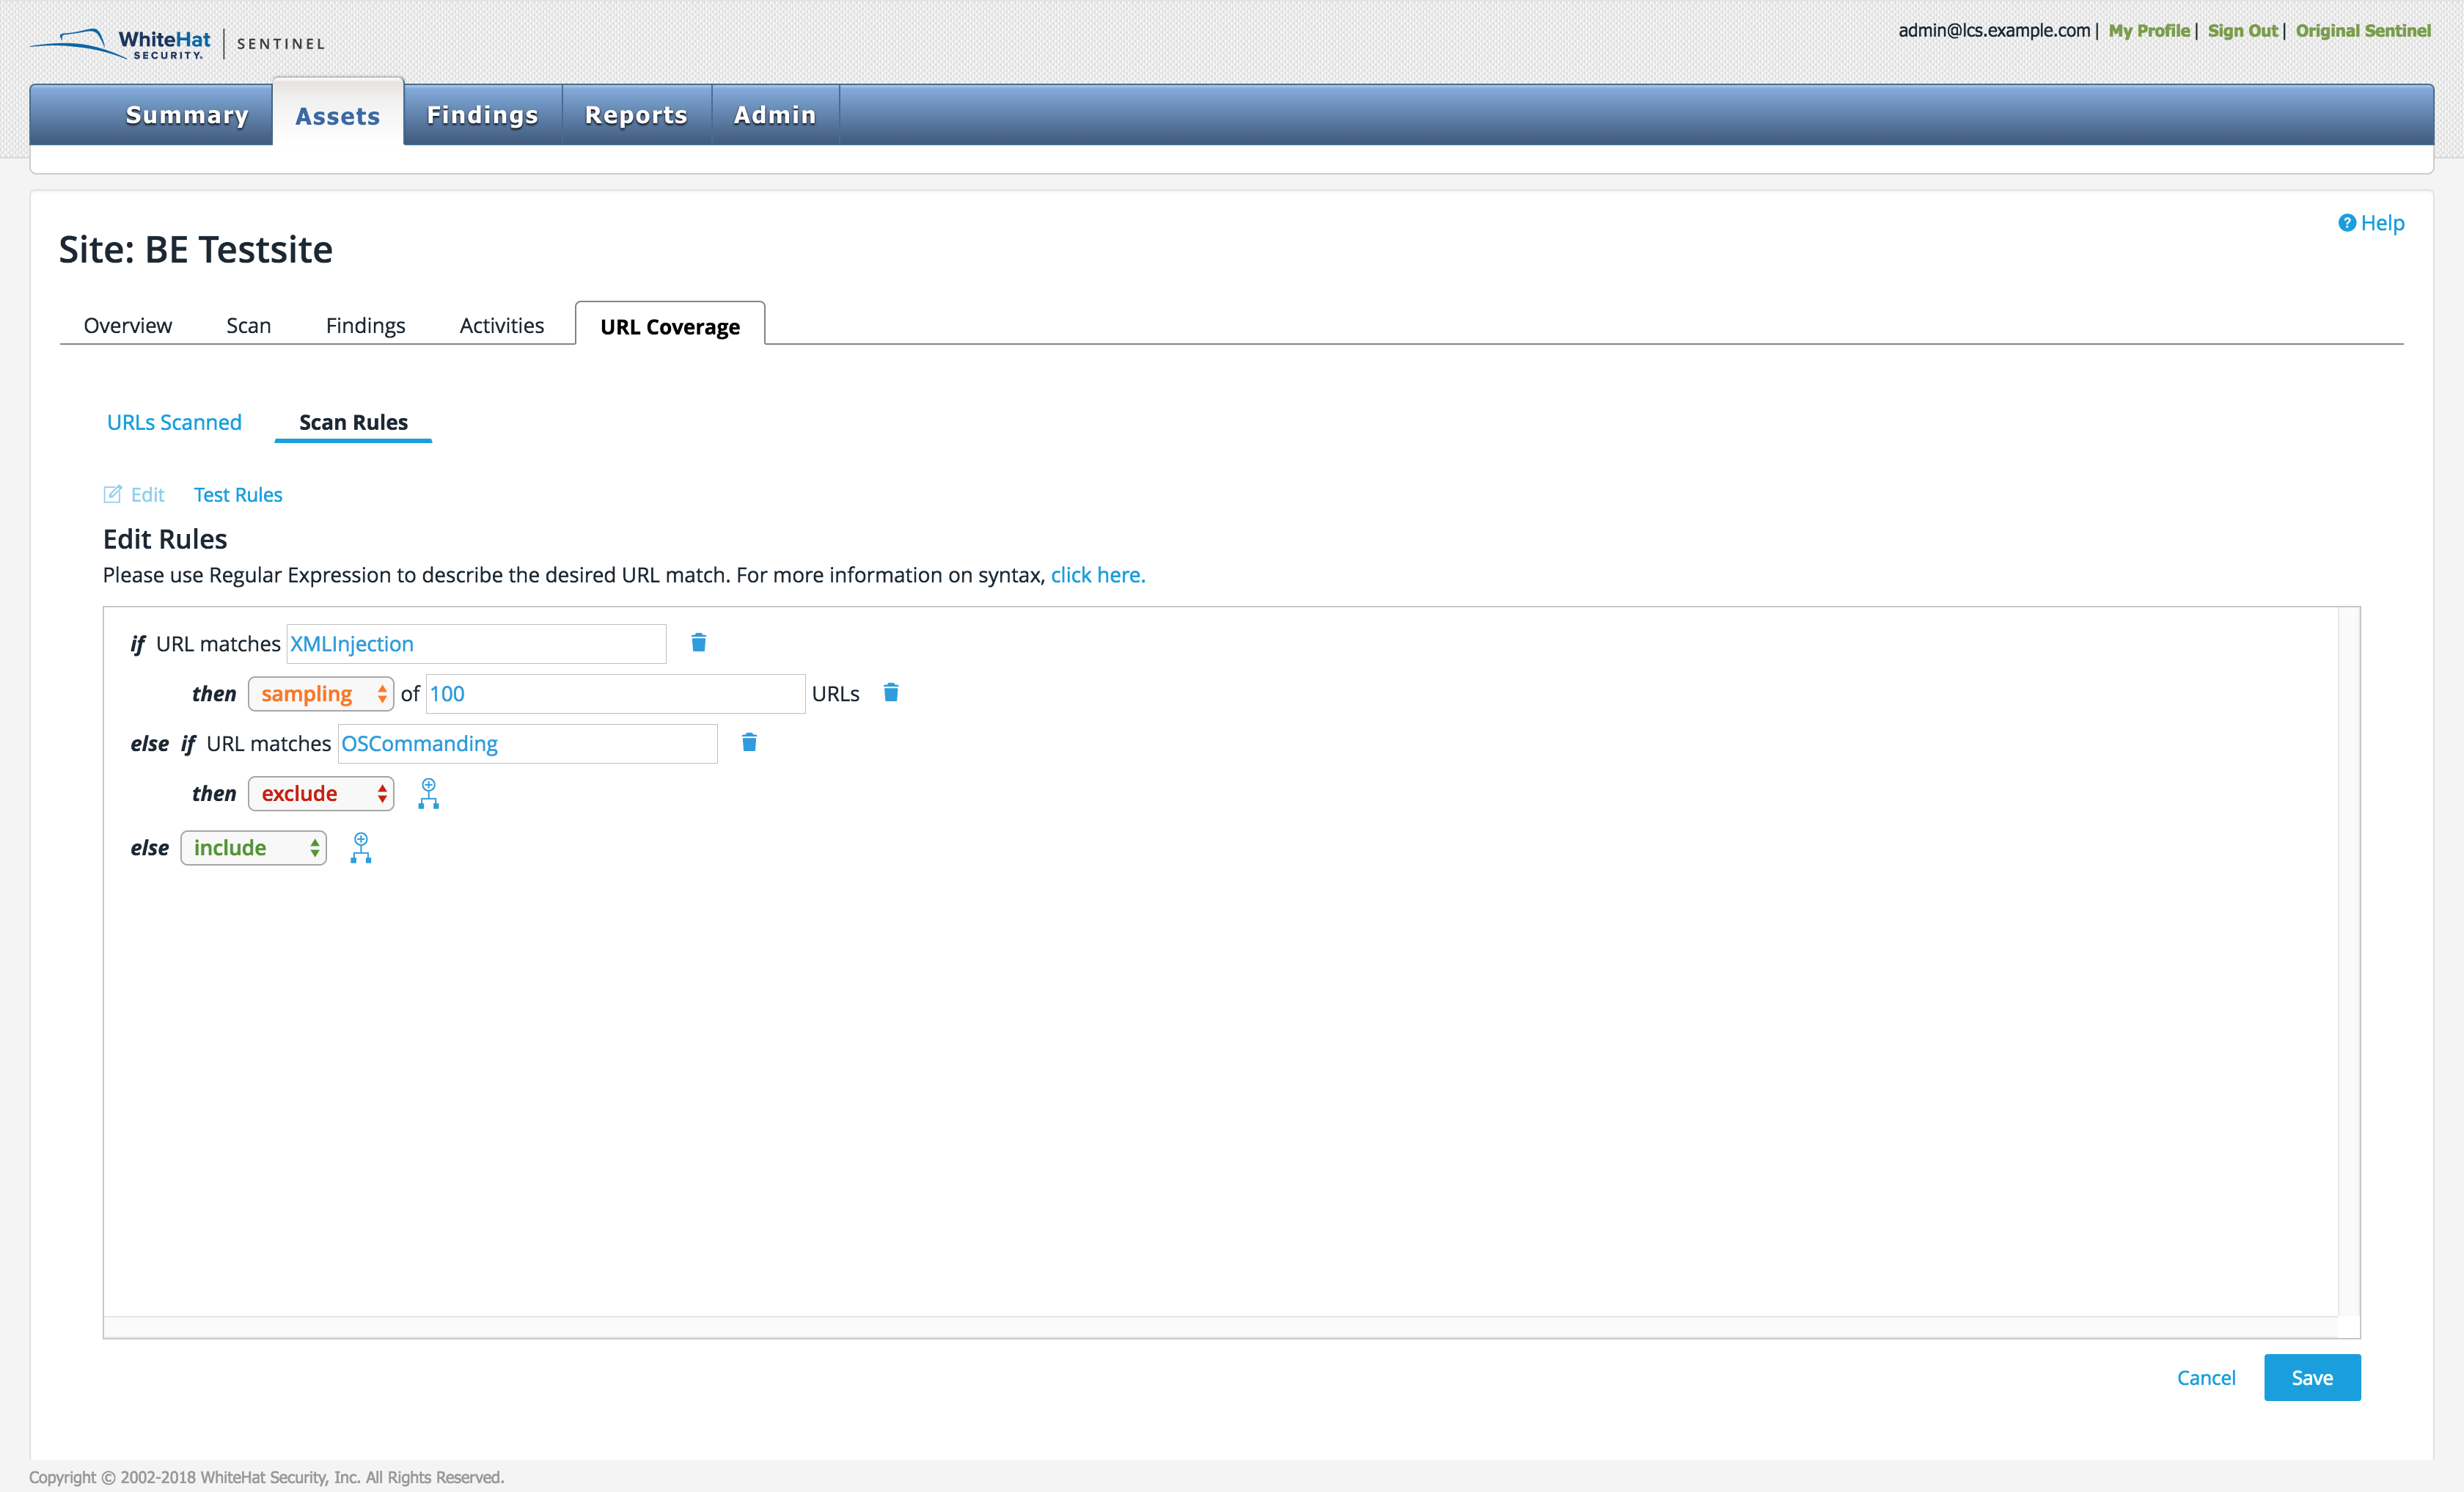
To add or change any rules, click the Edit button and enter the desired URL. Use regular expressions to describe the specific parameters you have in mind. To add a new branch to a rule, click the Branch icon.
| It is important to remember that rules are case sensitive. |

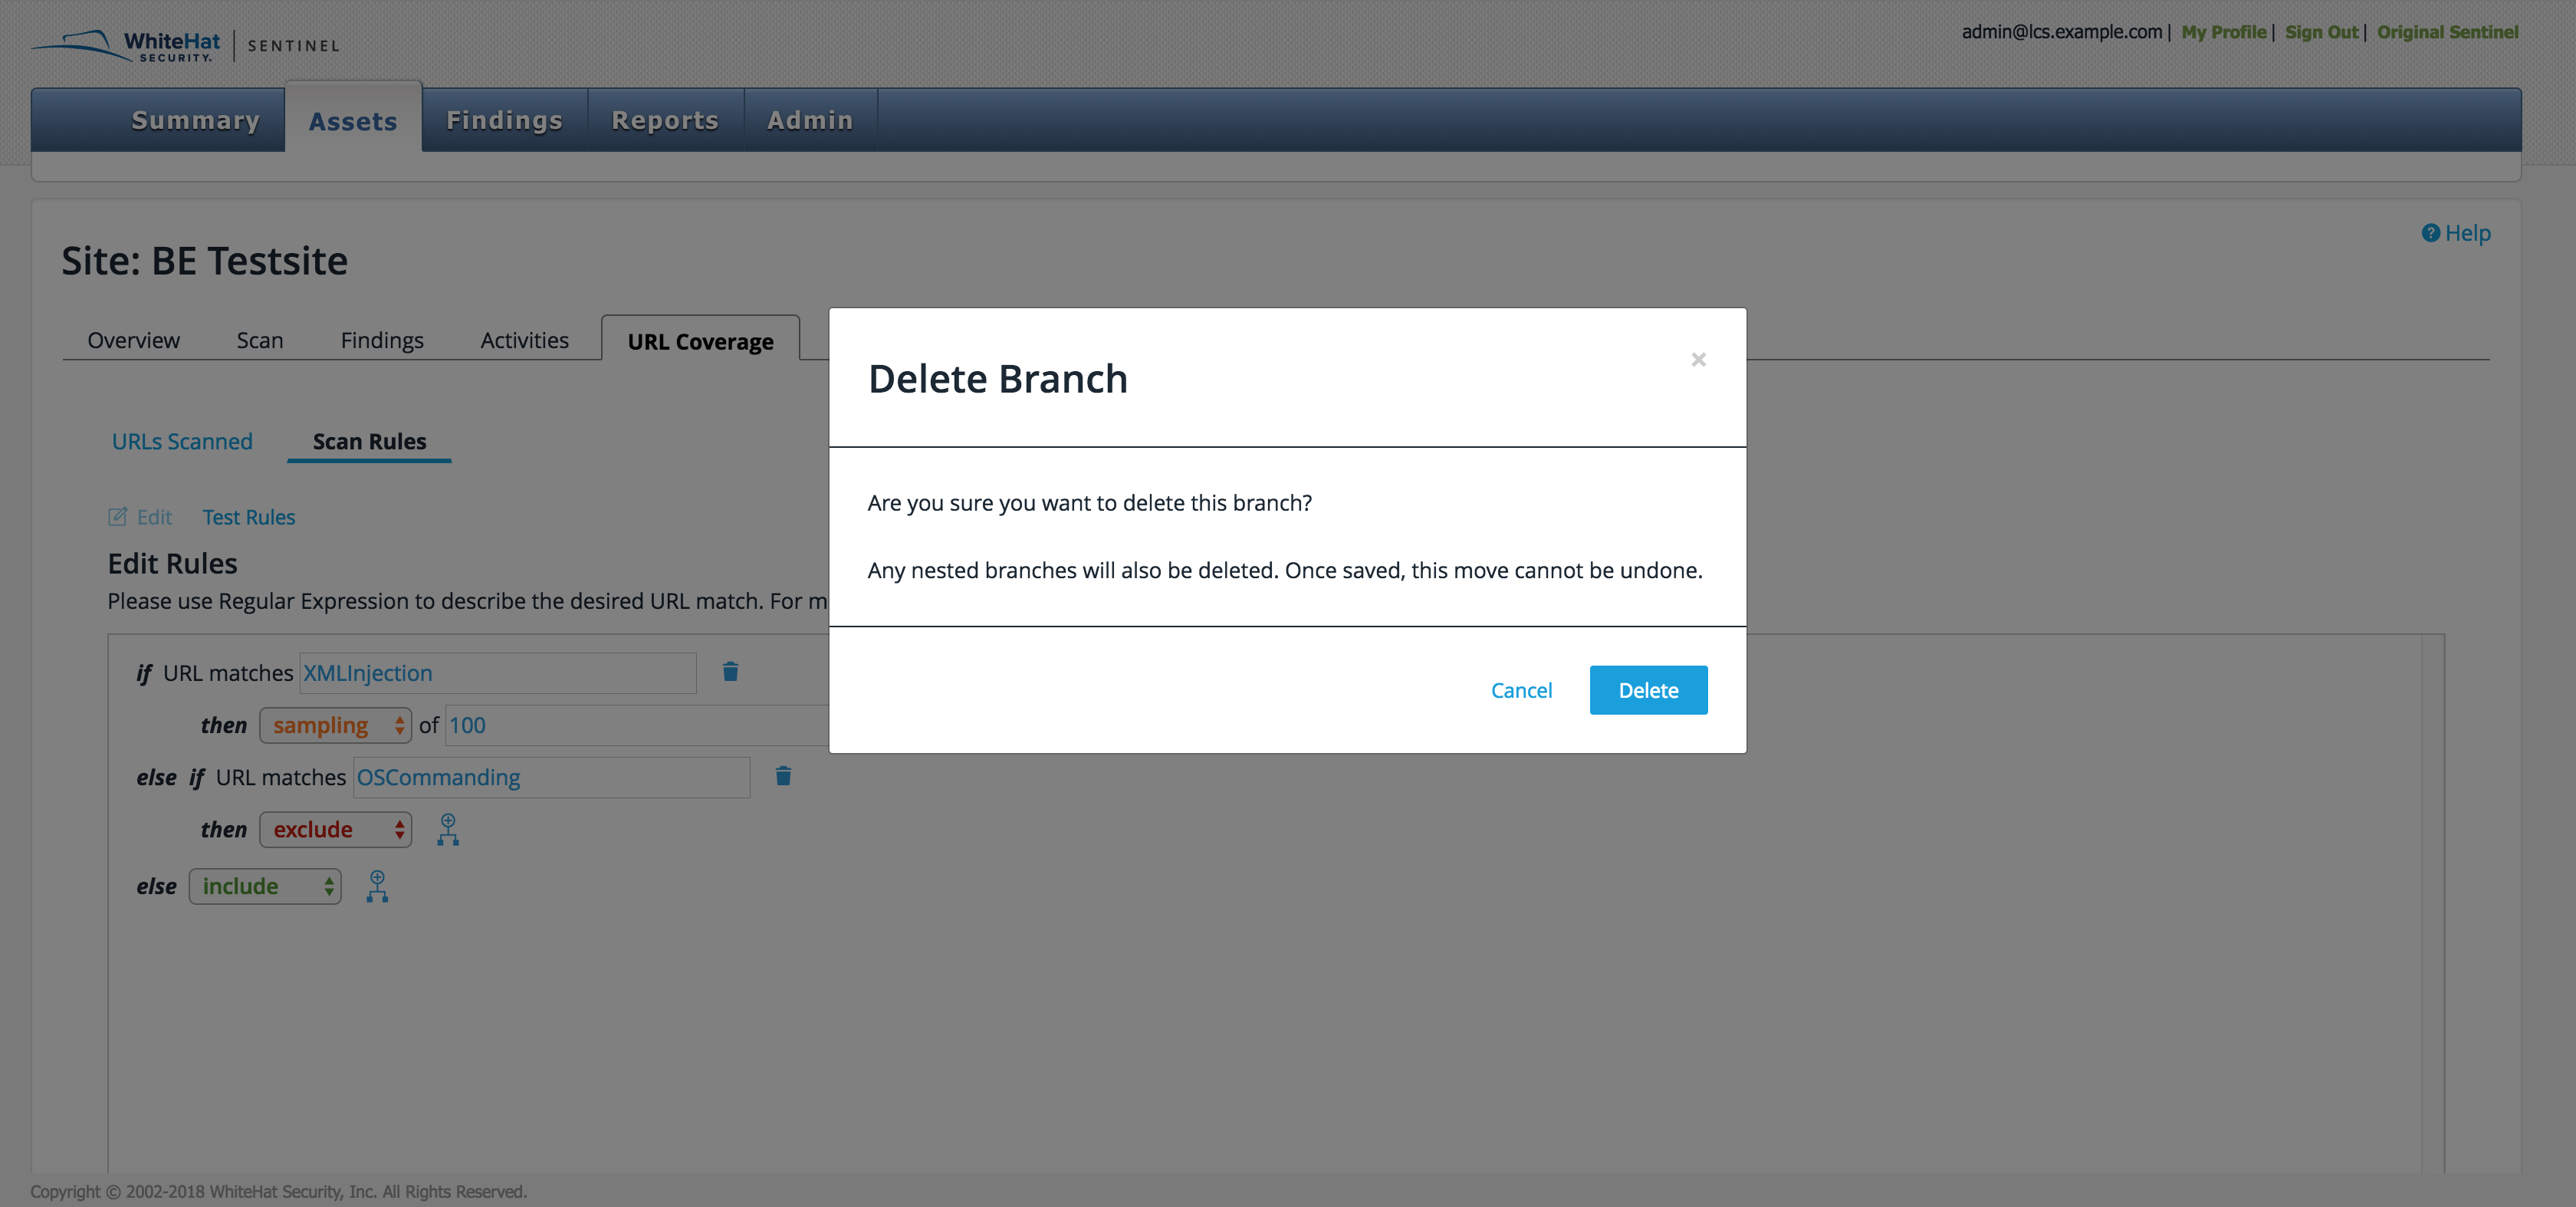
To delete a rule or a branch, click the small trash can icon immediately to the right of the rule. A window will appear confirming your choice.
The user can also add or amend sampling rules.
Regular Expressions
A regular expression (generally abbreviated to "regex") is a special text string for describing a search pattern. Regular expressions are similar to wildcards but more powerful and configurable. Instead of having to list each individual URL to be excluded, regular expressions allow users to much more efficiently and easily identify them. For more information on regular expressions, see https://www.regular-expressions.info/.
Saving and Testing Scan Rules
When you are finished creating the scan rule, click Save. A new window will appear, showing which open vulnerabilities will be affected by this change. No closed or accepted vulns are included in this count.
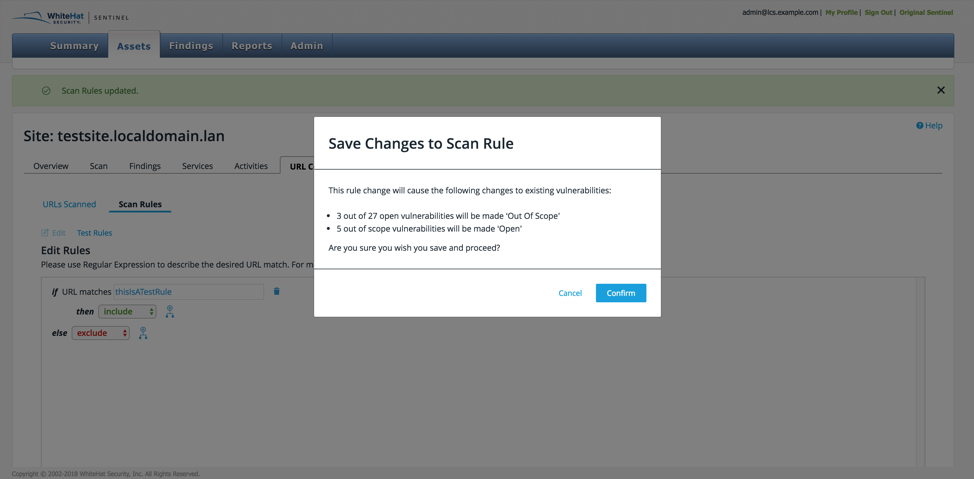
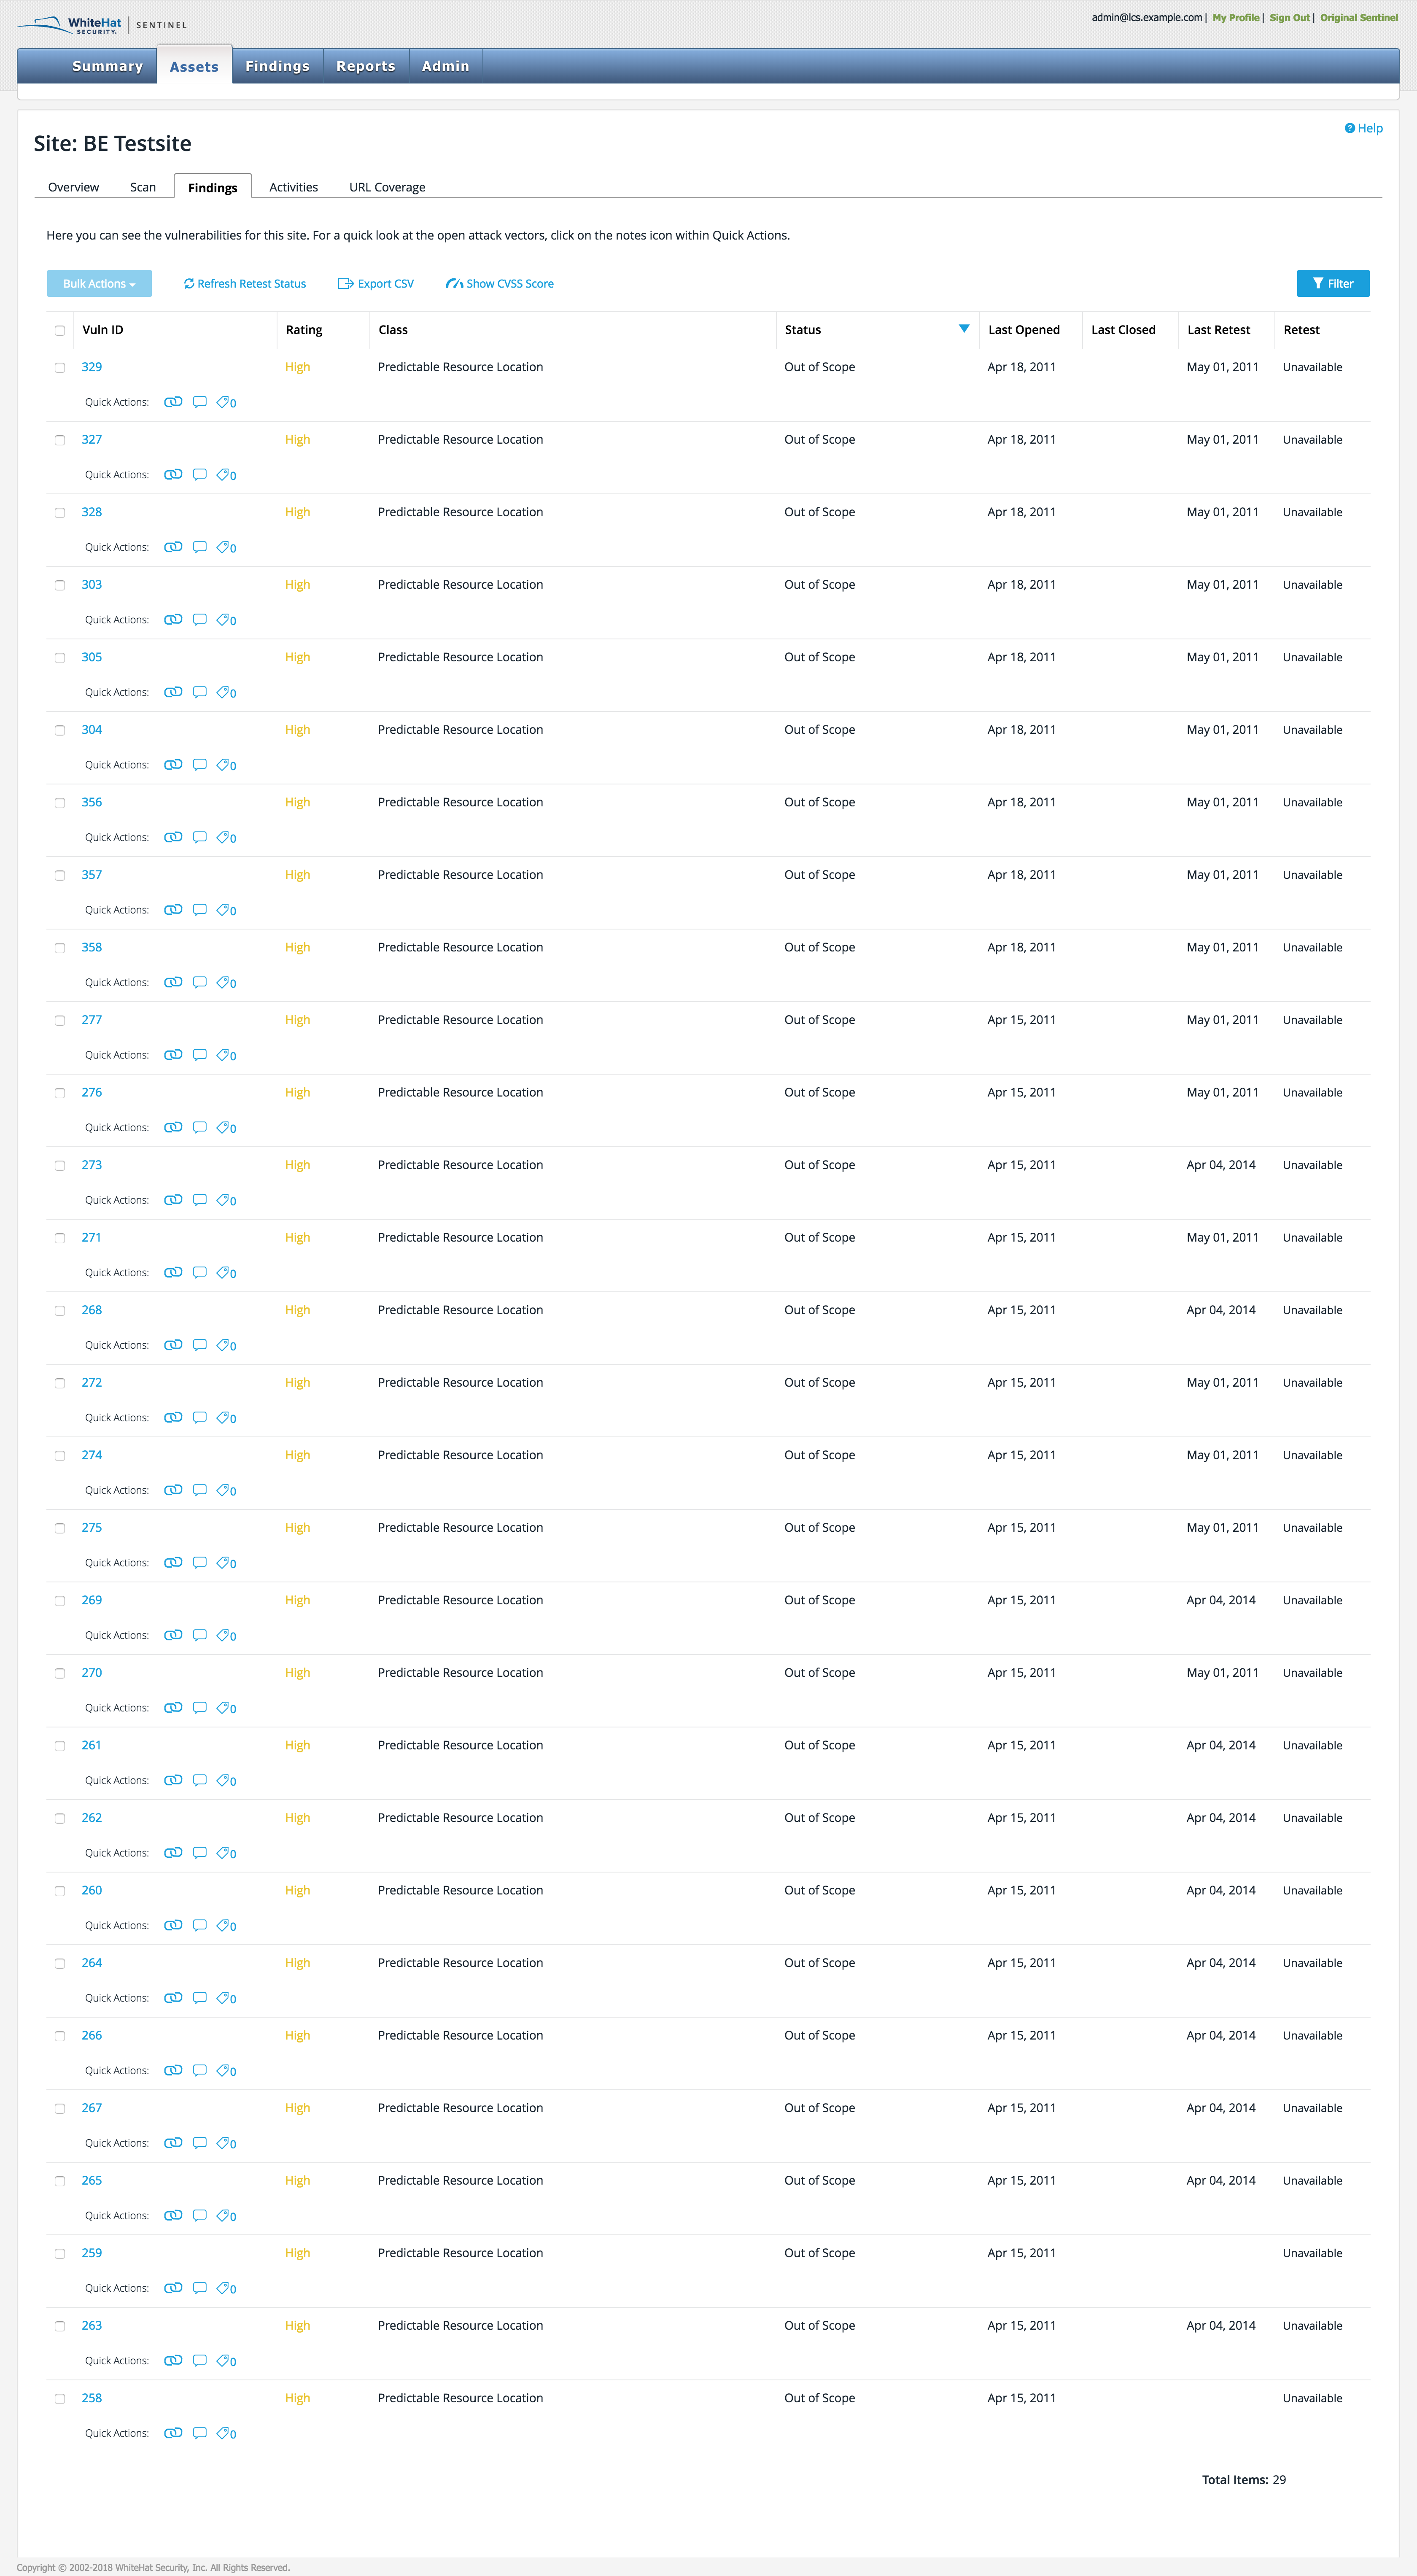
The first line shows how many open vulns will be marked Out of Scope by this change. The second line shows how many vulns ruled Out of Scope by the scan rule will become open again.
To accept the new scan rule and the resulting changes to the vulns, click Confirm. A green banner will appear at the top saying Scan Rules updated. This will result in updates to the list of affected vulnerabilities, the status as listed on individual vuln pages, and the activity log.


To make further changes to your proposed scan rule, click Cancel and continue with the editing process.
Testing Custom Scan Rules
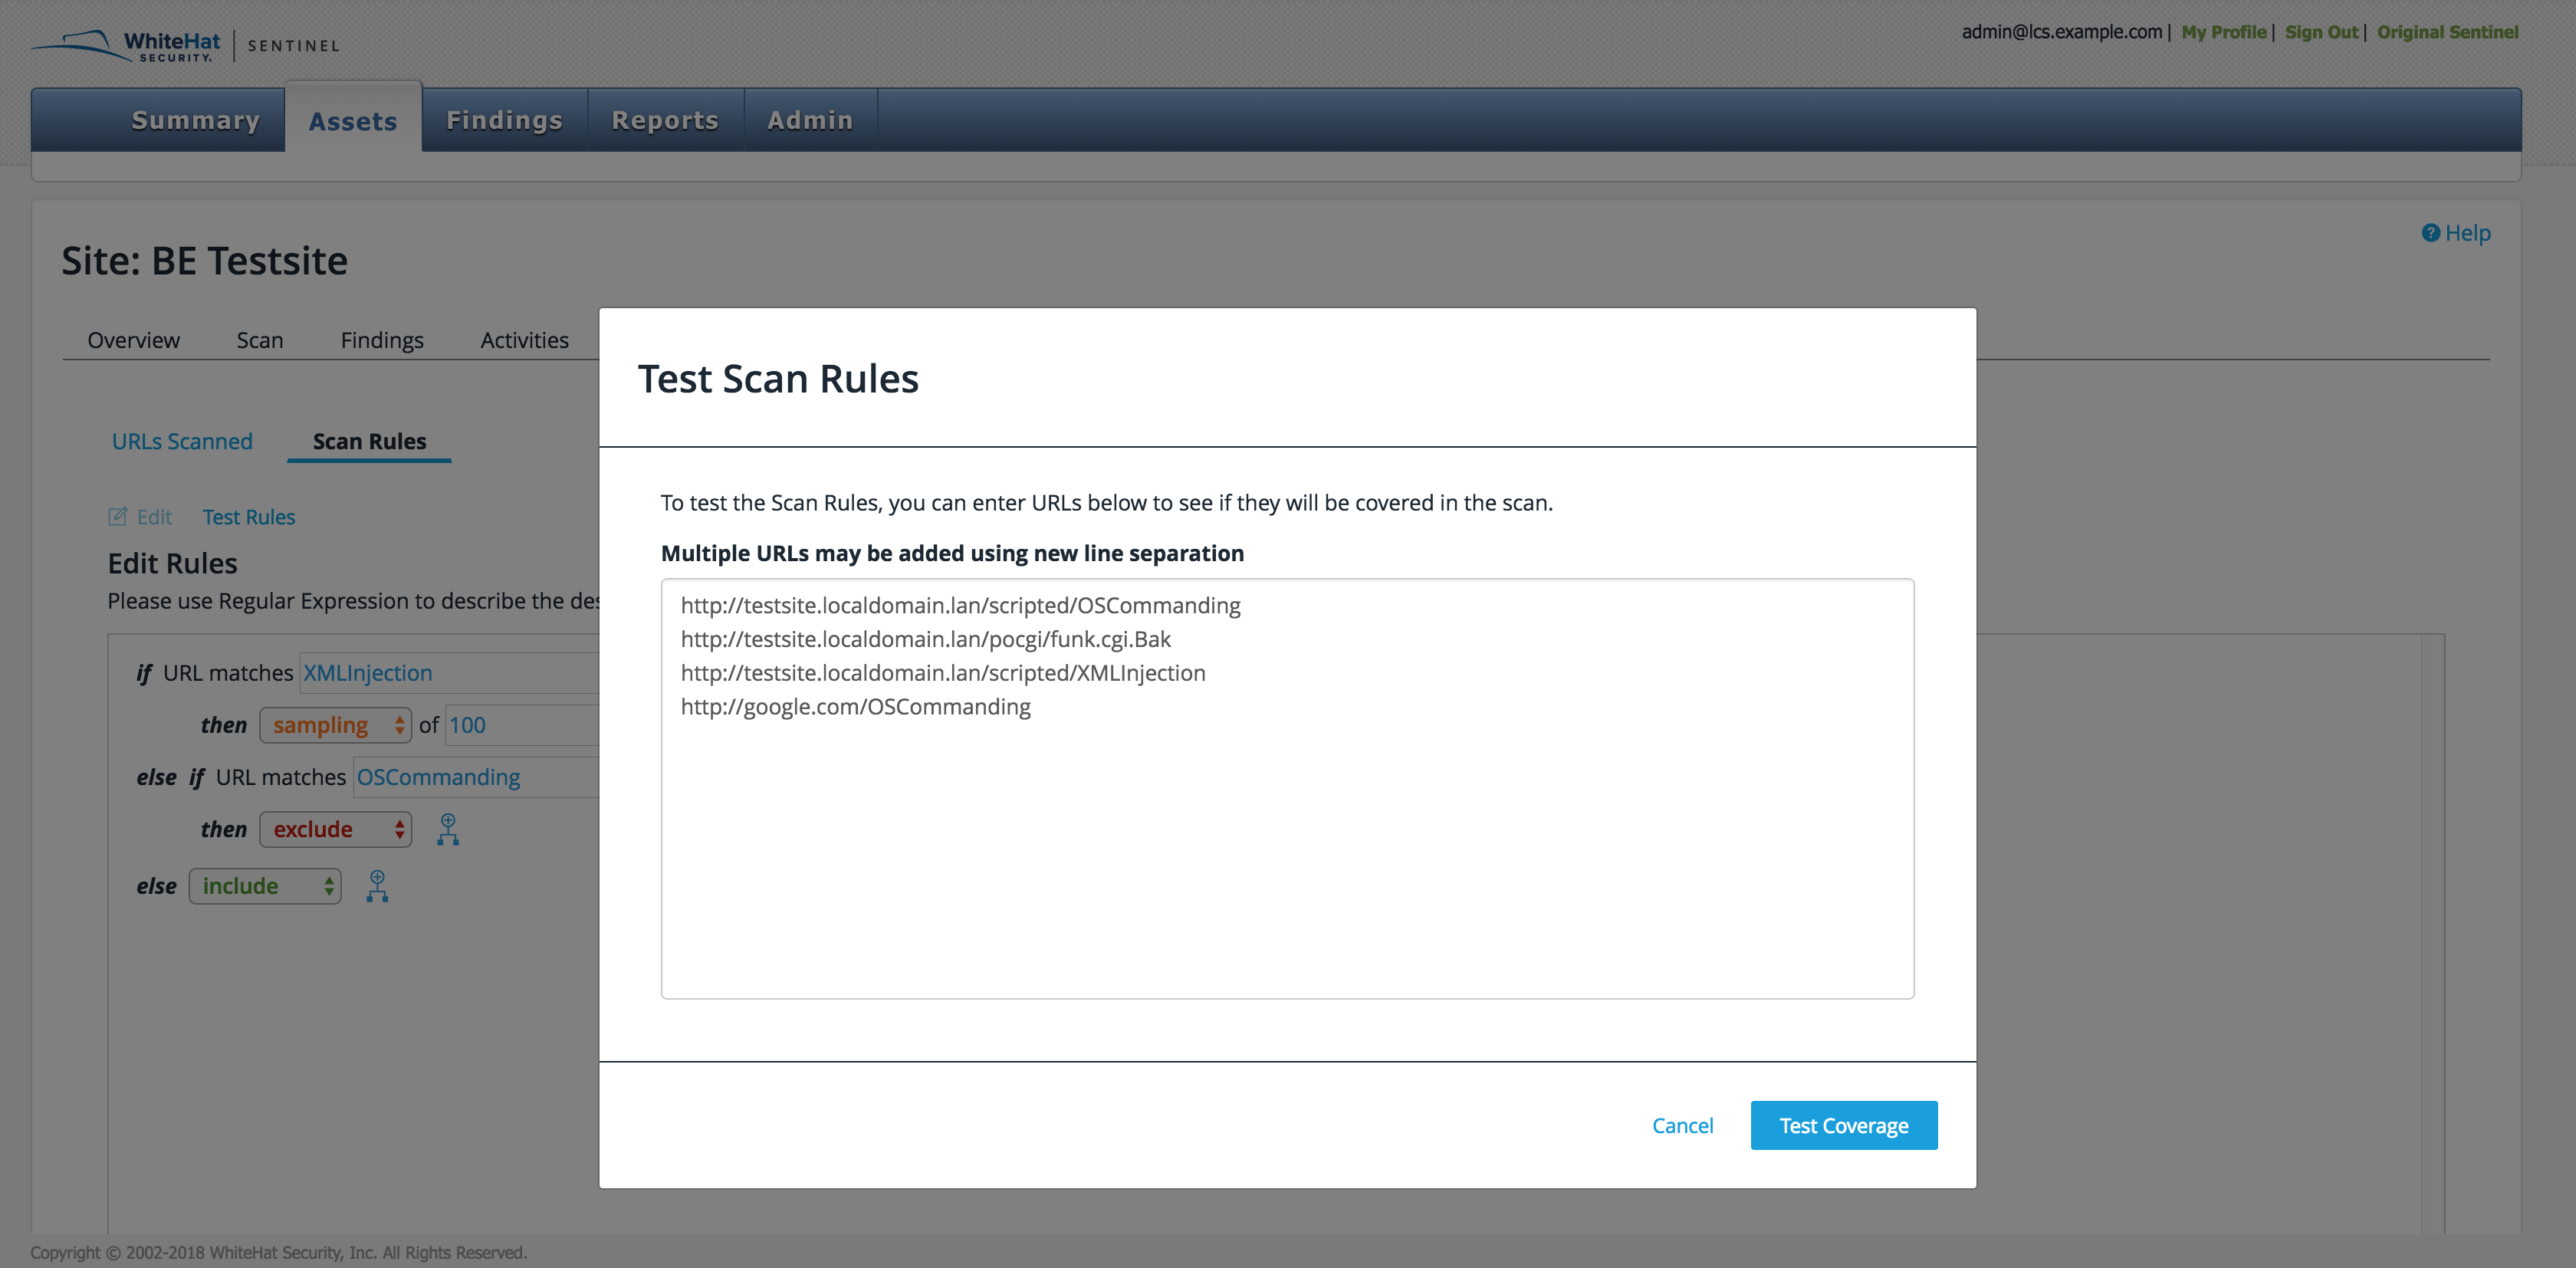
The Test Rules button gives the user the ability to test given URLs against the scan rule displayed. When a user clicks Test Rules, a window appears for the URLs. To add more than one at a time, separate the URLs by a new line. When the list is complete, click Test Coverage.
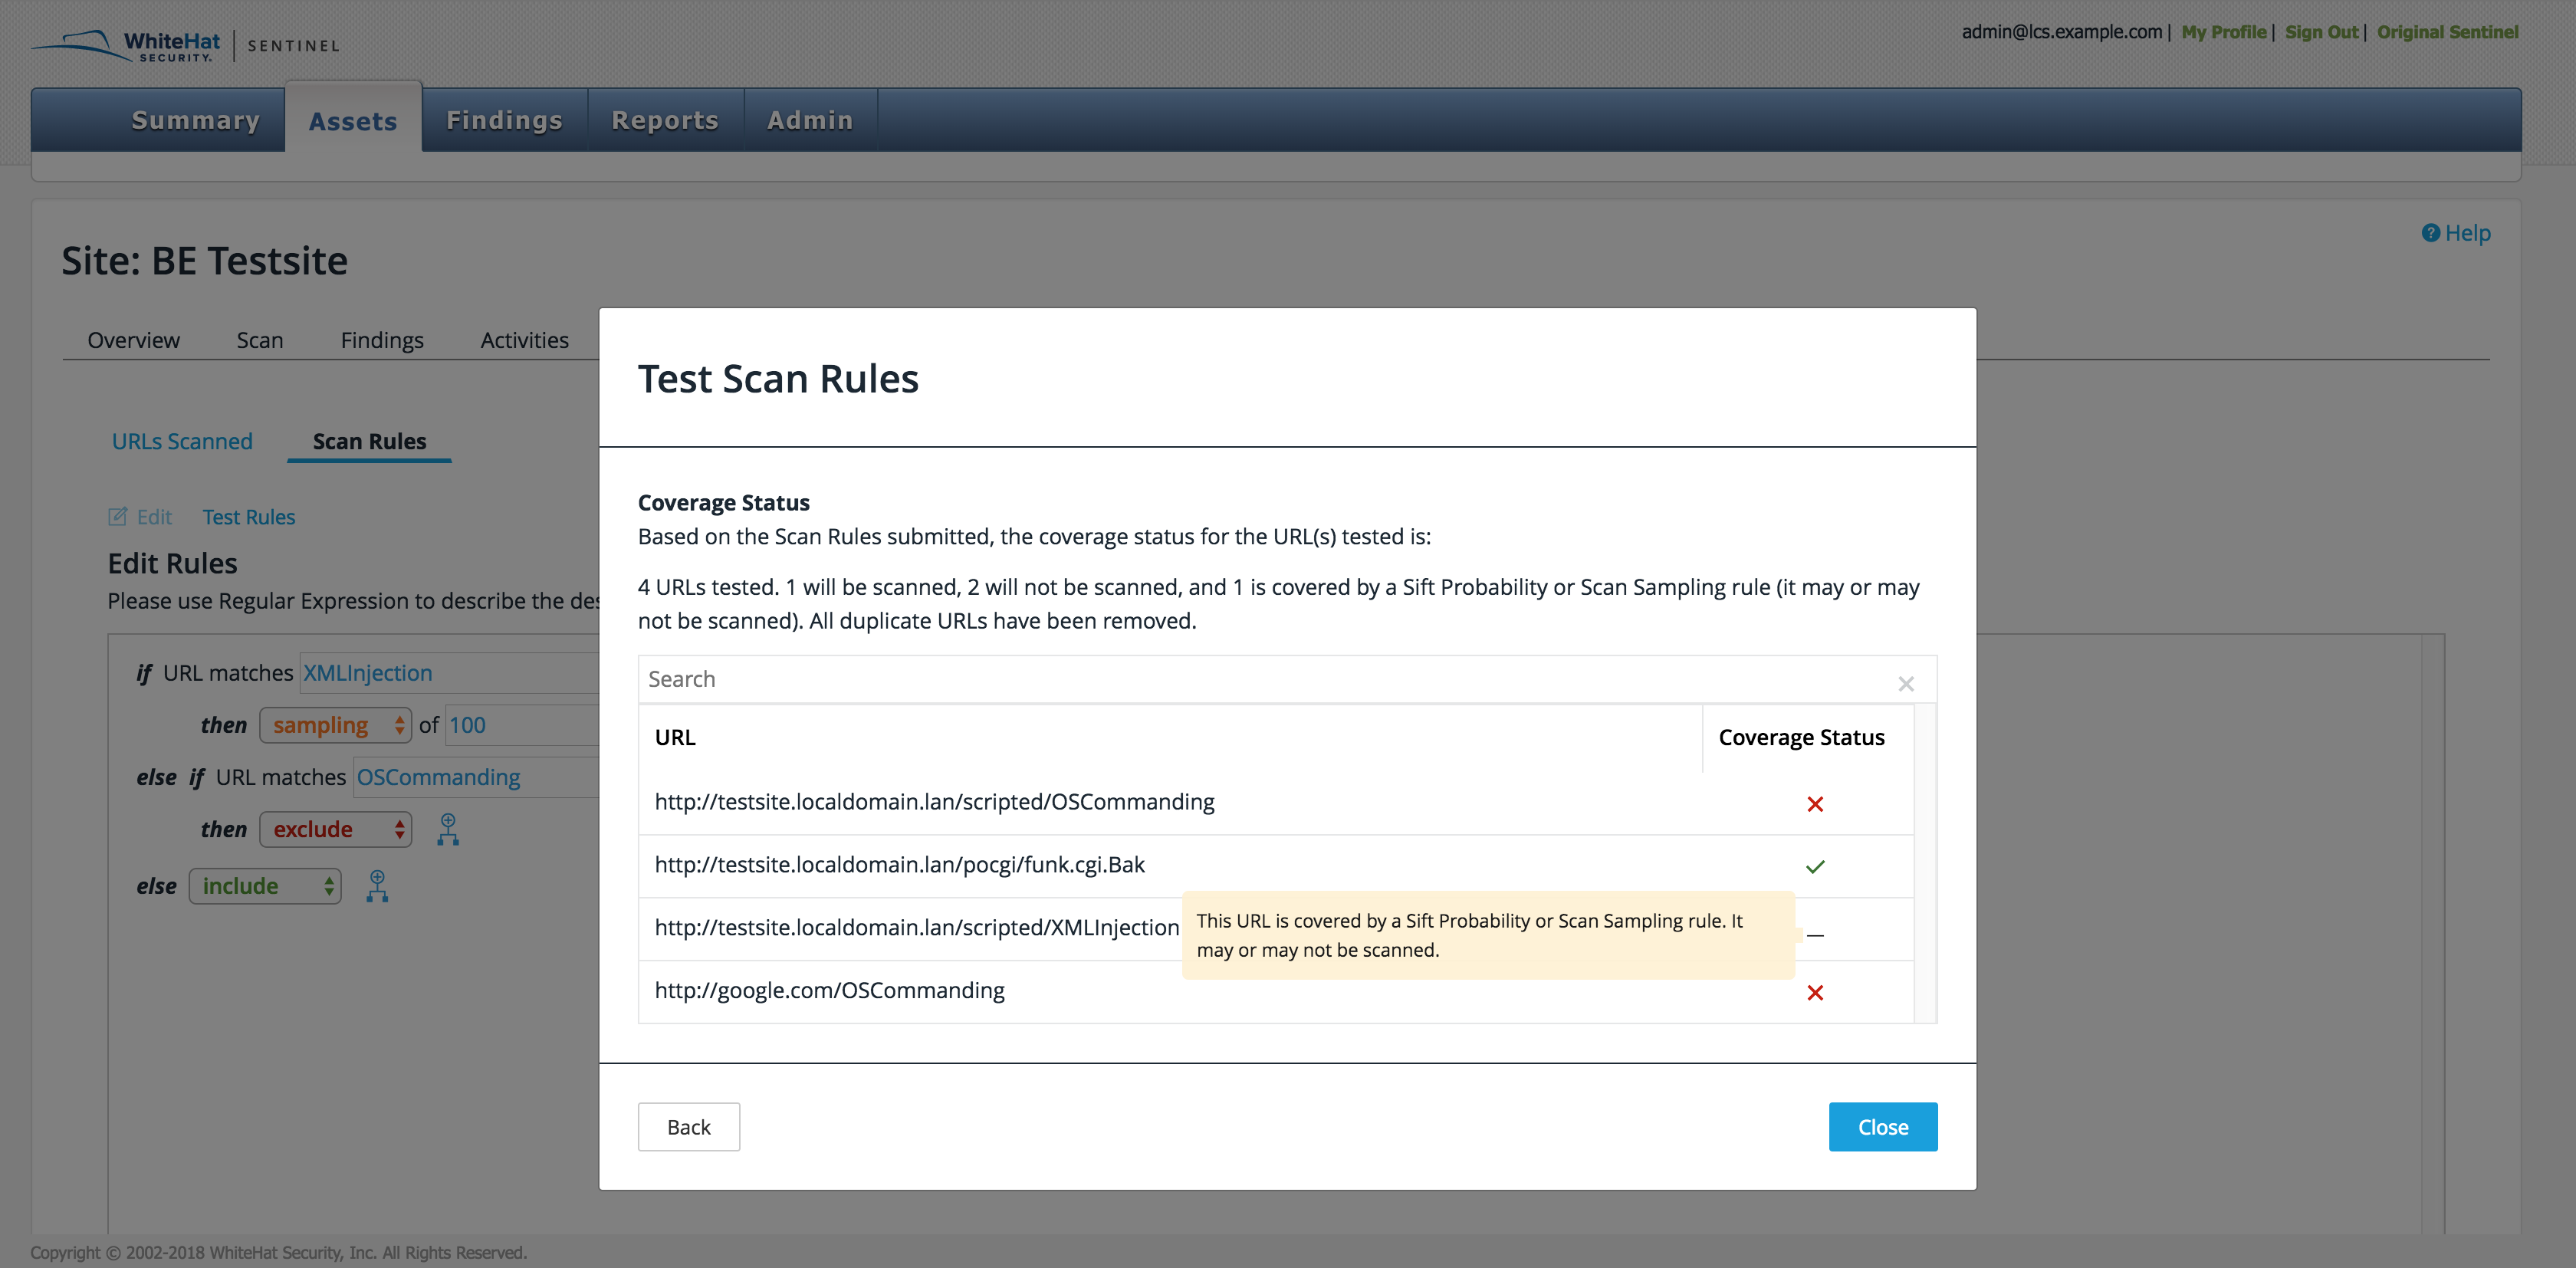
A new screen will appear, showing how many of the URLs will be scanned, will not be scanned, or may be scanned. (The latter result is due to complex rules such as sift, which can only be set up by the TRC.) A table shows the status of each URL: a checkmark for yes, an X for no, and a dash for maybe. Duplicate URLs are removed from the list.
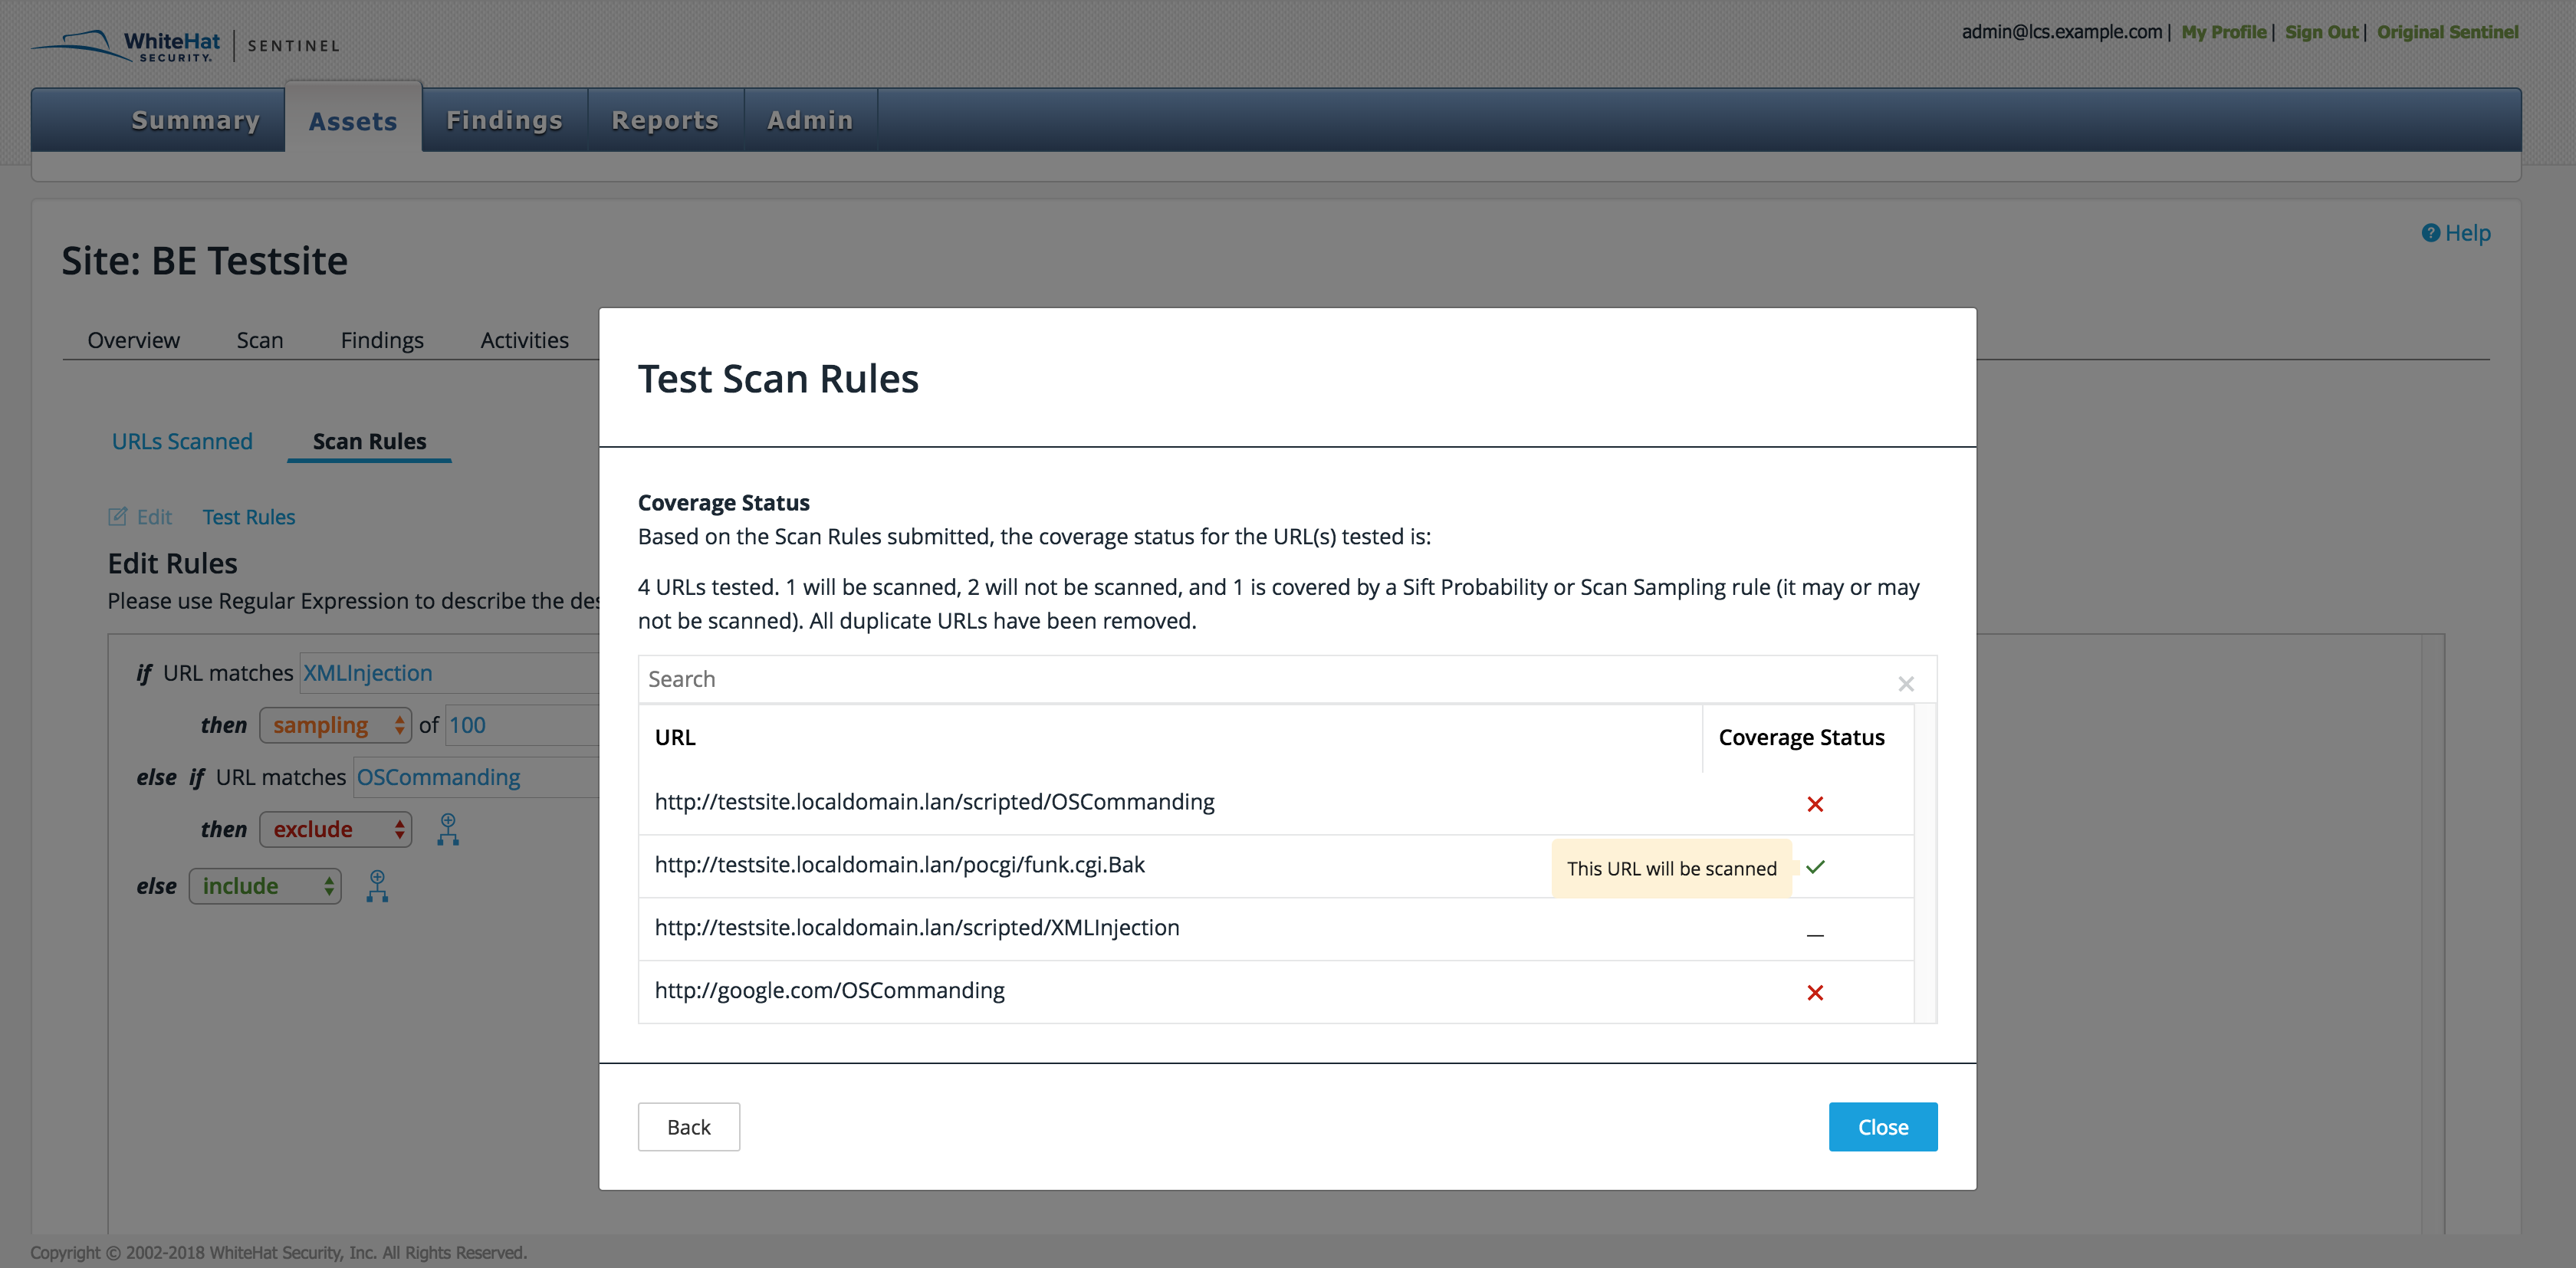
Icons can be hovered over for messages.
The user can also search the table for specific URLs.
Working with User-Added URLs
This section describes how to work with user-added URLs in your whitelist and blacklist scans.
To view, add, or delete user-added URLs:
-
Select the Asset Management tab and click on the name of a DAST asset.
-
Click the URL Coverage sub-tab and then click Scan Rules.
-
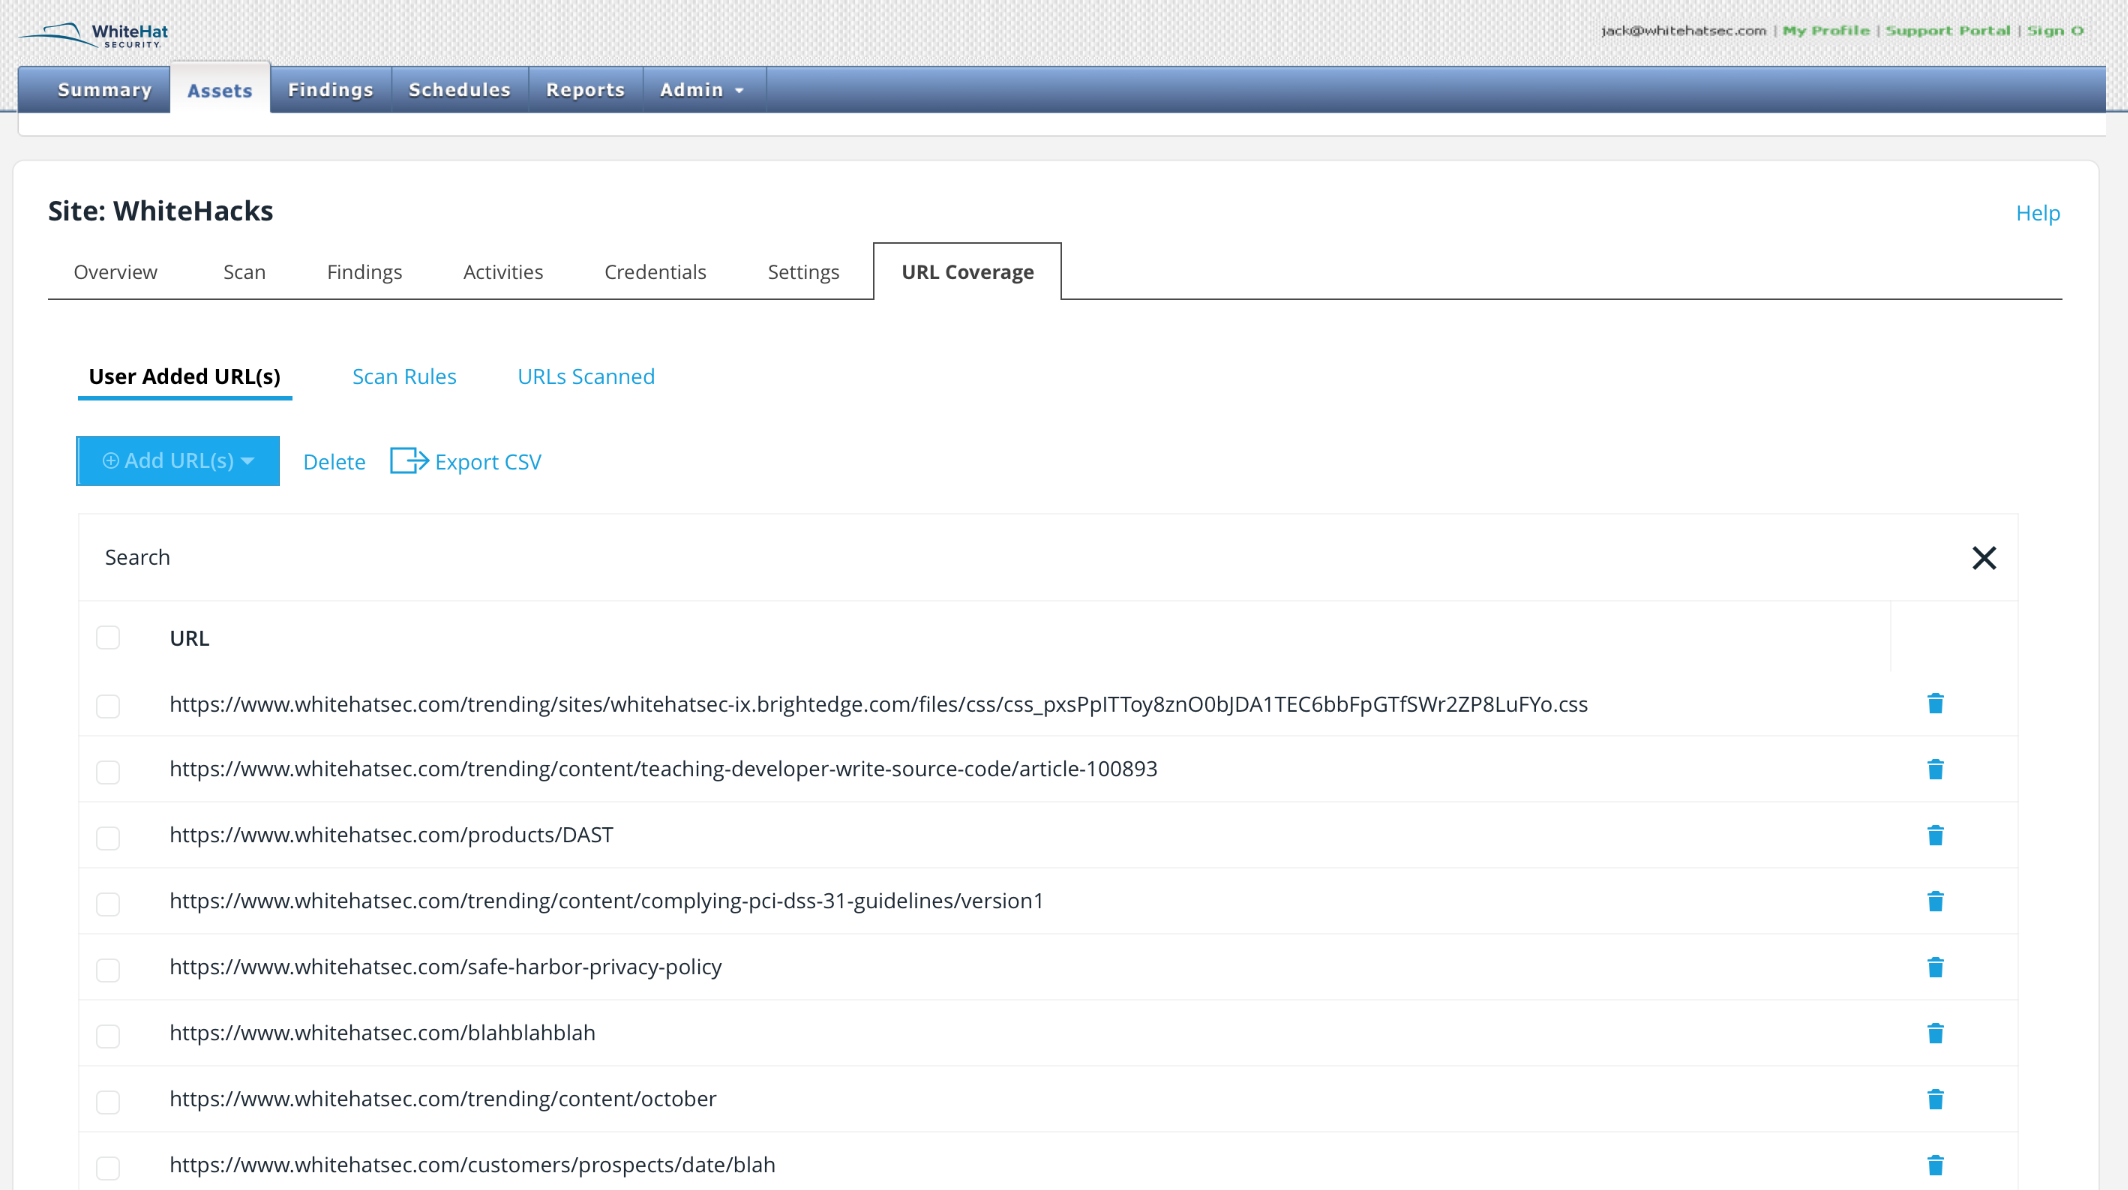
Click User Added URL(s). The windows displays the existing URLs that have been added to the scan.
-
To add a URL, click the Add URL(s) link. You can add URLs manually or through a browser.
-
To delete a URL, click a checkbox and select Delete or click the trash icon.
Additional Information
Any URL that is not on the base-host or an associated hostname will be considered not scanned as the scanner will not have access to it.
If the user has no scan rule for a particular site, the default is Include All: everything will be scanned.
The TRC can create some scan rules that the user cannot create, such as replace and sift rules. However, you can view and delete these rules, as well as edit the sift probability.
Replace simply finds any instances in the URL of the first regex and replaces it with the second, then continues through the scan rule.
Sift is a probability between 0 and 1 of whether the URL will continue down the then route. If the sift is 1, there is a 100% chance it will do so; if it is 0, there is a 100% chance it will not.