Configure MAST Settings
Select Configure MAST Settings to set your default reporter and assignee, map assets or groups to Jira projects, and map ticket priority to Continuous Dynamic ratings.
-
To Configure MAST Settings, select Enable MAST integration.
Until the radio button is set to Yes, no other configuration options will be available. 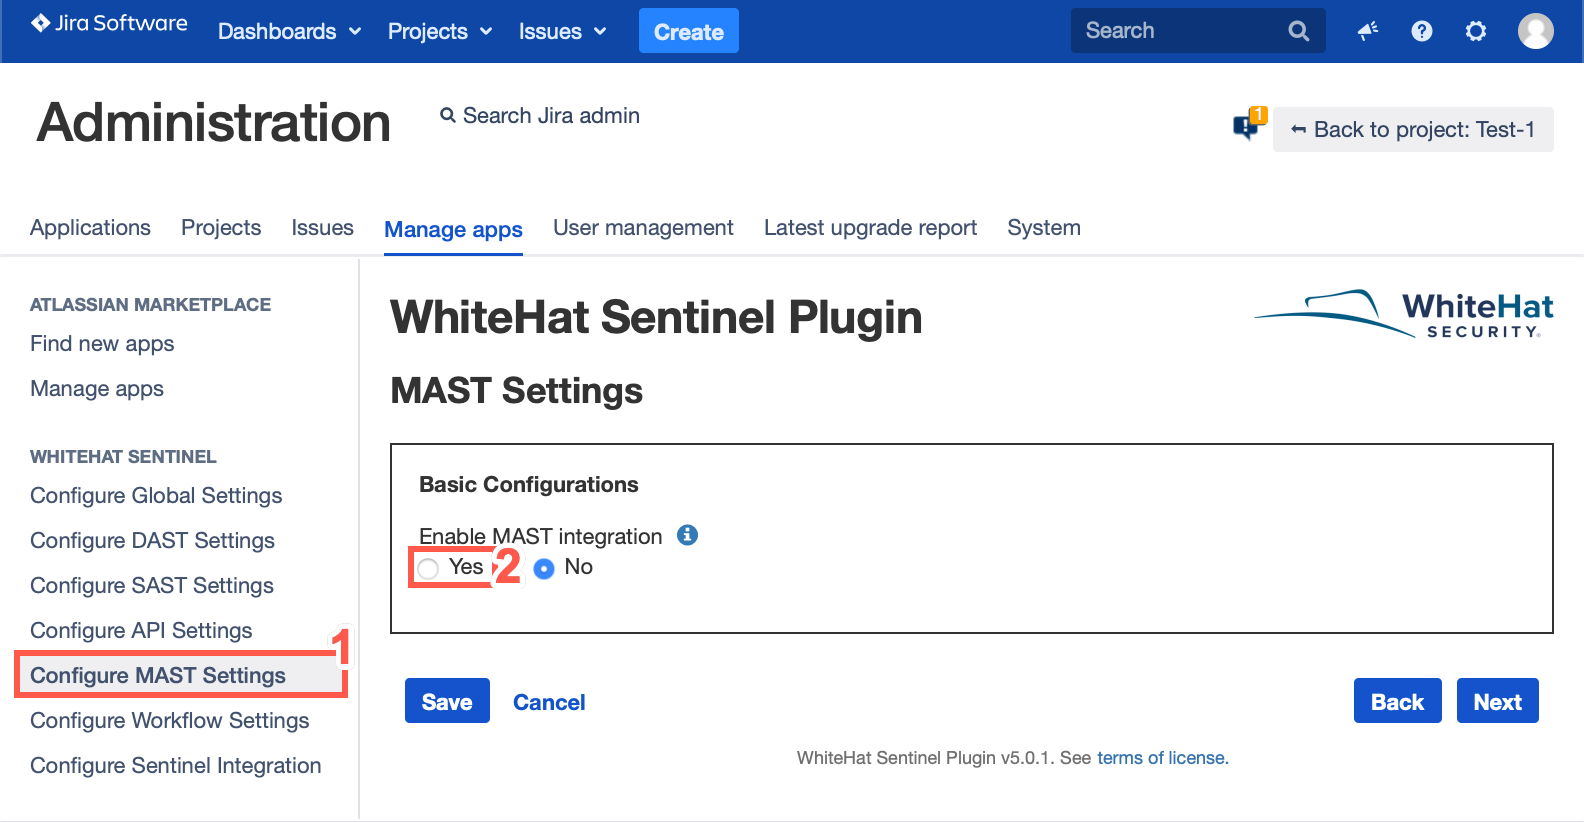
-
Select the Yes radio button. Once you have selected Yes, you will see the configuration settings. This will allow you to:
-
Set the default Reporter for Jira tickets generated by the plugin
-
Set the default Assignee for Jira tickets generated by the plugin based on asset-and-project combinations
-
Map Vulnerability Ratings to Jira Priorities
-
Configure Jira Tickets
-
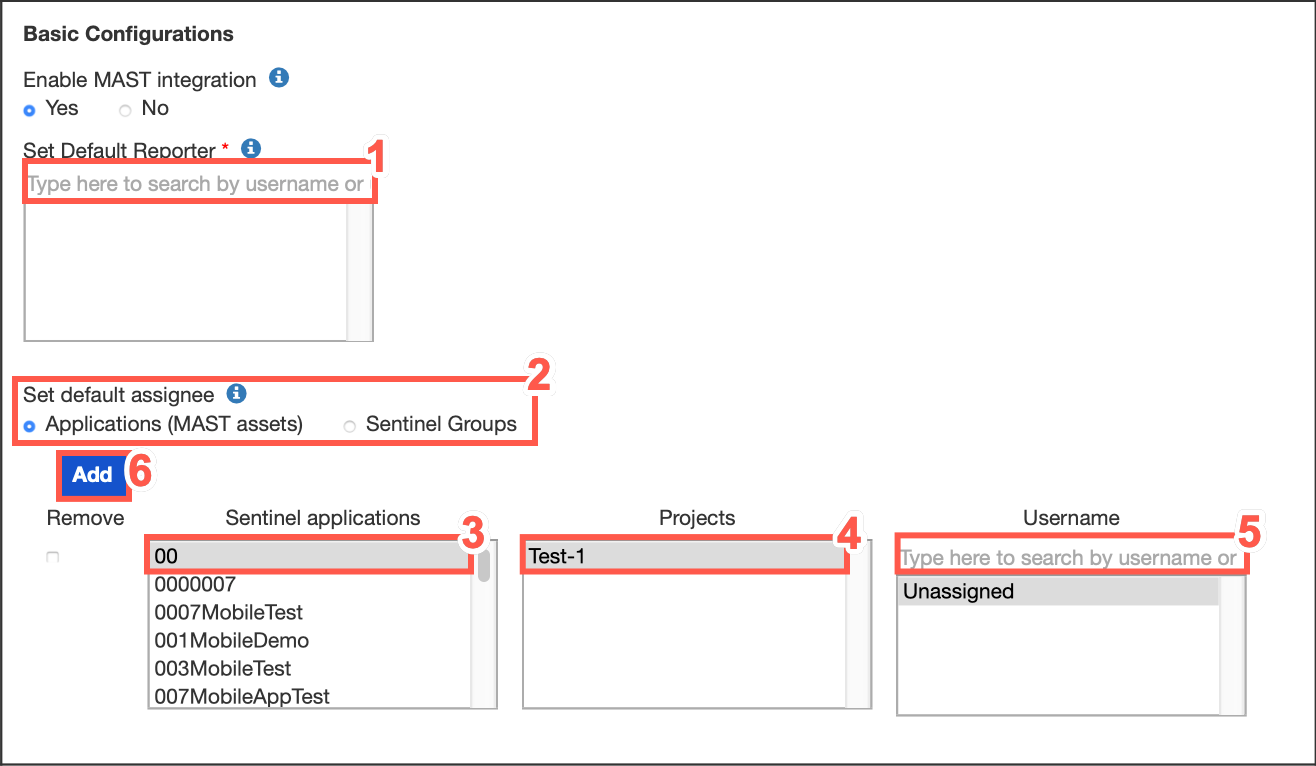
Basic Configurations
-
Enter the name or email of your default reporter in the search bar, then select your default reporter.
-
Set the default Jira assignee for a given application and associated Jira project. (This will map these assets to the Jira project(s) in question.) To set default assignees by group rather than asset, select the Continuous Dynamic Groups radio button. In this case, all assets in a group will be associated to the Jira project selected.
-
Select the asset from the list of Sentinel applications.
-
Select a project from the Projects list to assign.
-
Type the name or email of your default assignee in the search bar provided and then select them from the list.
-
To create additional default assignees and asset-to-project mappings, click Add.
| Only one user can be selected as the default reporter in Jira. Only one user can be set as the default assignee to any given asset-project mapping. If Unassigned is selected for the Username field, any tickets generated will show the default assignee for that project. |
Reporter Permissions Required
A reporter must have the following privileges for the project:
-
Assign Issue
-
Close Issue
-
Create Issue
-
Edit Issue
-
Modify Reporter
-
Resolve Issue
-
Transition Issue
-
Comment Issue
If you attempt to assign a user as reporter who does not have these permissions for the appropriate project, you will receive an error message.
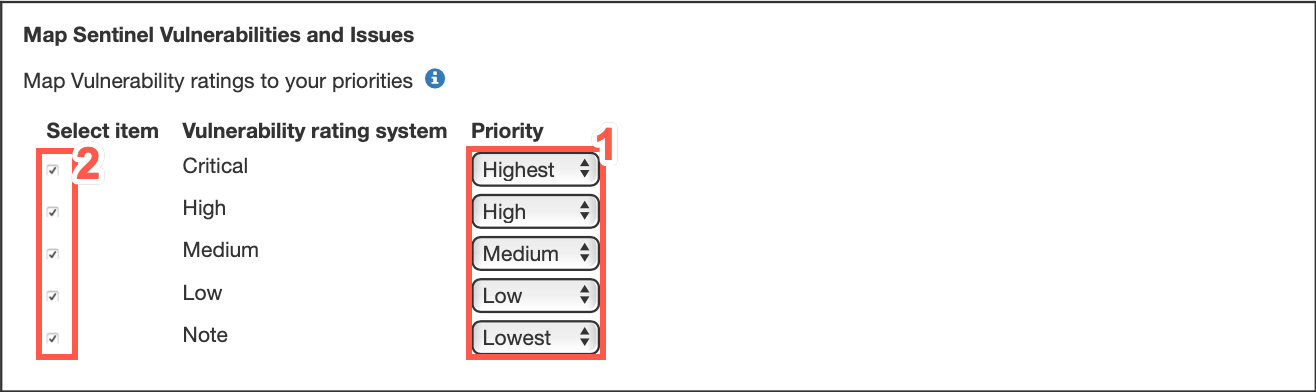
Mapping Vulnerability Ratings to Jira Priorities
-
The default mapping will associate the most severe rating with the highest Jira priority. You can change this mapping using the drop-down lists.
For more information on choosing Legacy Ratings or Advanced Ratings, see Understanding the Rating Methodologies.
-
Select the vulnerability ratings that should (checked) or should not (unchecked) be used to create Jira tickets.
Jira tickets will now be created for vulnerabilities rated Critical, High, or Medium. Critical vulnerabilities will receive the Highest Jira priority, High risk vulnerabilities will receive a Jira priority of High, and Medium risk vulnerabilities will receive a Jira priority of Medium. Jira tickets will not be created for vulnerabilities with a rating of Low or Note. In addition it is also possible to limit vulnerabilities that will result in Jira tickets based on the Continuous Dynamic tags associated to the vulnerability.
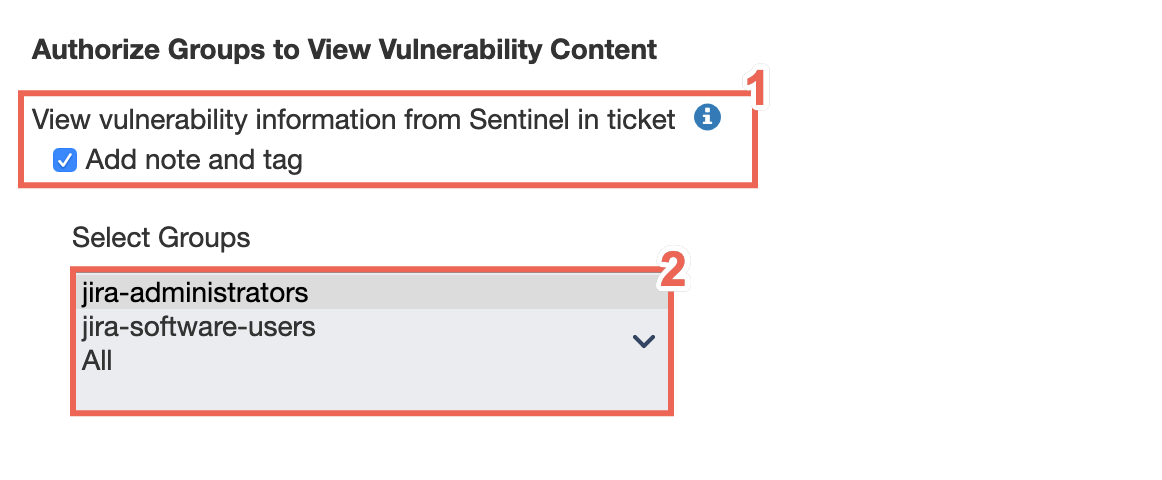
Set Vulnerability Viewing Authorizations for MAST Vulnerabilities
You can authorize Jira groups to view content from the vulnerabilities discovered via MAST testing, including vulnerability notes and tags.
-
Select the relevant radio buttons to configure the type of vulnerability information that is visible to specific groups.
-
Select a group from the Select Groups table.
| This information will appear in the summary section of your tickets. |
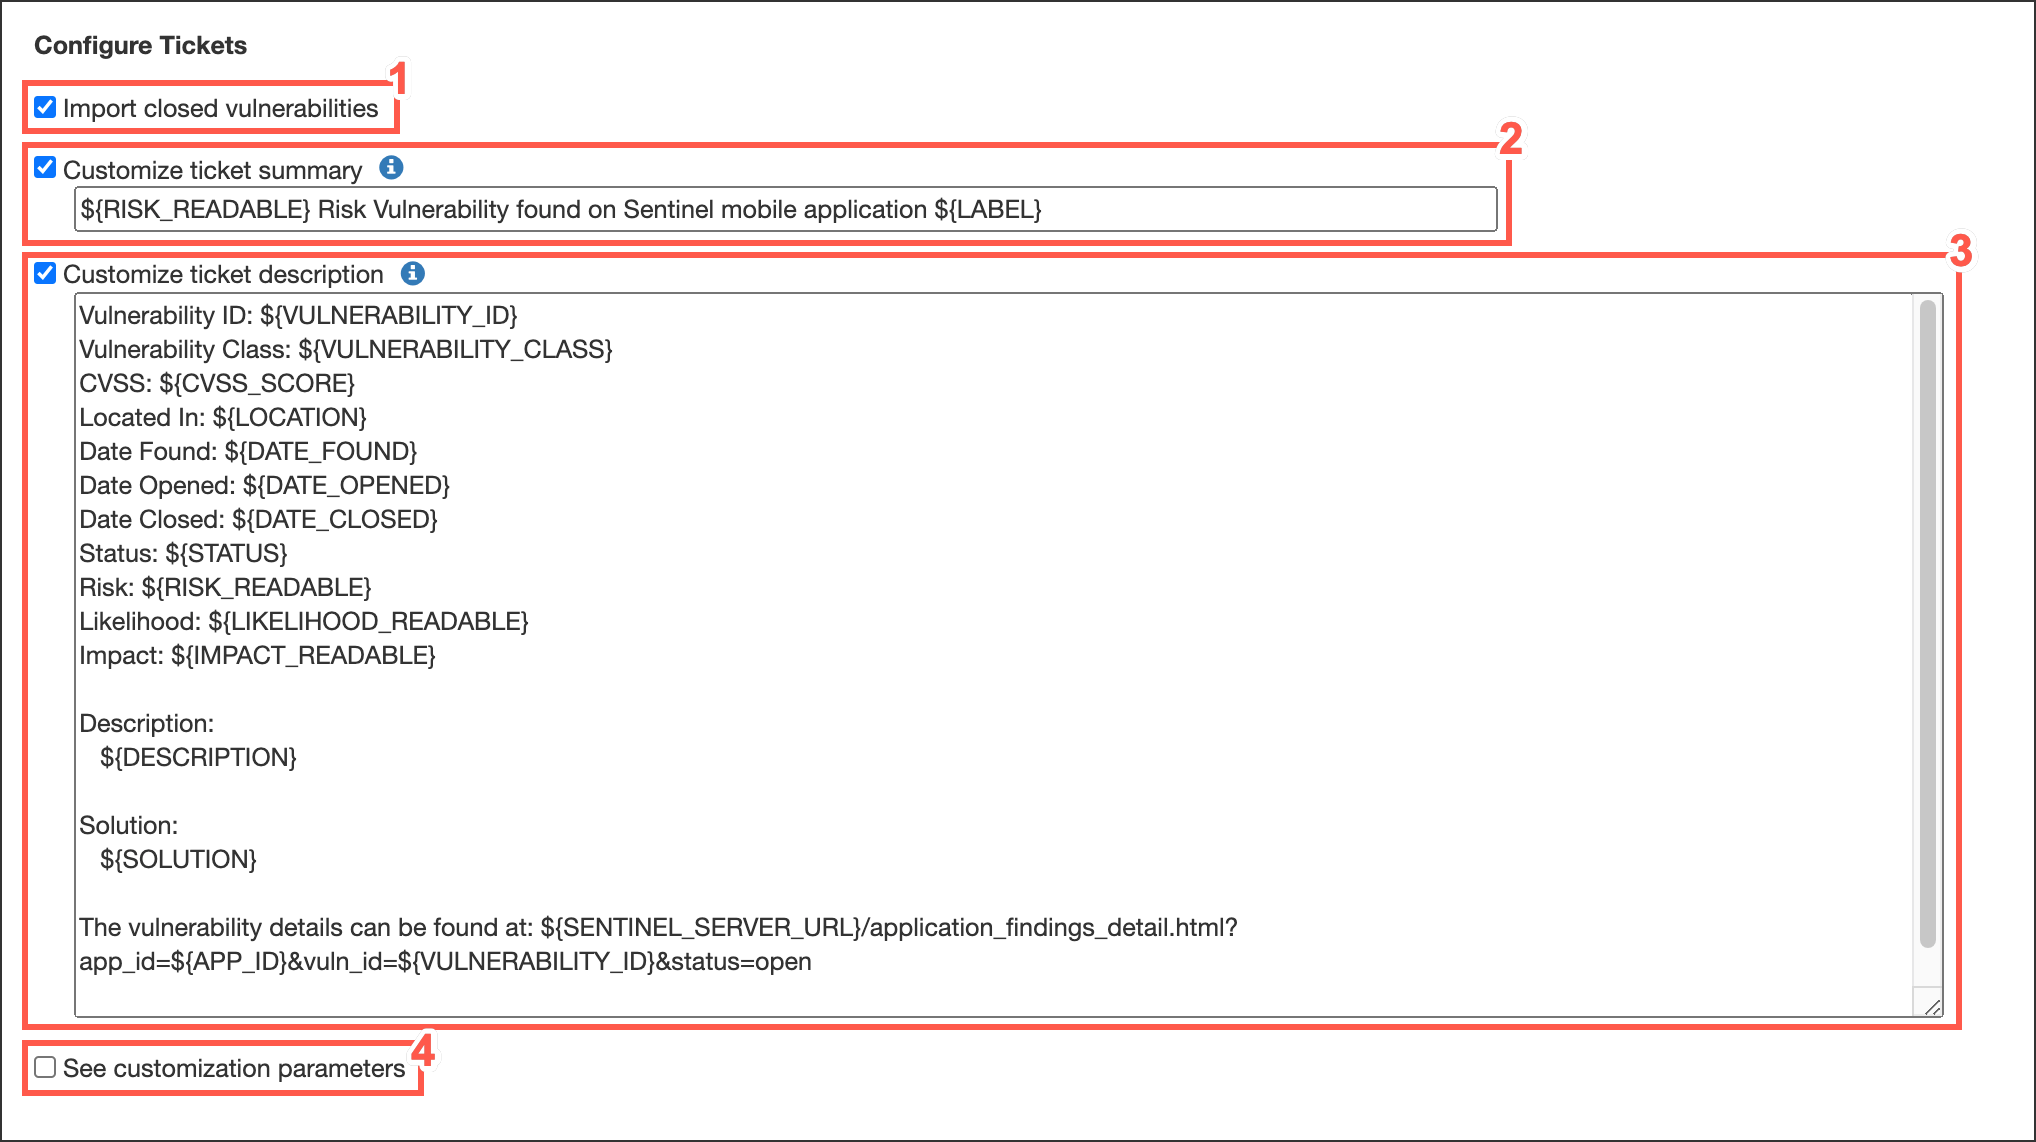
Configure Jira Tickets
-
To import closed vulnerabilities select the Import closed vulnerabilities checkbox.
-
To customize the ticket summary select the Customize ticket summary checkbox.
-
To customize the ticket description select the Customize ticket description checkbox.
-
Optionally, to see customization parameters, check the checkbox next to See Customization Parameters

-
When you have completed configuration for MAST settings according to your preferences, click Save.
| If you’ve set a Custom Asset ID for this mobile application (from the Overview tab in the Continuous Dynamic Portal), it will appear as a field in the ticket Details. |