SAST (Applications) Configuration
Select the SAST (Applications) Configuration tab to set the default reporter and assignee, map assets or groups to Jira projects, and map ticket priority to Continuous Dynamic ratings.
To configure the Continuous Dynamic Plugin for Jira Cloud, perform the following steps:
-
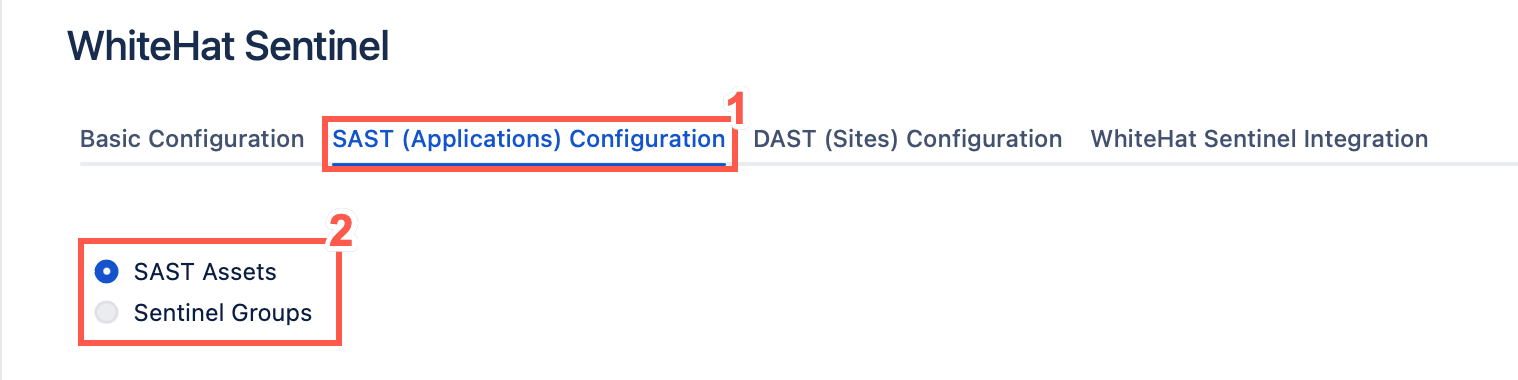
On the app page, select the SAST (Applications) Configuration tab.
-
Set the default Jira assignee for a given asset (site or application) and associated Jira project. (This will map these assets to the Jira project(s) in question.) To set default assignees by group rather than asset, select the Continuous Dynamic Groups radio button. In this case, all assets in a group will be associated to the Jira project selected.
Mapping Configuration
-
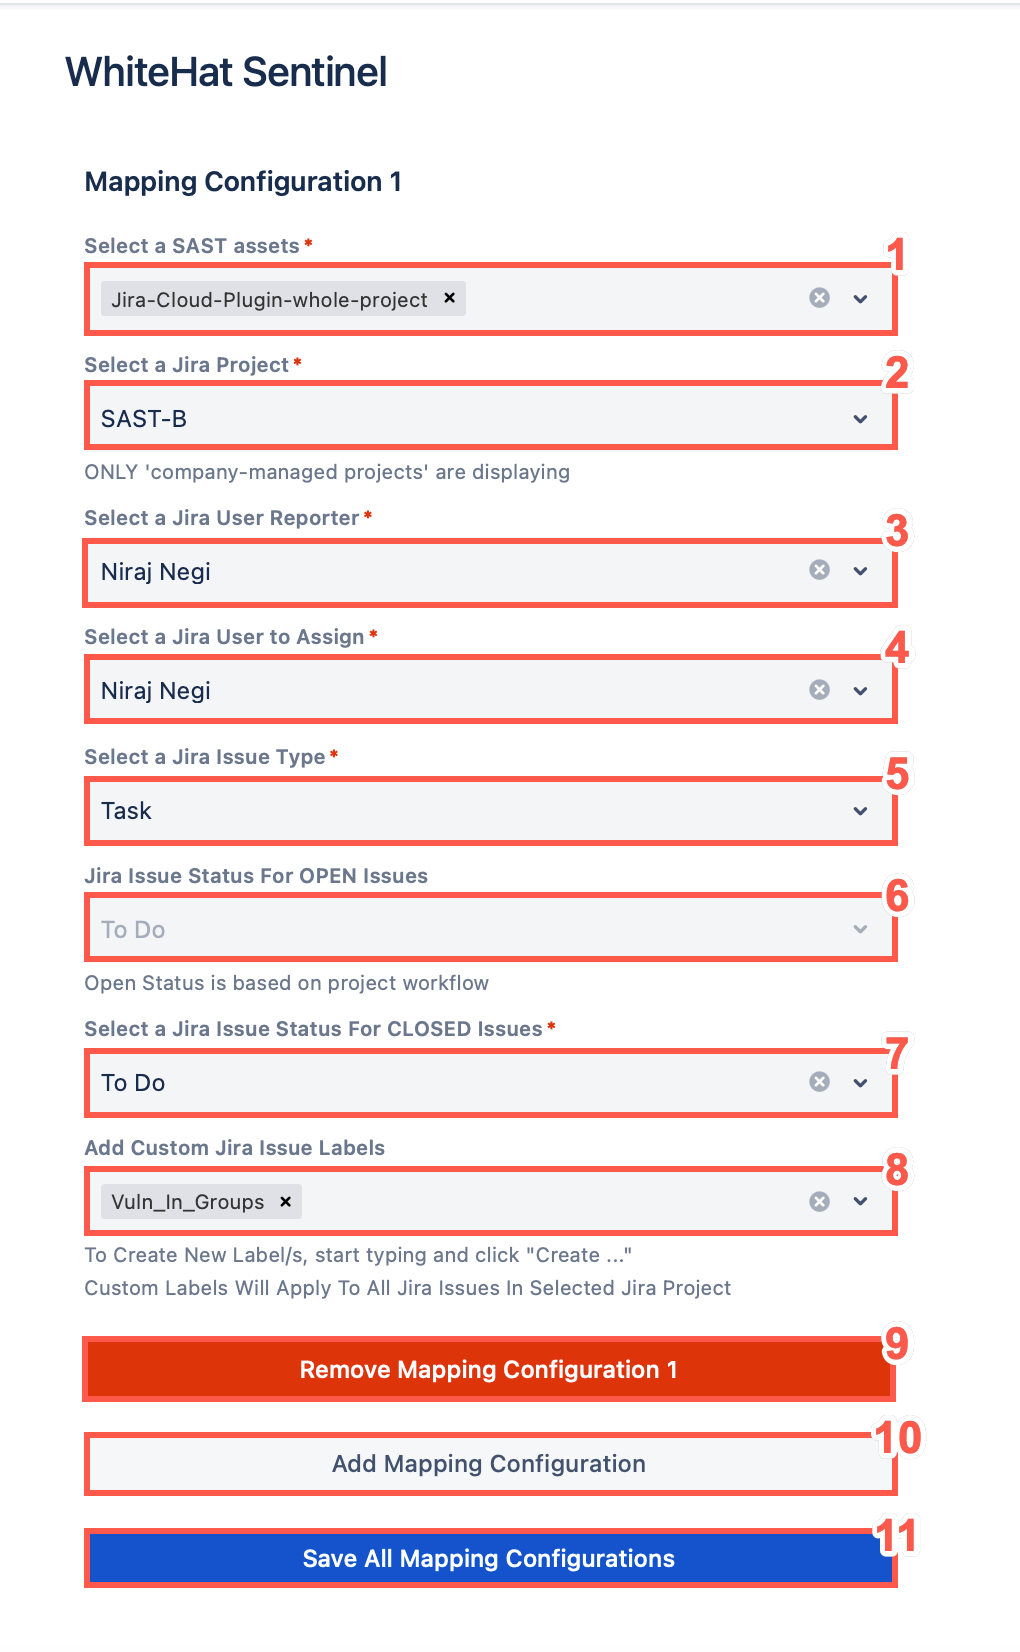
Select an asset from the list of SAST Assets.
-
Select a Jira project from the Projects list.
The autocomplete for some fields might not populate until you enter an exact match. This is due to an Atlassian limitation. -
Enter the username of your Jira User Reporter in the search bar provided, then select them from the list.
-
Enter the username of your Jira User to assign in the search bar provided, then select them from the list.
-
Select the Jira Issue Type from the drop down list.
-
The Jira Issue Status for OPEN Issues value is automatically set based on the Jira project workflow. The drop-down menu is disabled and manual change is not possible.
-
Select a Jira Issue Transition For Closed Issues. In this menu, you can choose the status of Jira tickets that are closed by the Plugin: Done, In Review, or Closed. These values can differ depending on the selected Jira Issue Type.
-
You can create Custom Issue Labels, which apply to each Jira Issue in the selected Jira Project.
-
If you wish to remove Mapping Configuration, click Remove Mapping Configuration. It is possible to remove or save the first Mapping Configuration. If you do not want SAST integration to run, simply disable SAST integration in the Basic Configuration tab.
-
If you want to map your SAST assets to multiple Jira Projects, you can add another Mapping Configuration by clicking Add Mapping Configuration. To configure another Mapping Configuration follow previous steps.
-
After finishing your configuration and adding or removing Mapping Configurations, save this configuration by clicking Save All Mapping Configurations. A success message should appear. If the message does not appear, refer to the Troubleshooting section.
Allow only vulnerabilities with tags
-
In the Allow only vulnerabilities with tags text box, you can define one or more tags. Only SAST vulnerabilities which include the defined tag(s) will be processed by the Plugin.
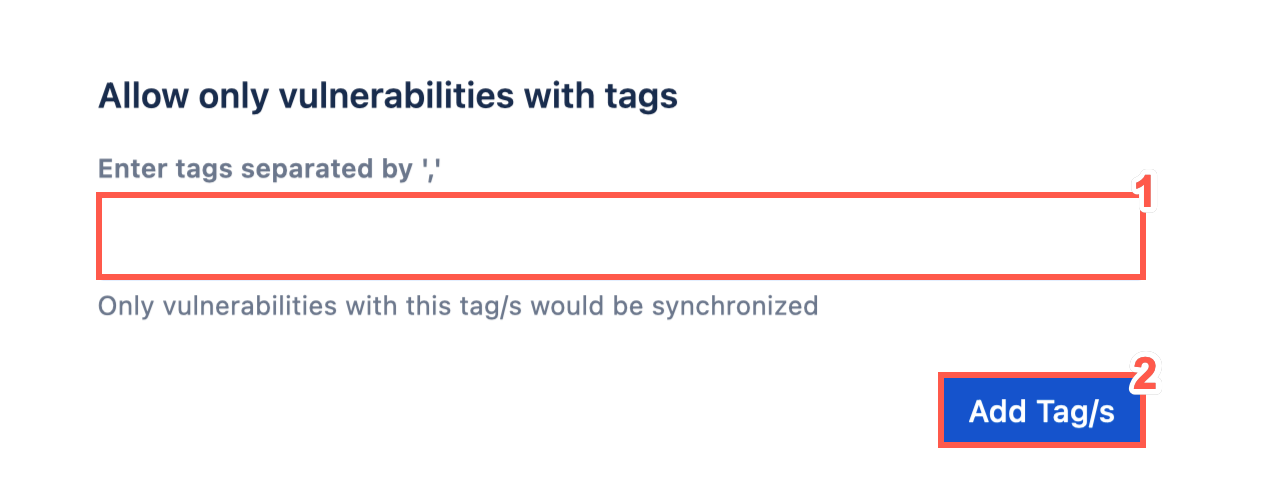
If the input is empty and does not contain any tag(s), all selected SAST assets will be processed. -
Click Add Tag/s to save your changes. The success message should appear. If the message does not appear, refer to the Troubleshooting section.
Authorize Jira Groups to View/Interact Vulnerability Content (Retesting, TRC Team Responses, Add note and tag, and Submit Questions)
-
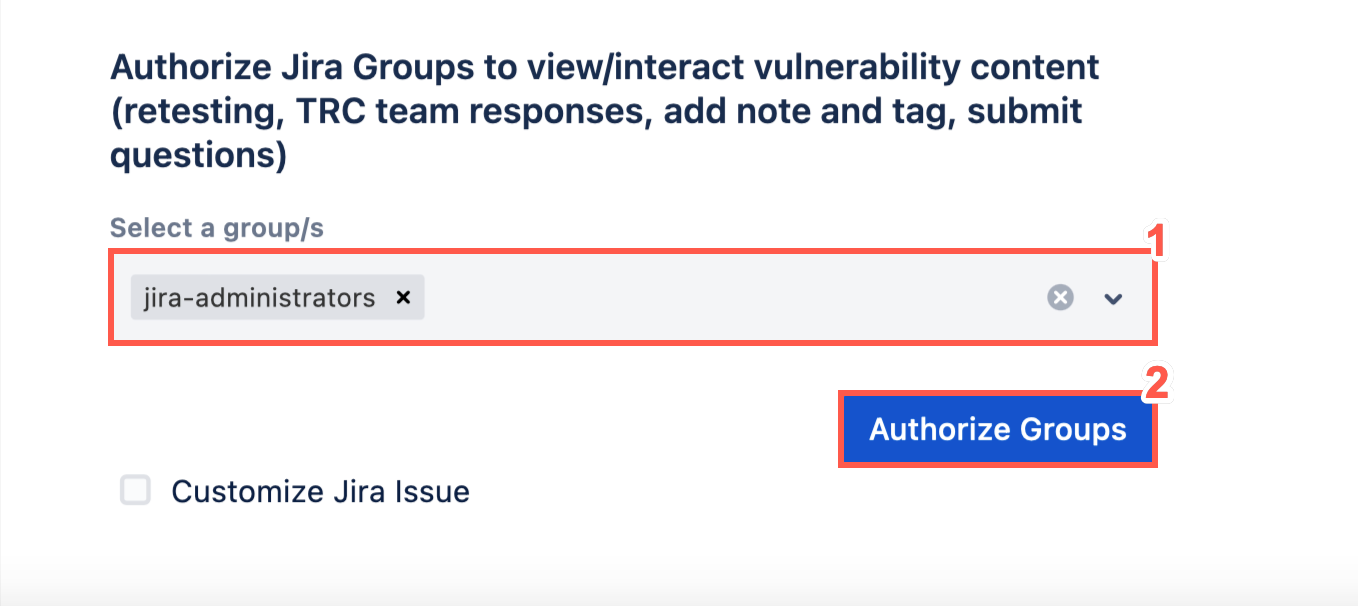
Select one or more Jira User Groups that will be authorized to view the retesting status of asset/vulnerability, and TRC team responses. Members of this group are authorized to Add Notes and Tag/s and Submit questions related to a specific vulnerability opened in Jira Issue view.
-
After adding/removing groups, click Authorize Groups to save changes.
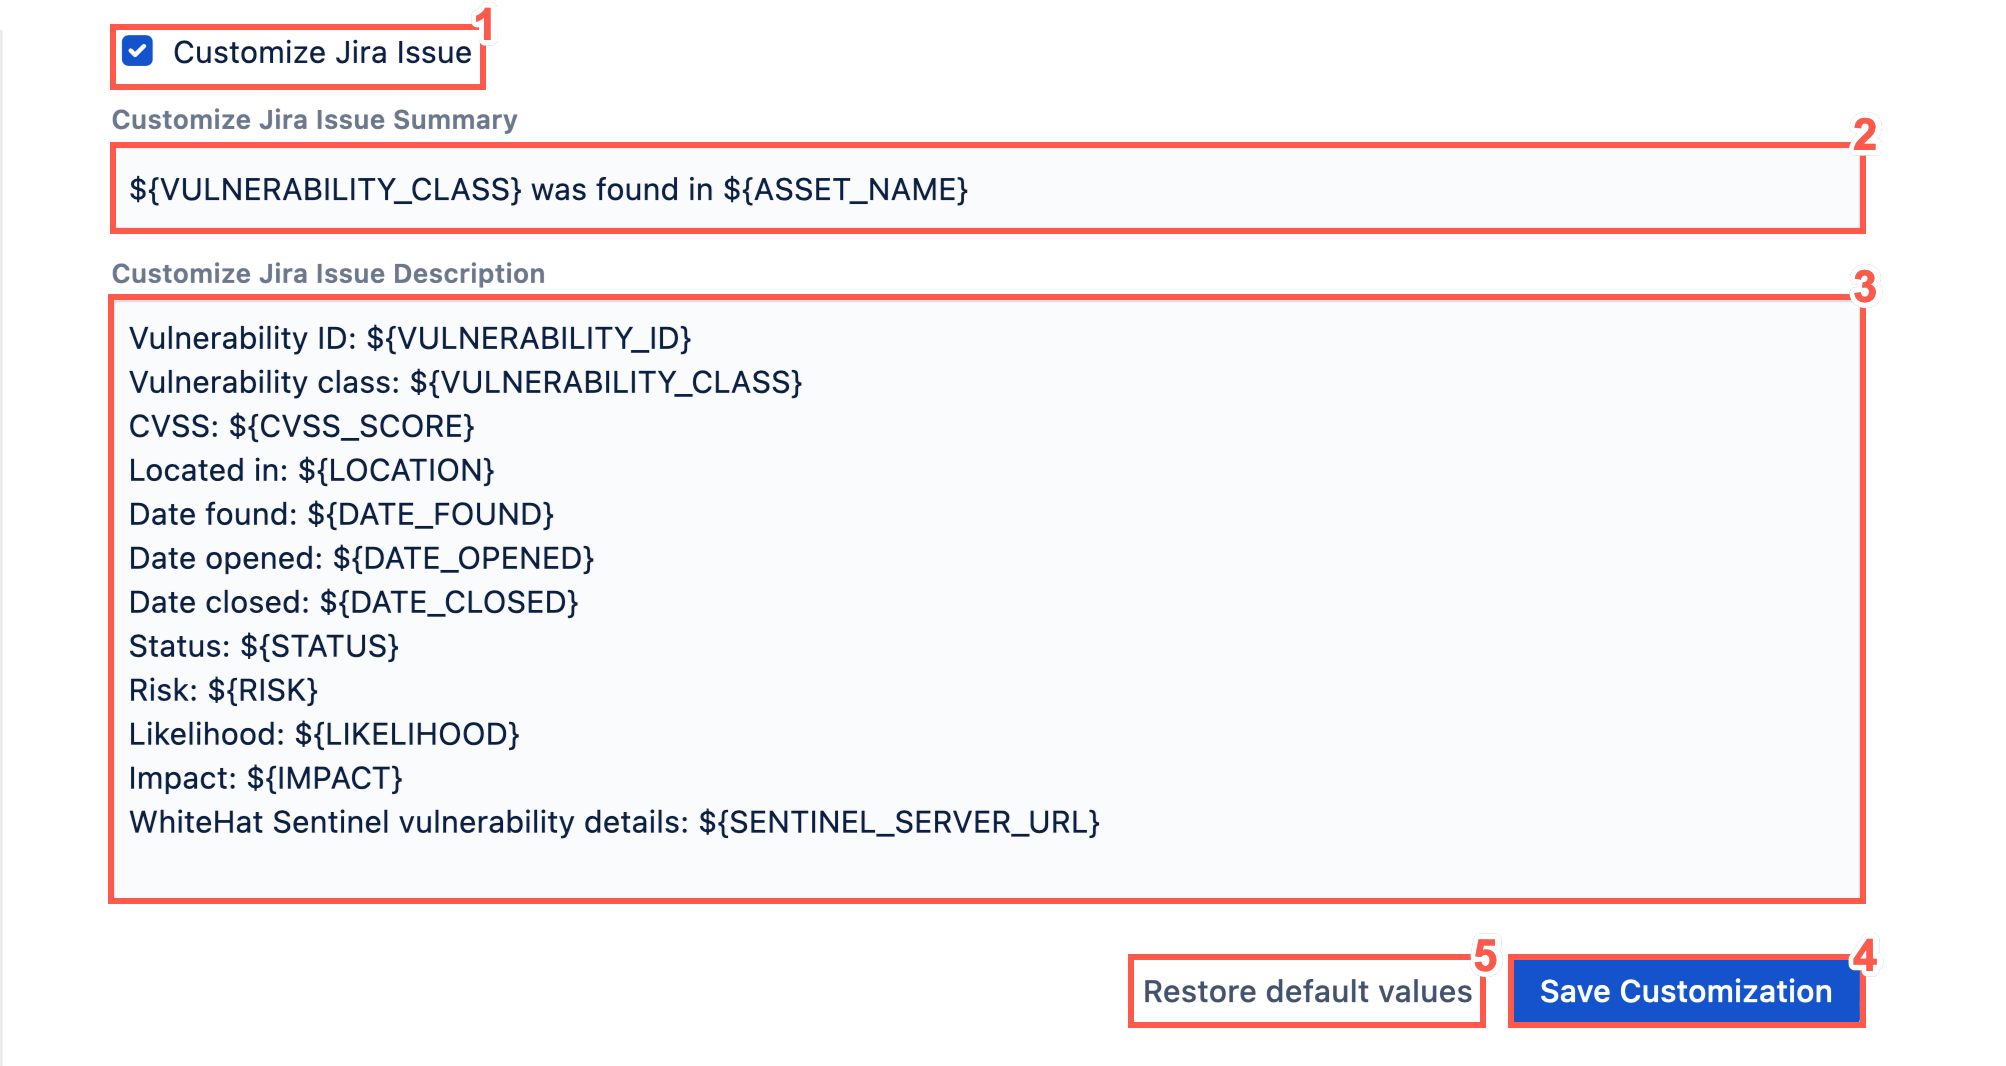
Customize Jira Issue
-
Select the Customize Jira Issue checkbox.
-
Edit the Customize Jira Issue Summary text field.
-
Edit the Customize Jira Issue Description text field.
-
When you have completed configuration for SAST (Applications) according to your preferences, click Save Customization.
-
To restore the default values, click Restore default values.
| You must click Save Customization after selecting Restore default values to keep the default values. |