Customizing Values by Policies
As a Continuous Dynamic Admin, you can add or edit a risk management policy, and customize or accept the business risk ratings of vulnerability classes for one or more assets. Accepted risks are shown as "accepted" and display the default Continuous Dynamic risk rating.
Creating a Risk Management Policy
To create a risk management policy, perform the following steps:
-
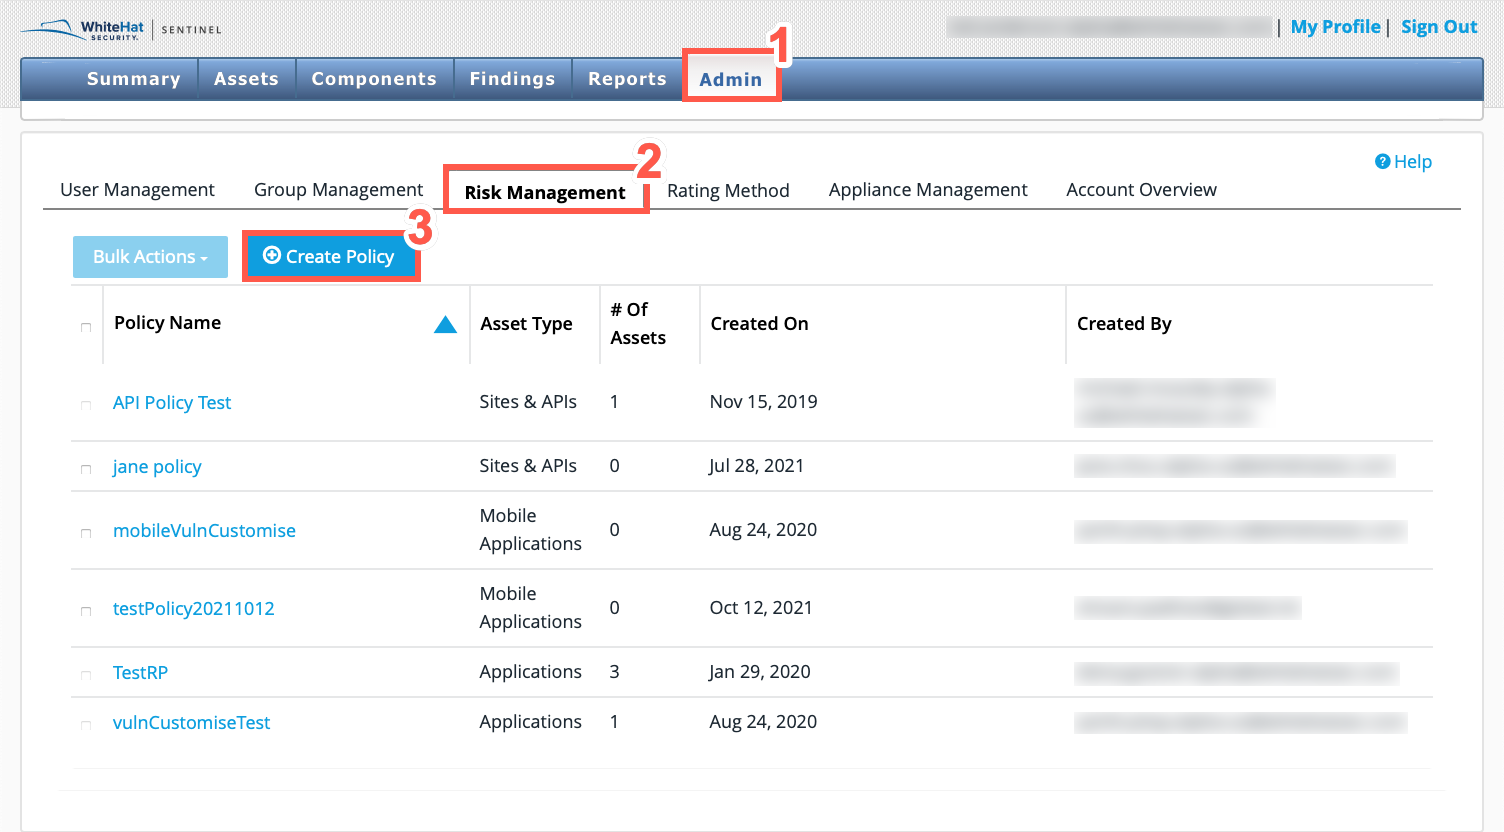
From the main Portal menu, select Admin > Risk Management.
-
Click Create Policy.
-
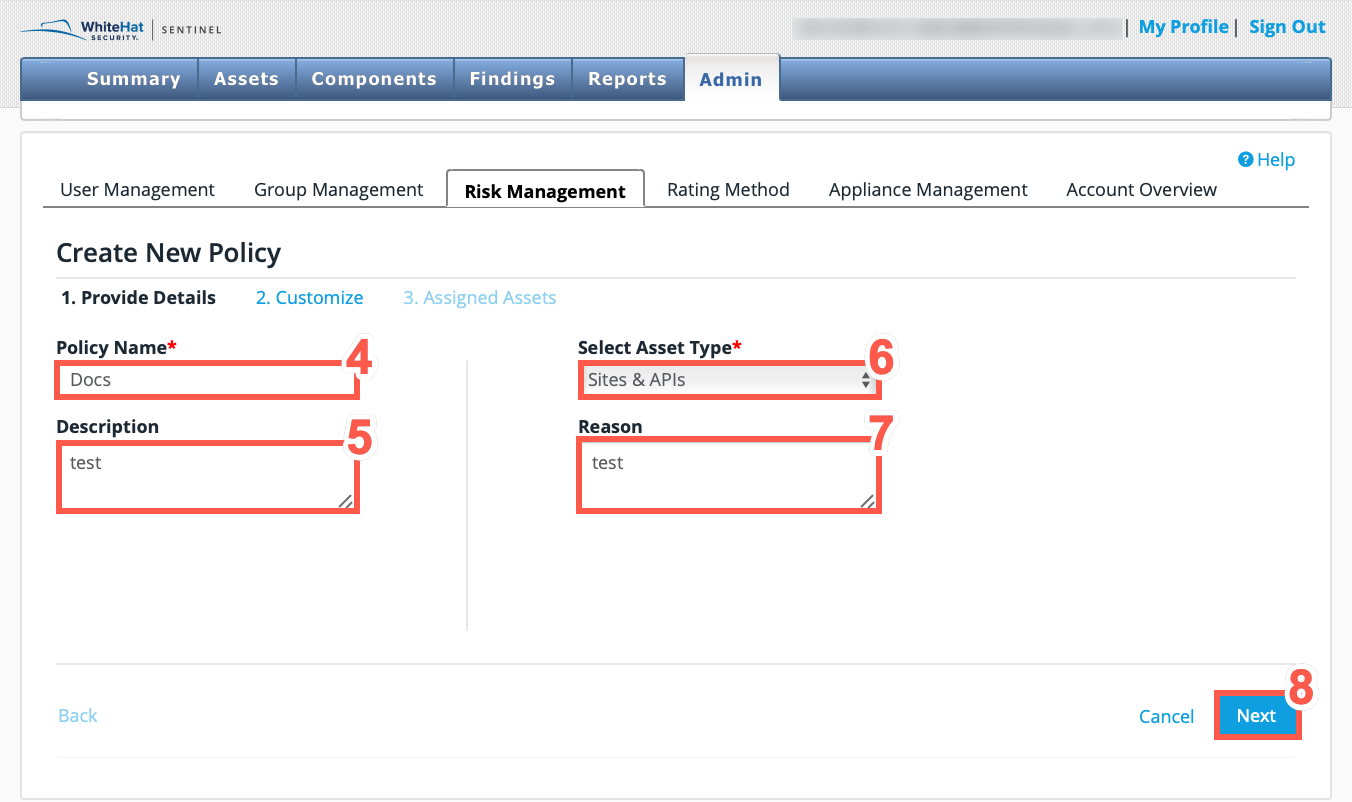
Enter a Policy Name.
-
(Optional) Enter a Description.
-
For Select Asset Type, select Sites & APIs.
-
(Optional) Enter a Reason for creating the risk management policy.
-
Click Next to proceed to the Customize step.
-
Use the search bar to search for a Vulnerability Class.
-
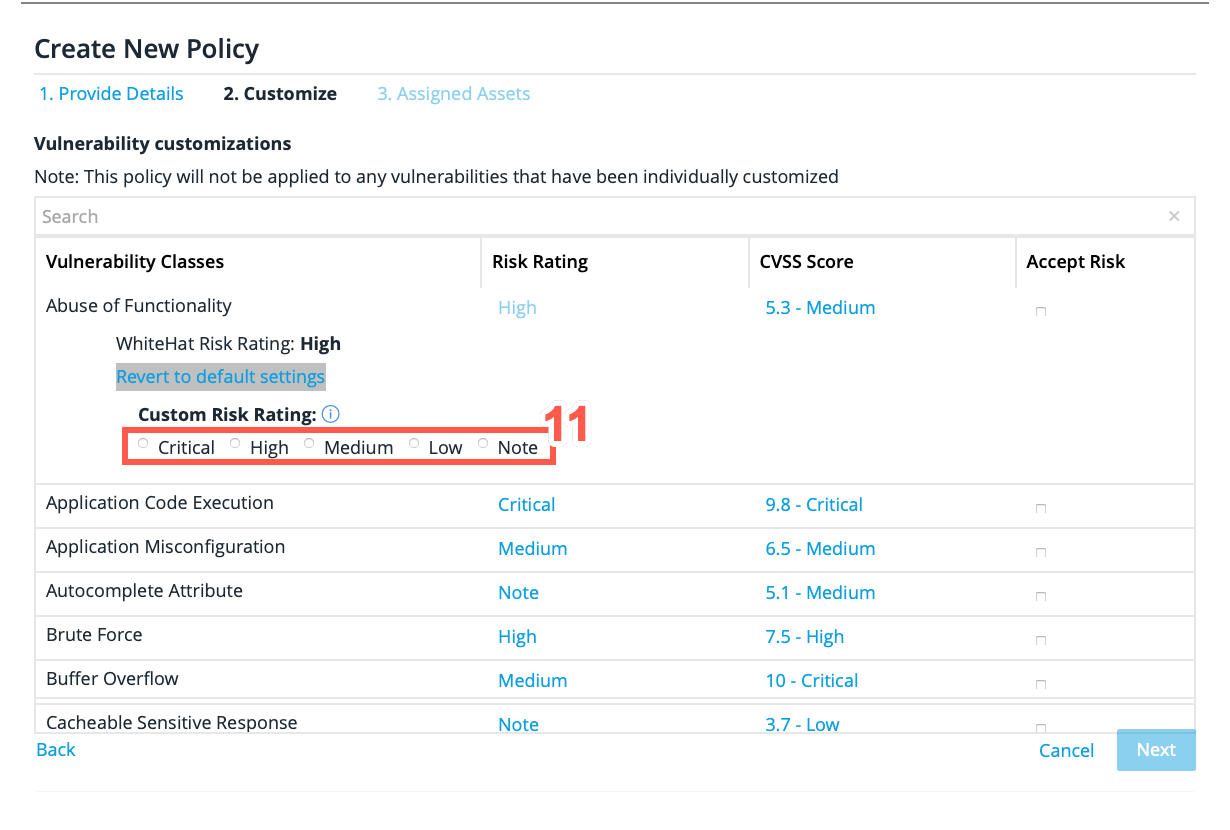
Select a Risk Rating to set a custom rating.
-
Select the Custom Risk Rating for the vulnerability class: Critical, High, Medium, Low, or Note (informational).
-
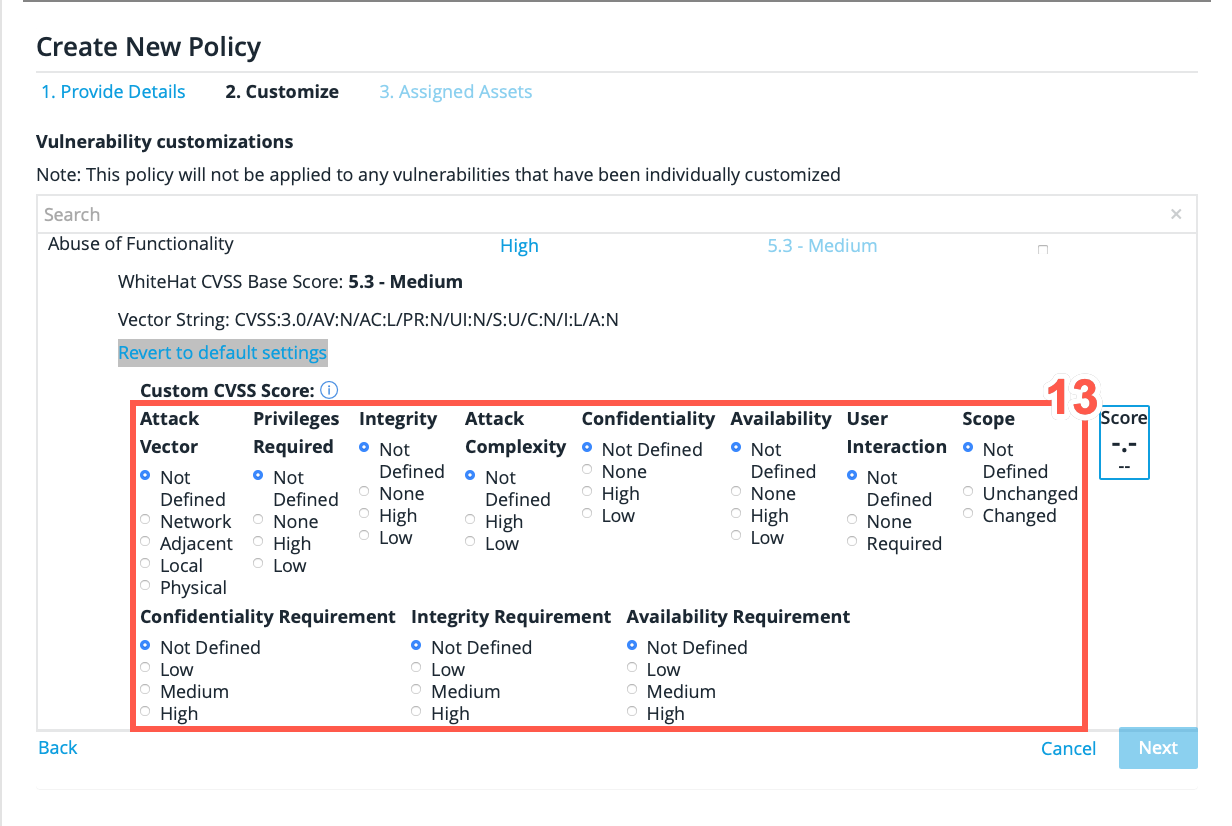
Select the CVSS Score to set a custom rating.
-
Select the ratings for the Custom CVSS Score.
-
(Optional) Select the Accept Risk checkbox to accept the overall vulnerability class as a business risk.
Accepting risk is not recommended for general vulnerability classes because this will include all vulnerability subclasses. -
Click Next.
-
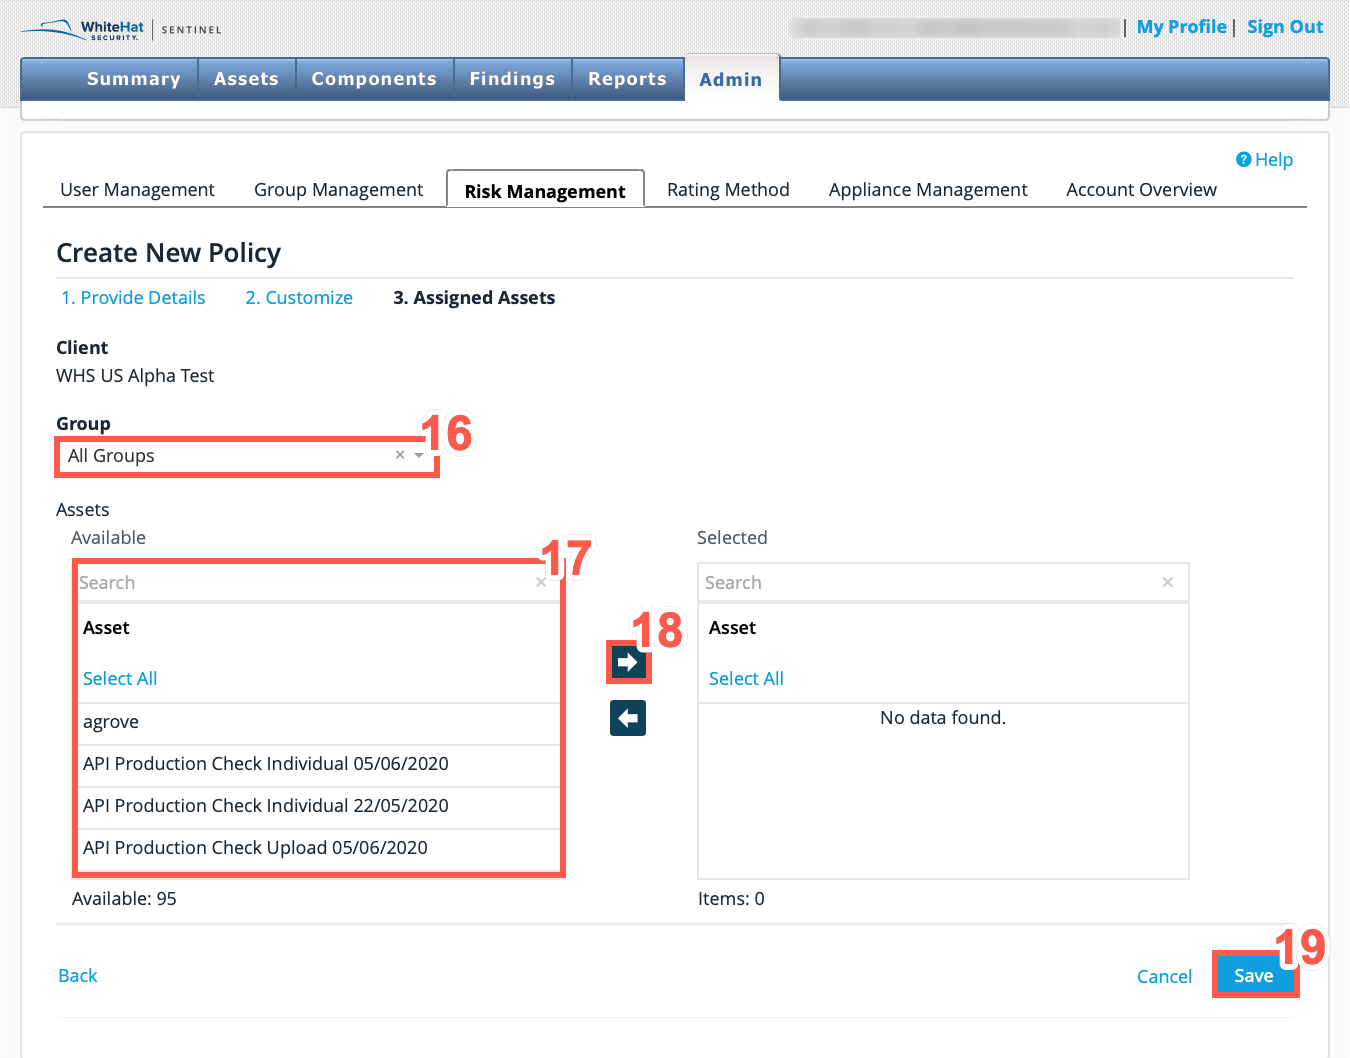
Select an existing asset group from the Group dropdown, or select All Groups to display all assets.
-
From the Available table, select the assets that you want to include in the policy. To locate specific assets, use the Search bar at the top of the Available or Selected columns. You can also click Select All to select all available assets.
-
Click Save to assign the assets and create the risk management policy.
| The customized ratings are used for the assigned assets in reports and in the Portal. However, the WhiteHat Security Index (WSI) and the PCI 3.2 Compliance Reports use the default Continuous Dynamic values for vulnerabilities. |
Editing a Risk Management Policy
To edit a Risk Management Policy, perform the following steps:
-
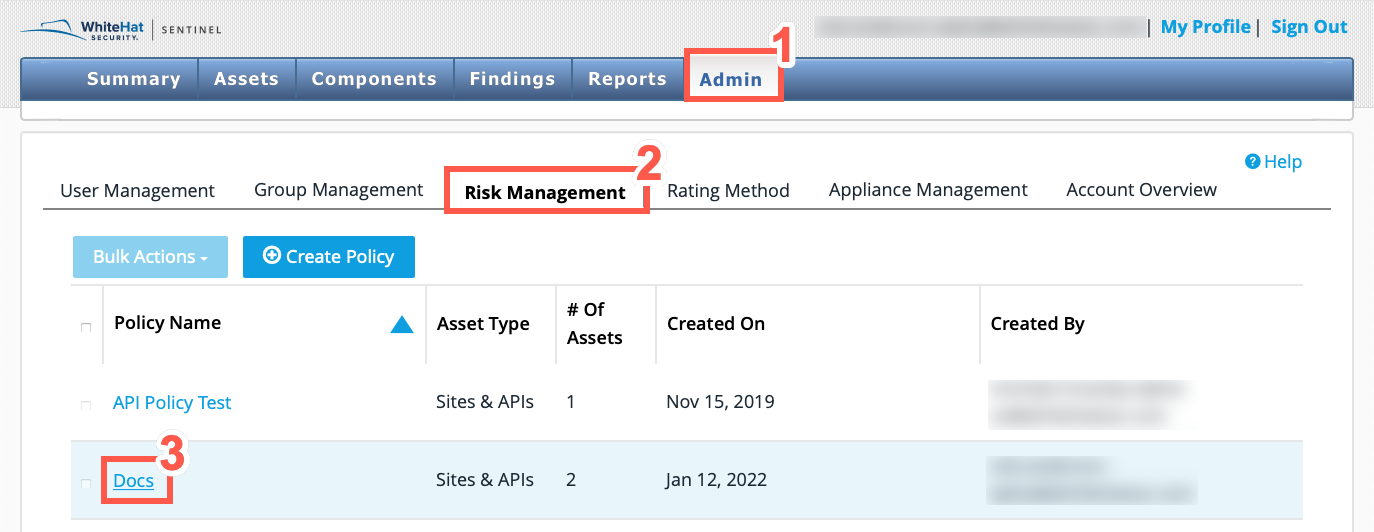
From the main Portal menu, select Admin > Risk Management.
-
Select the Policy Name.
-
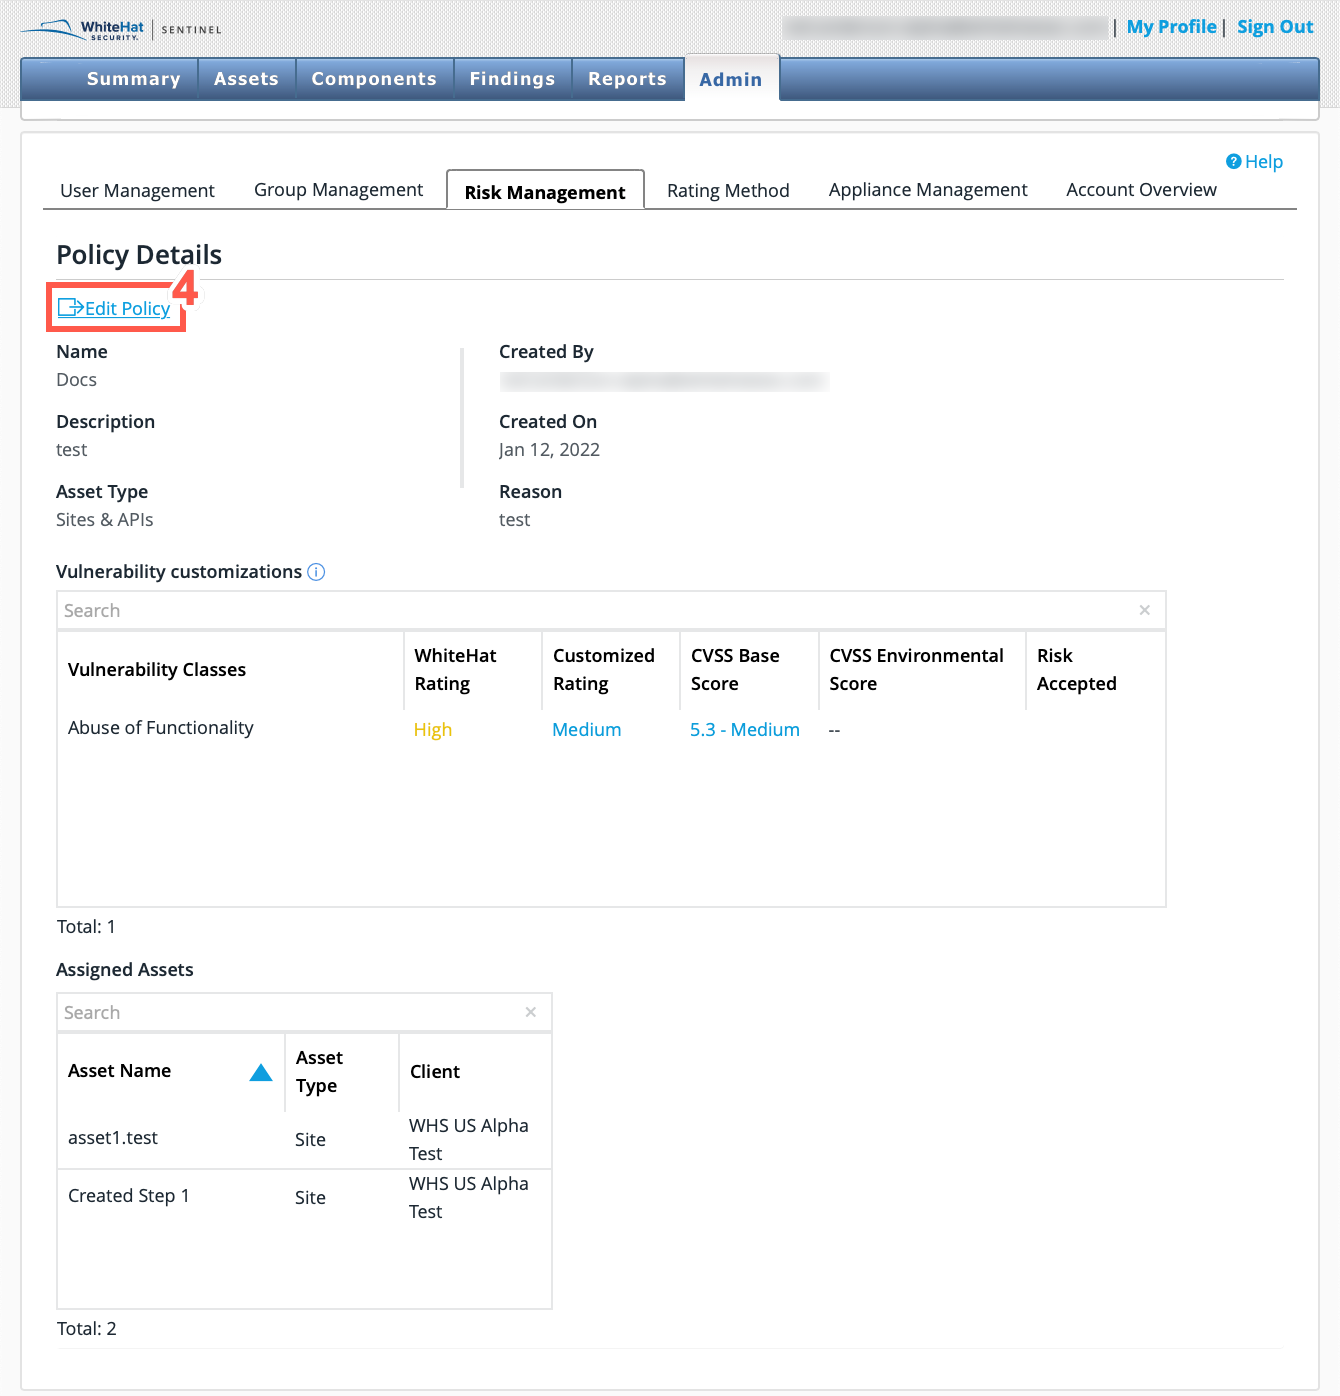
Click Edit Policy.
-
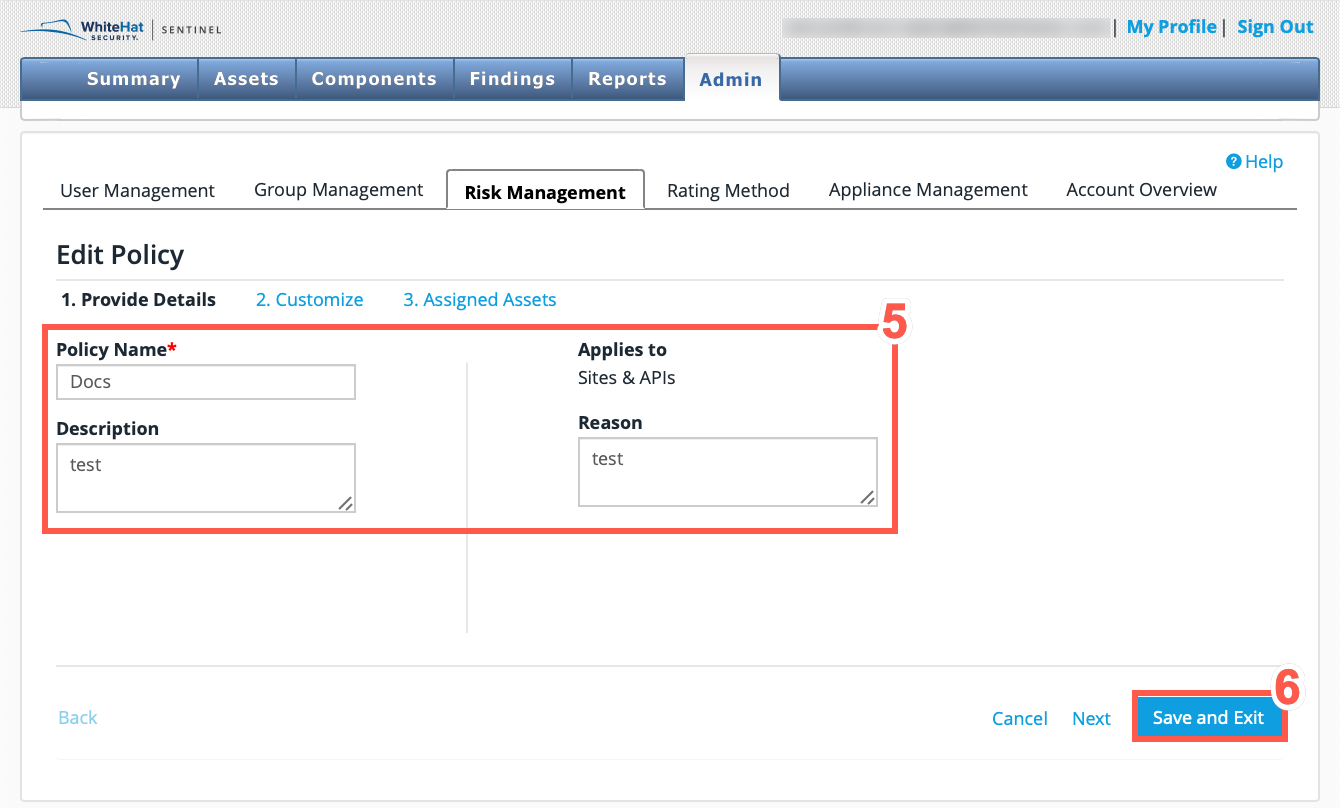
Edit the risk management policy. You can edit the Policy Name, Description, the Vulnerability Customizations, and the Assigned Assets.
-
Click Save and Exit to finish editing the risk management policy.
Deleting a Risk Management Policy
Deleting a risk management policy involves first removing all associated assets. If there are no assets associated with the policy you want to delete, skip to step 8.
-
From the main Portal menu, select Admin > Risk Management.
-
Select the Policy Name.
-
Click Edit Policy.
-
Click Next to proceed to step 3. Assigned Assets.
-
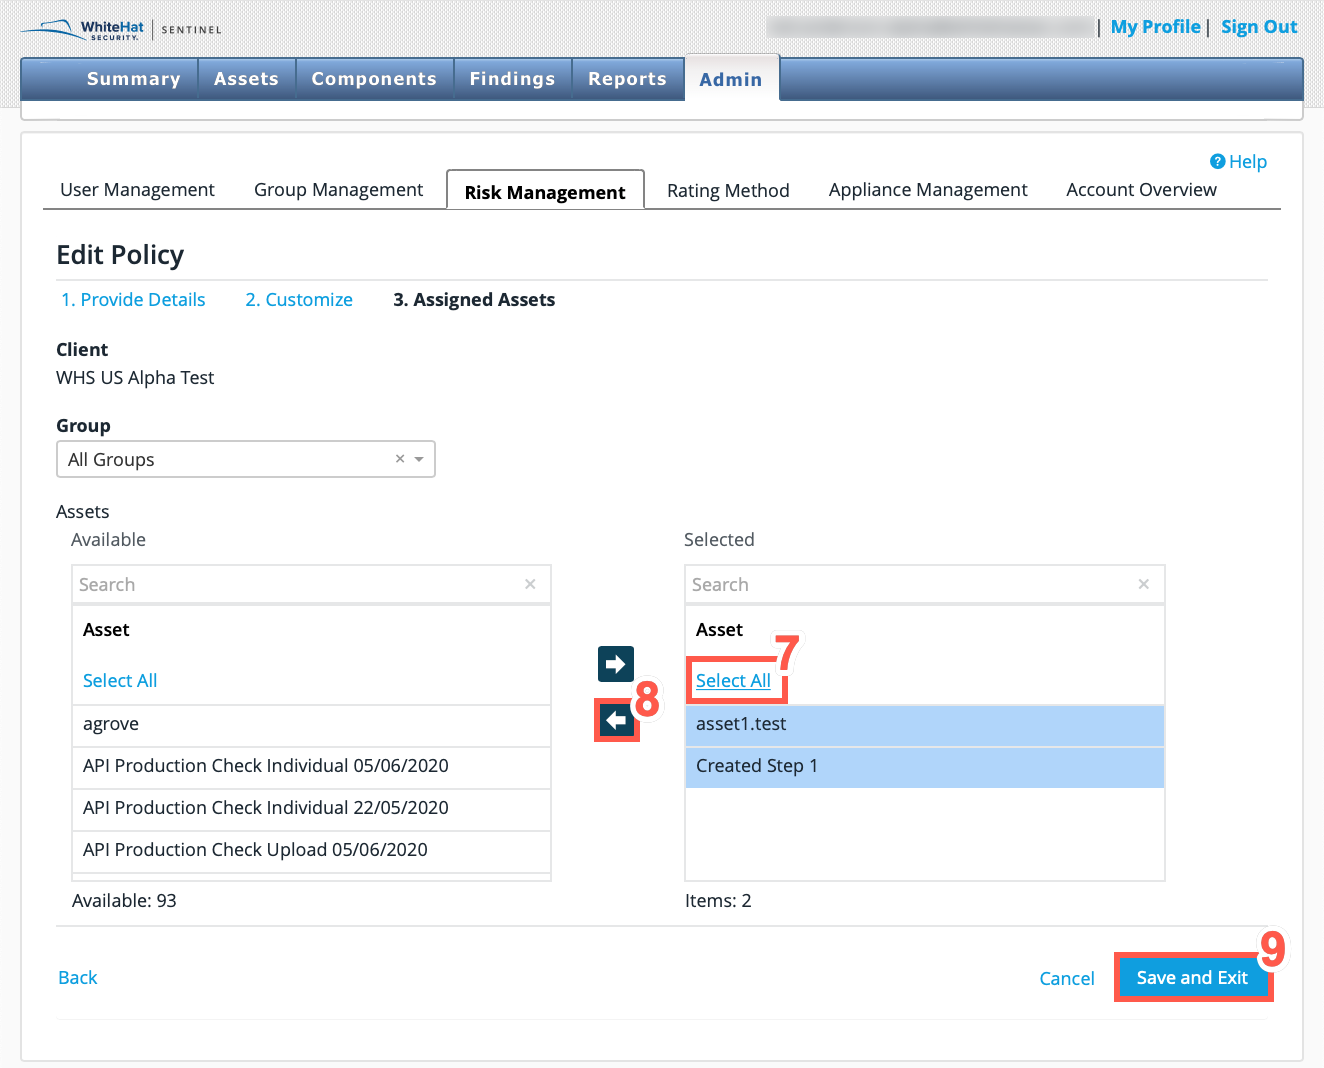
In the Selected table, click Select All.
-
Click the left arrow to move the Assets from the Selected table to the Available table.
-
Click Save and Exit.
-
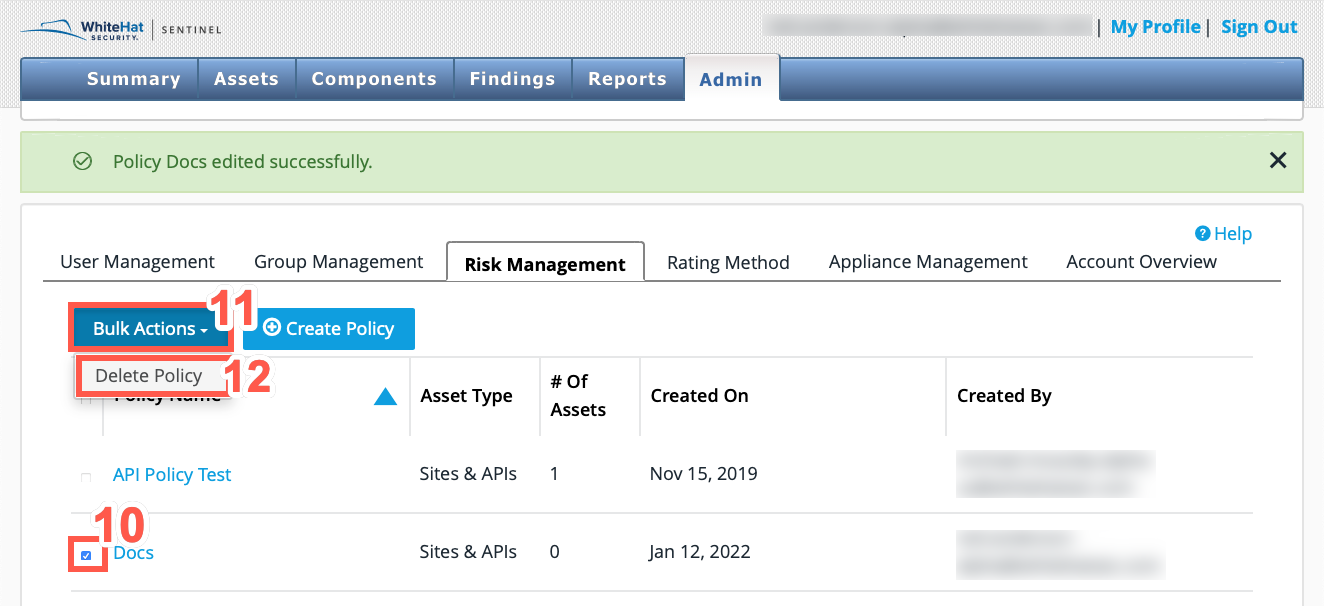
Select the checkbox beside the Policy Name that you want to delete.
-
Select the Bulk Actions menu and then select Delete Policy.
-
In the Delete Custom Policies dialog, click Confirm to delete the custom policy.