Adding an Application
To add a new application, click the Add Asset button in the Assets tab and then select Add Application.
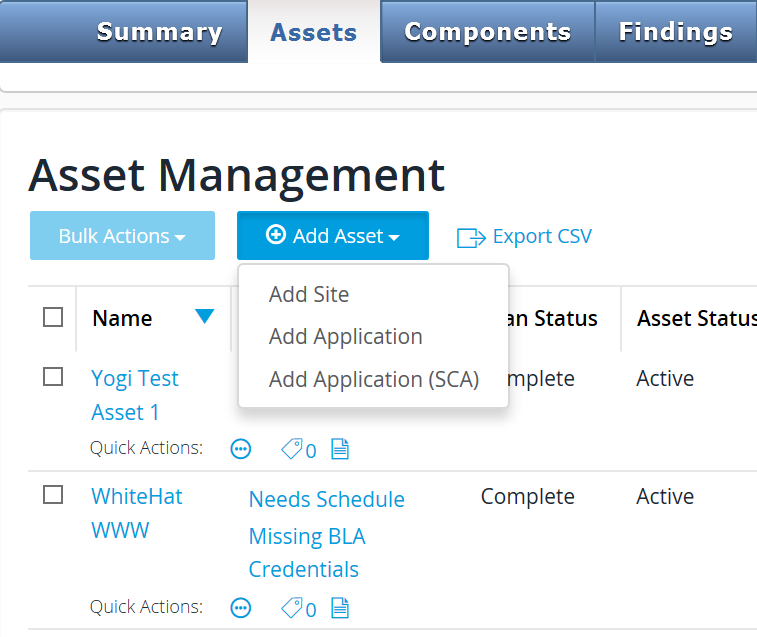
The dropdown menu offers 3 choices: Add Site, Add Application, and Add Application (SCA). If you choose Add Application, the next screen allows you to select the service level you want to assign to this application: SE or EE.
The Add Application page will ask for the asset (application) name, the associated appliance name, and language.
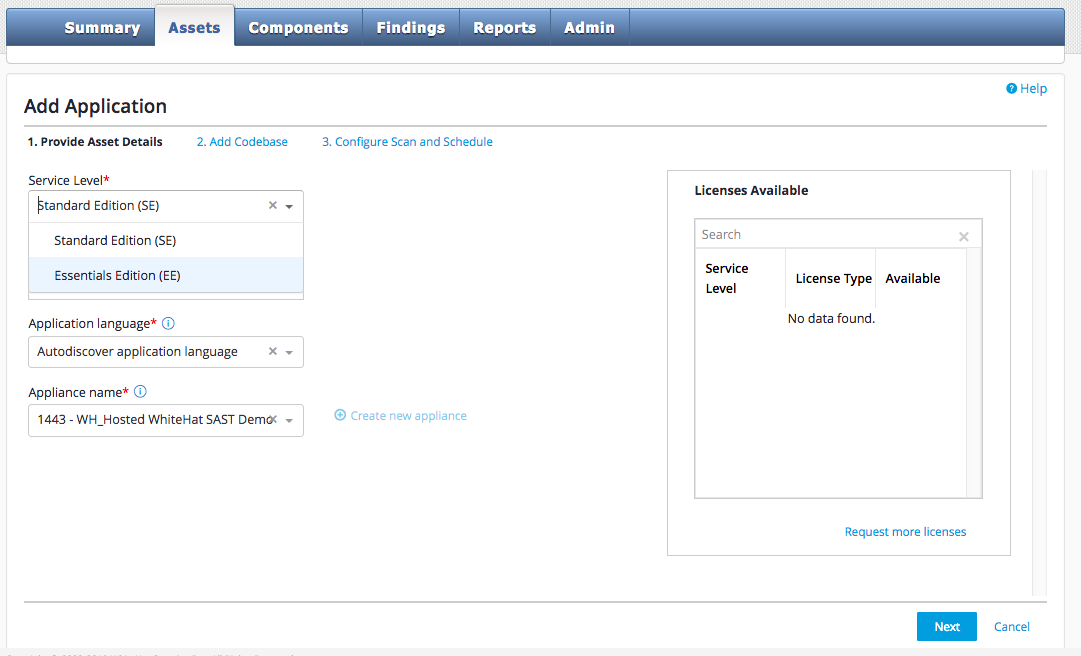
Note that the language you select determines what engine will be run when your code is scanned. If you make an error in this selection, the scan will complete without identifying any errors; however, the TRC engineer responsible for the post-scan analysis may observe and correct the error.
If you are uncertain of the language, you can select discover and Continuous Dynamic will attempt to determine the language being used when the assessment begins.
(For specific information on our support for Javascript, please see Javascript Support.)
Click Create Application. You will see the Application Overview page for the application you have created.
When you are creating an asset, you must validate the codebase connection by clicking Validate Codebase Connection or a pre-scan cannot be done. However, the asset can be created.
If there are 0 lines of code, the application will not be created.
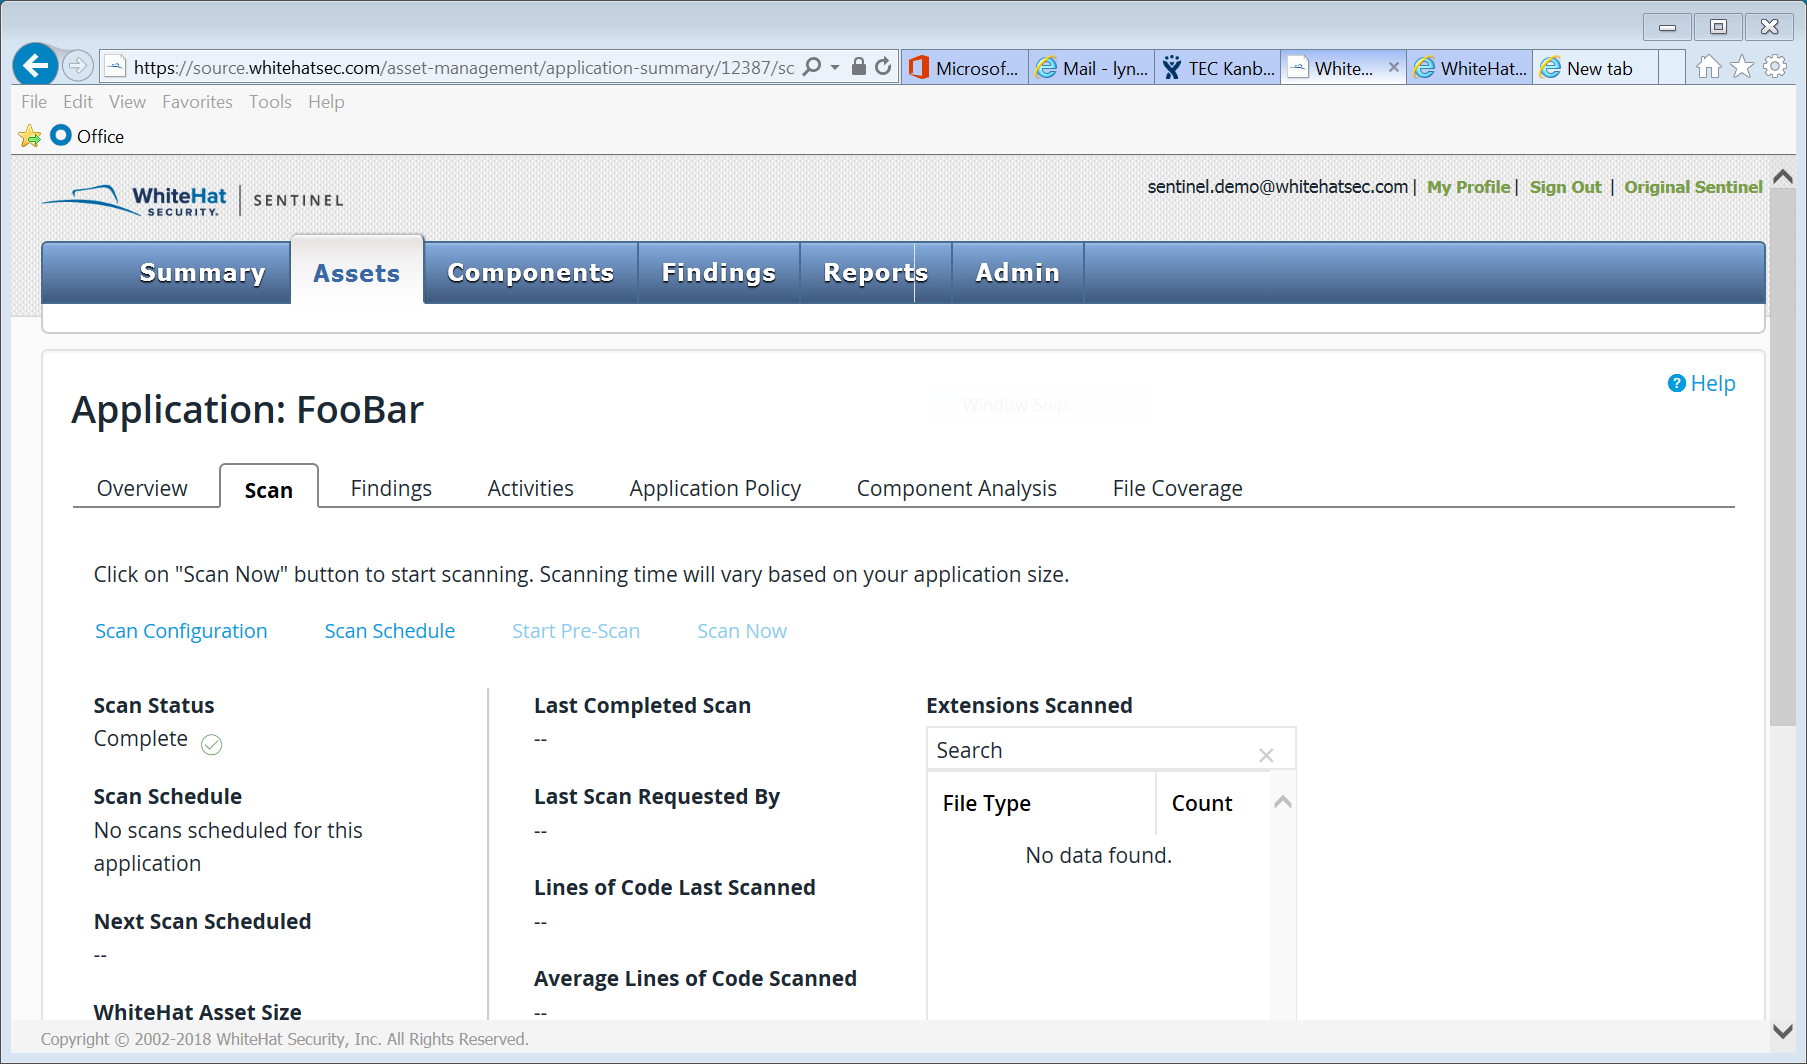
From this page, you may:
-
Add a Code Base (or edit or delete an existing code base)footnote:[Customers may create up to twenty (20) code bases per application; if additional code bases are required, please contact support@whitehatsec.com.
-
Run a preliminary scan ("Pre-scan") of the application to determine the application size)
-
View Findings
-
View or Edit the Scan Configuration
-
View File Coverage
-
Edit Application Information, including the application name, your custom asset ID, the asset owner, or the asset phase
-
Edit the Application Language (click on the pencil icon next to the language)
-
Edit the Satellite used for this application (click on the pencil icon next to the Satellite Name)
-
Edit the Application Policy (click on the pencil icon next to the Application Policy header)