Adding a V2 Engine Asset
V2 Engine assets are a modern asset type that supports a variety of assets, including Single Page Application (SPA) sites.
| V2 Engine assets are currently an Early Access feature. To request access to this feature, contact support. |
To add a V2 Engine asset, navigate to the Asset Management page and perform the following steps:
-
Click Add Asset.
-
From the Add Asset dropdown, select Add Site.
-
Select V2 Engine Asset, then click Continue.
Now, complete the steps in the Add Site wizard. Further details of each step are provided below.
1. Provide Asset Details
To add a new V2 Engine asset you need to provide some basic information, including the target URL of the application you want to scan.
On the Provide Asset Details tab, perform the following steps:
-
Enter an Asset name in the text field provided.
-
Enter the Primary hostname URL.
-
Select an Industry that best fits the purpose of your site. This will be used for peer benchmarking purposes when you have received finding results.
-
Use the Attack grade slider to specify the level of attack you wish to use against your asset. The higher the number, the more potentially destructive the tests will be, meaning there is a greater chance of data mutation. The default setting is 4, which is one level below maximum.
-
Optionally, add any additional information to be reviewed by Technical Support (TS) or the Threat Research Center (TRC) teams before the site’s onboarding is finalized. Please note that this information will not be displayed in the Portal or available through the API.
-
Optionally, add a Custom Asset ID to the site in the text field provided. This is displayed in reports after the Asset name.
2. Schedule Scan
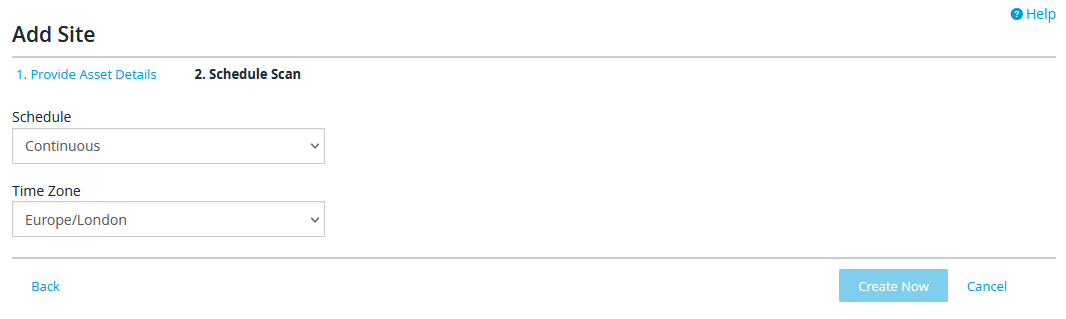
On the Schedule Scan tab, perform the following steps:
-
Select a Schedule from the dropdown. Schedules available include:
-
Never Scan
-
Continuous
-
Nights 8P-6A, and Weekends 24hrs
-
-
Select a Time Zone from the drop-down list.
The time zone is important for ensuring that the scan runs according to your preferred schedule. Please select it carefully. For additional information on setting your schedule, please see Scheduling a Scan. -
Click Create Now. A confirmation message of your site creation will display.
Select the Assets tab to return to the Asset Management page and the new site will be listed.
Editing a V2 Engine Asset
To edit a V2 Engine asset, navigate to the Site Overview page and select Edit.
This enables you to edit details such as the Site Name, your custom Asset ID for the site, the Asset Owner, Industry, Description of the site, Asset Status (active or inactive), and Asset Phase (pre-production, production, discontinued, or none). You can also change the scan Priority of the site.
When you’ve finished editing, press Save to apply your changes or Cancel to revert them.